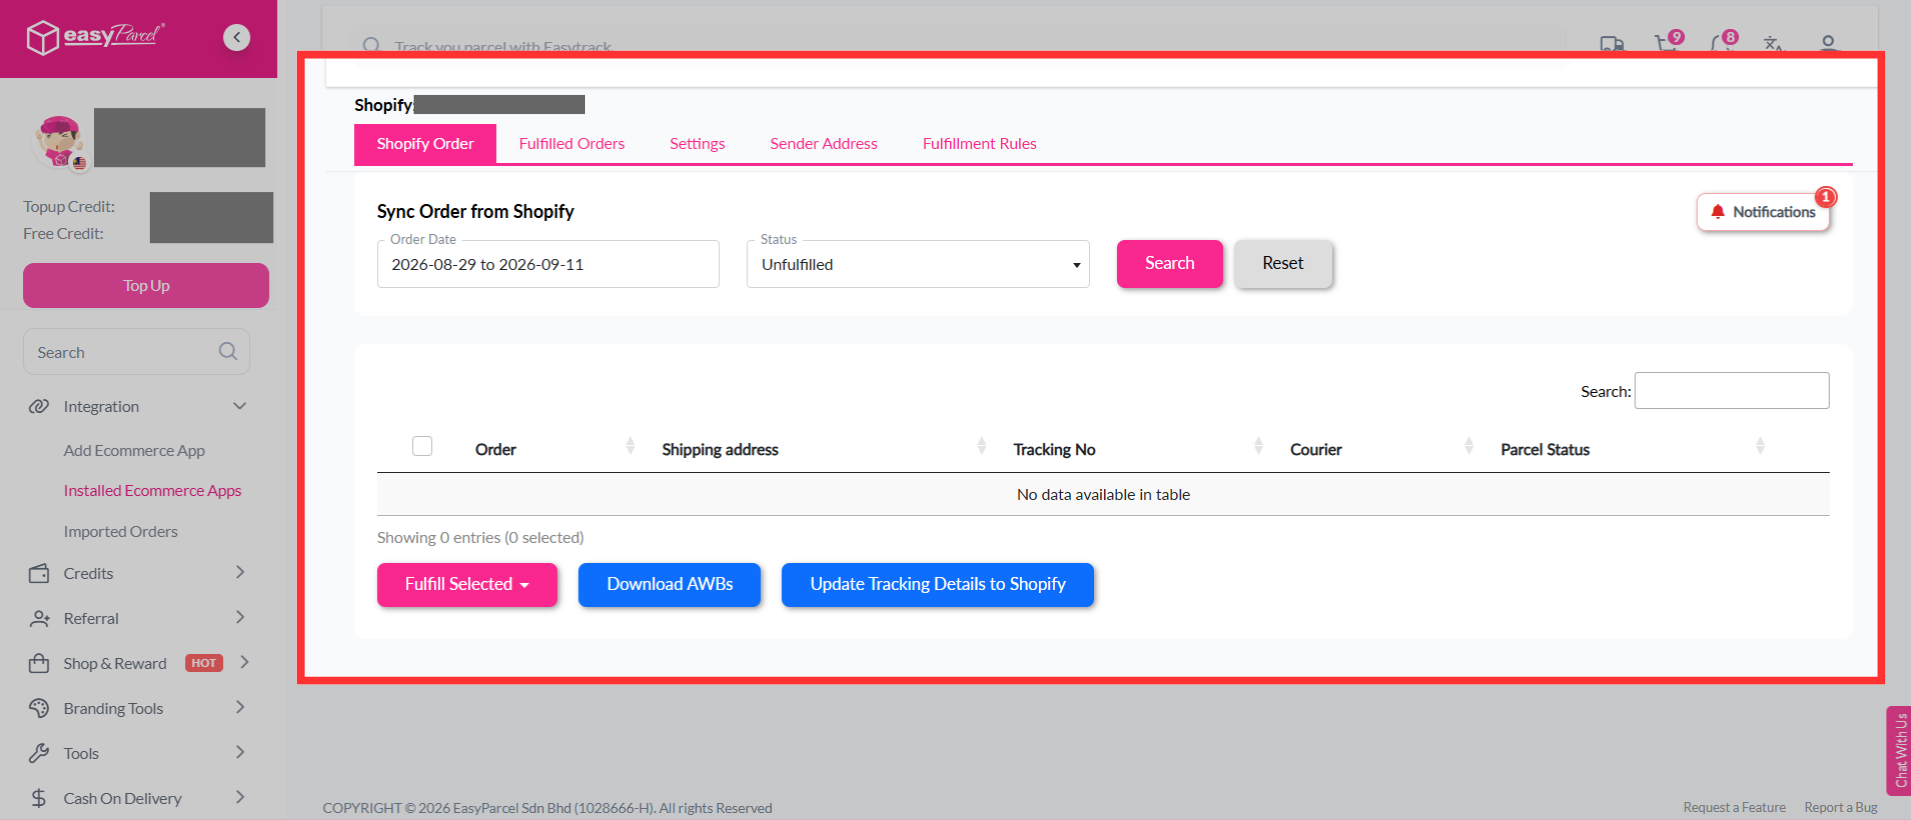
We'll Cover:
- Introduction
- Start Integrating and Choose your preferred fulfillment method
- Shopify APP Version (Seamless) - Highly Recommend
- Import Version
Introduction
Hey, EasyParcel fam! This article will explain how you can integrate your EasyParcel account with your Shopify store. By using EasyParcel Shopify APP, you are able to:
✔ One-Click Bulk Fulfillment
Fulfill single or bulk shipments with just one click, streamlining your shipping process and saving you time.
✔ Live Rate At Checkout
Real-time shipping rates from EasyParcel, ensuring accurate pricing every time.
✔ Auto-generate Bulk Shipping Label
Minimize manual errors and save time by creating multiple shipping labels in a single step.
✔ Partial Order Fulfilment
Send what you have, and ship the rest later. Keep your customers happy.
✔ Auto Tracking Number Notification (SMS, WhatsApp, Email)
Keep customers informed and reduce support inquiries.
✔ Compare 60+ Courier Options
Quickly find the best shipping options for your business and customers.
2: Start integrating - Add your store in EasyParcel account
2.1: Shopify APP Version (Seamless) option.
We highly recommend selecting EasyParcel Shopify APP, it enables:
- Display live shipping rates on your Shopify checkout page. Learn More
- Fulfill Shopify orders directly through the EasyParcel Shopify APP (single or multiple orders). Learn More
- Automate Shopify order fulfillment with preset couriers, automatic AWB generation, and tracking. Learn More
- Automatically update Shopify order status to 'fulfilled' after fulfilling via EasyParcel. Learn More
- Customize AWB file names for a smoother, faster workflow. Learn More
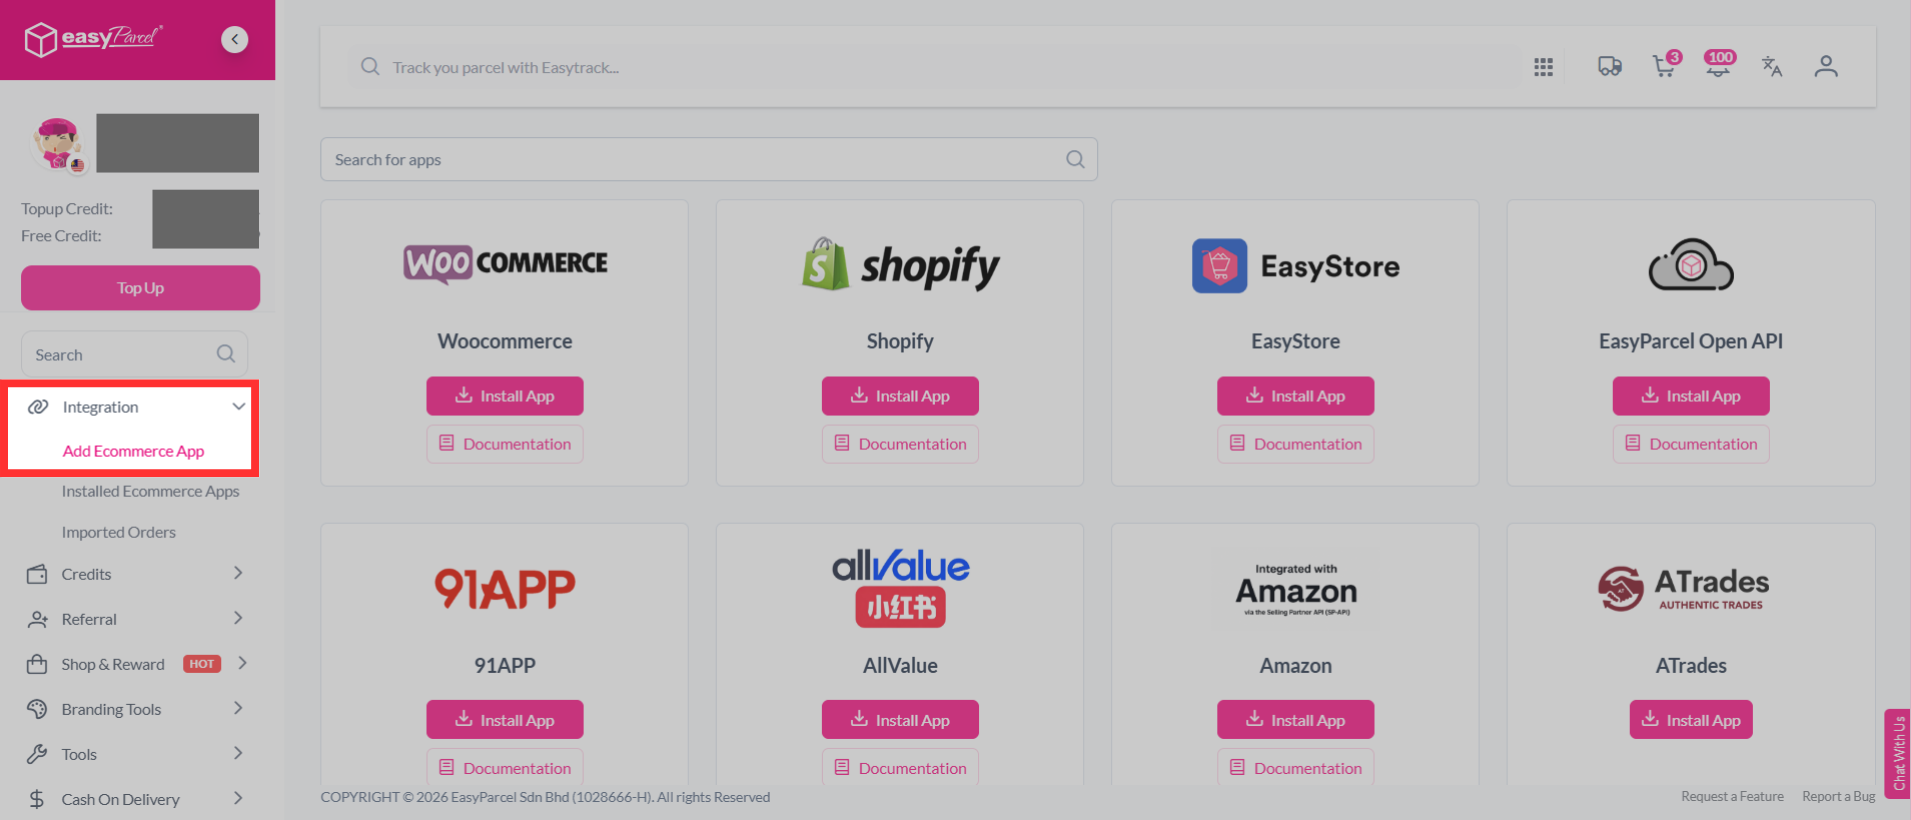
Step 1: From the dashboard, navigate to "Integration" and select it. Then, click "Add Ecommerce App".
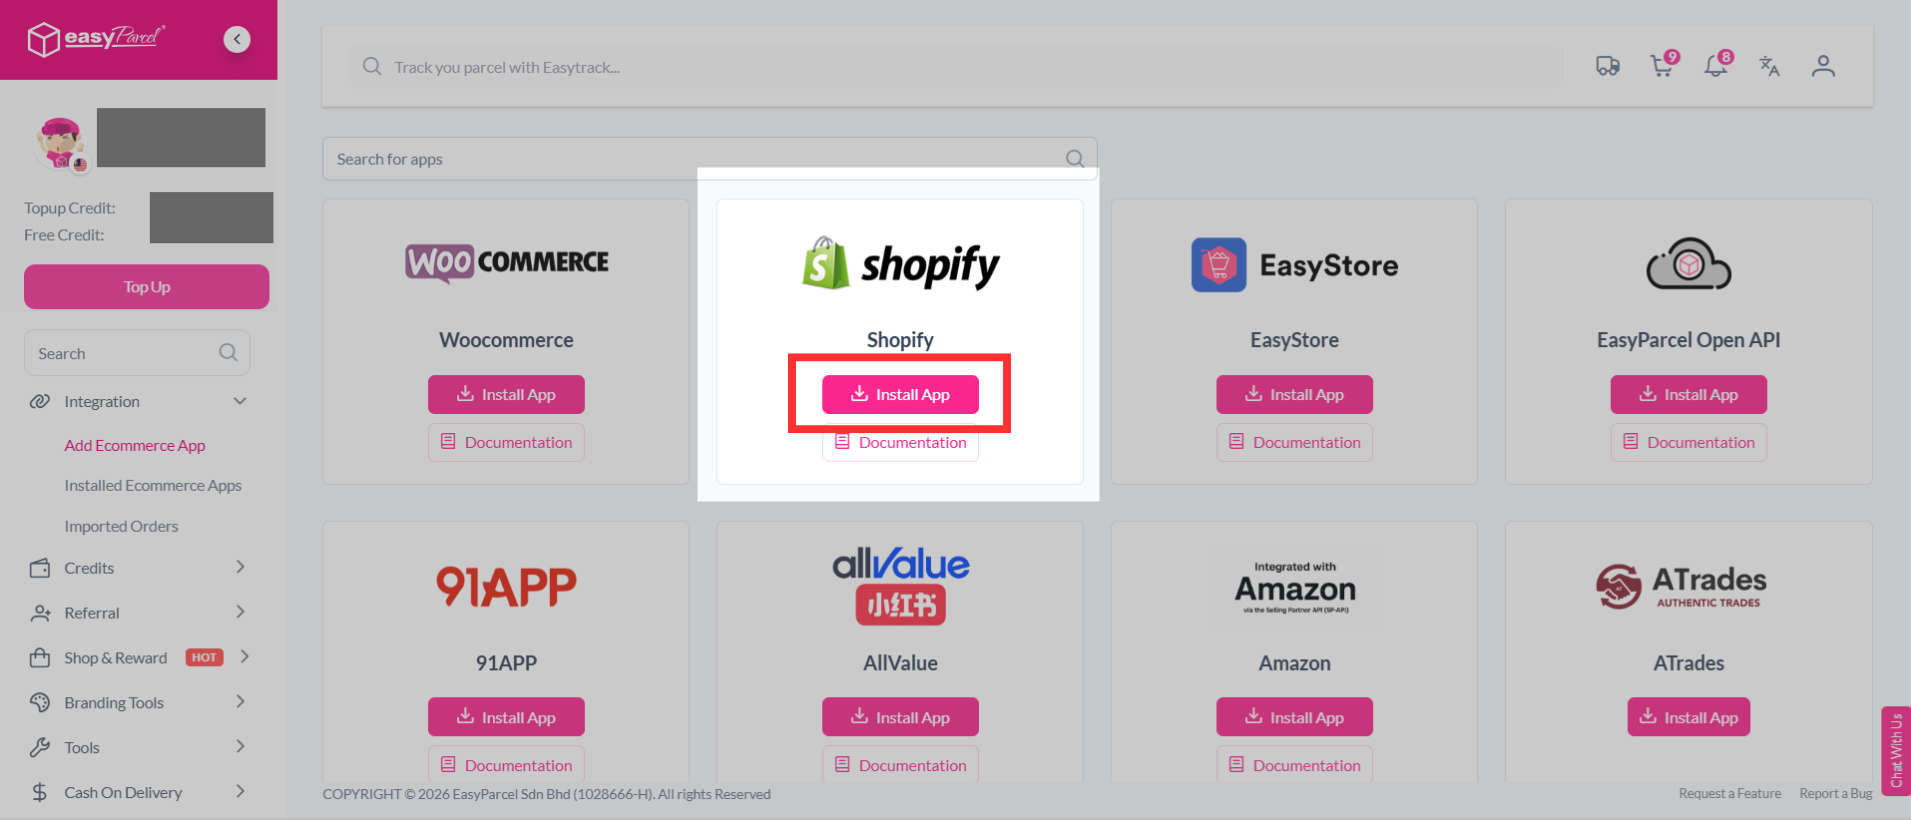
Step 2: Find "Shopify" from the list, and click "Install App".
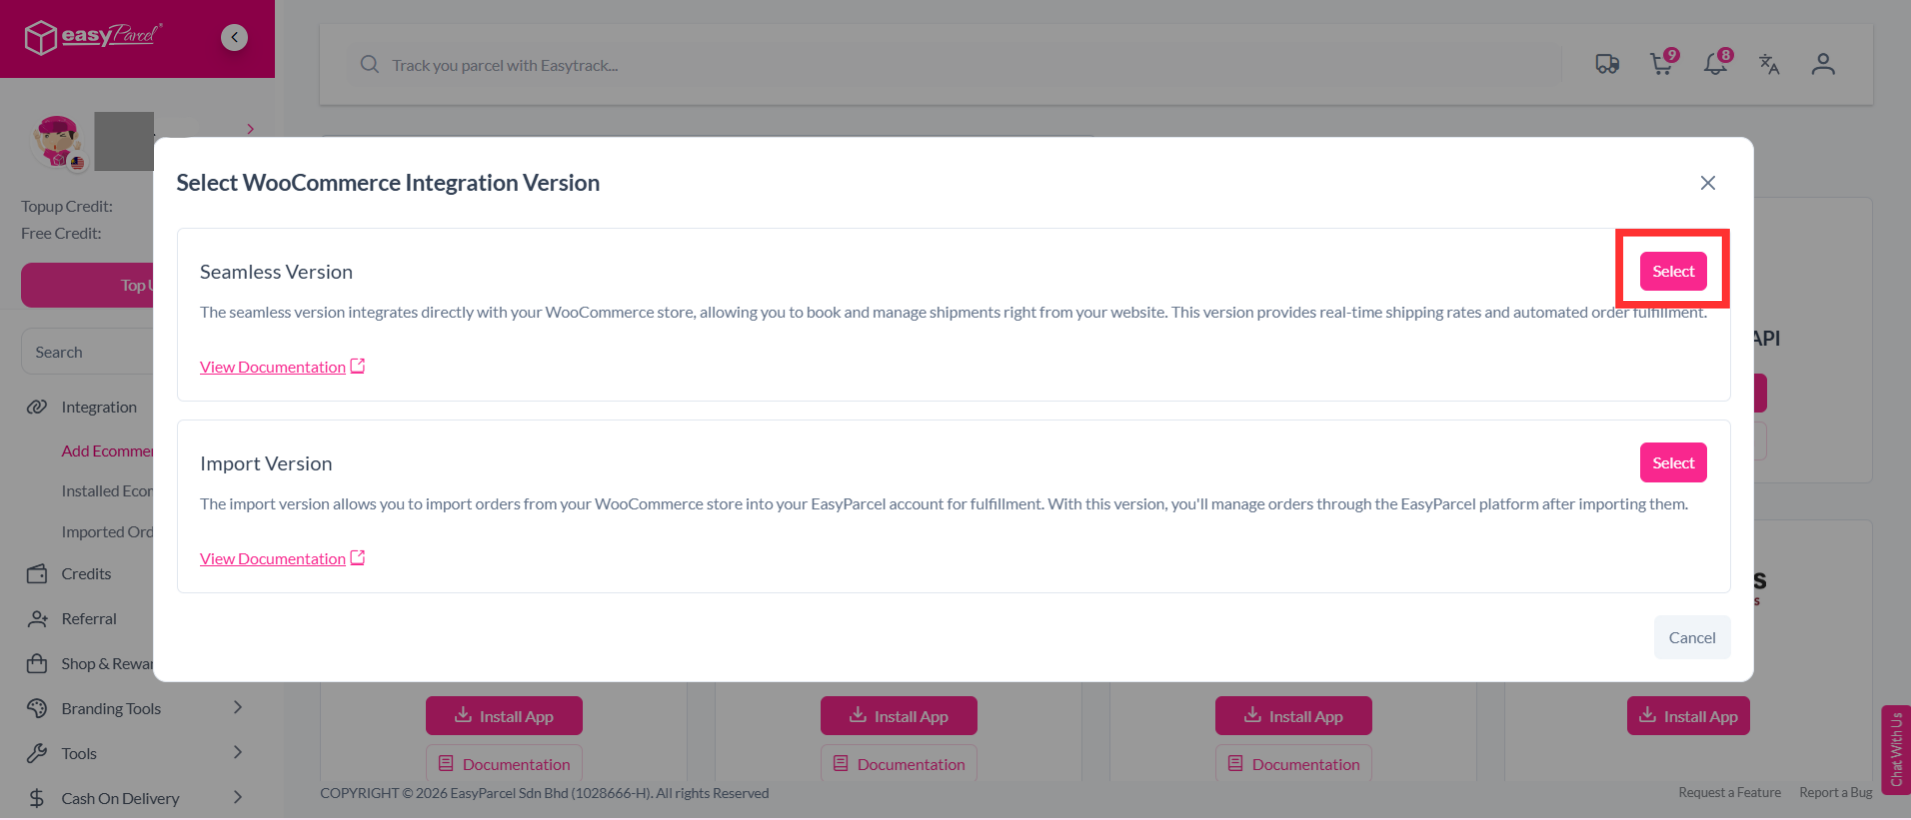
Step 3: Select "Seamless Version".
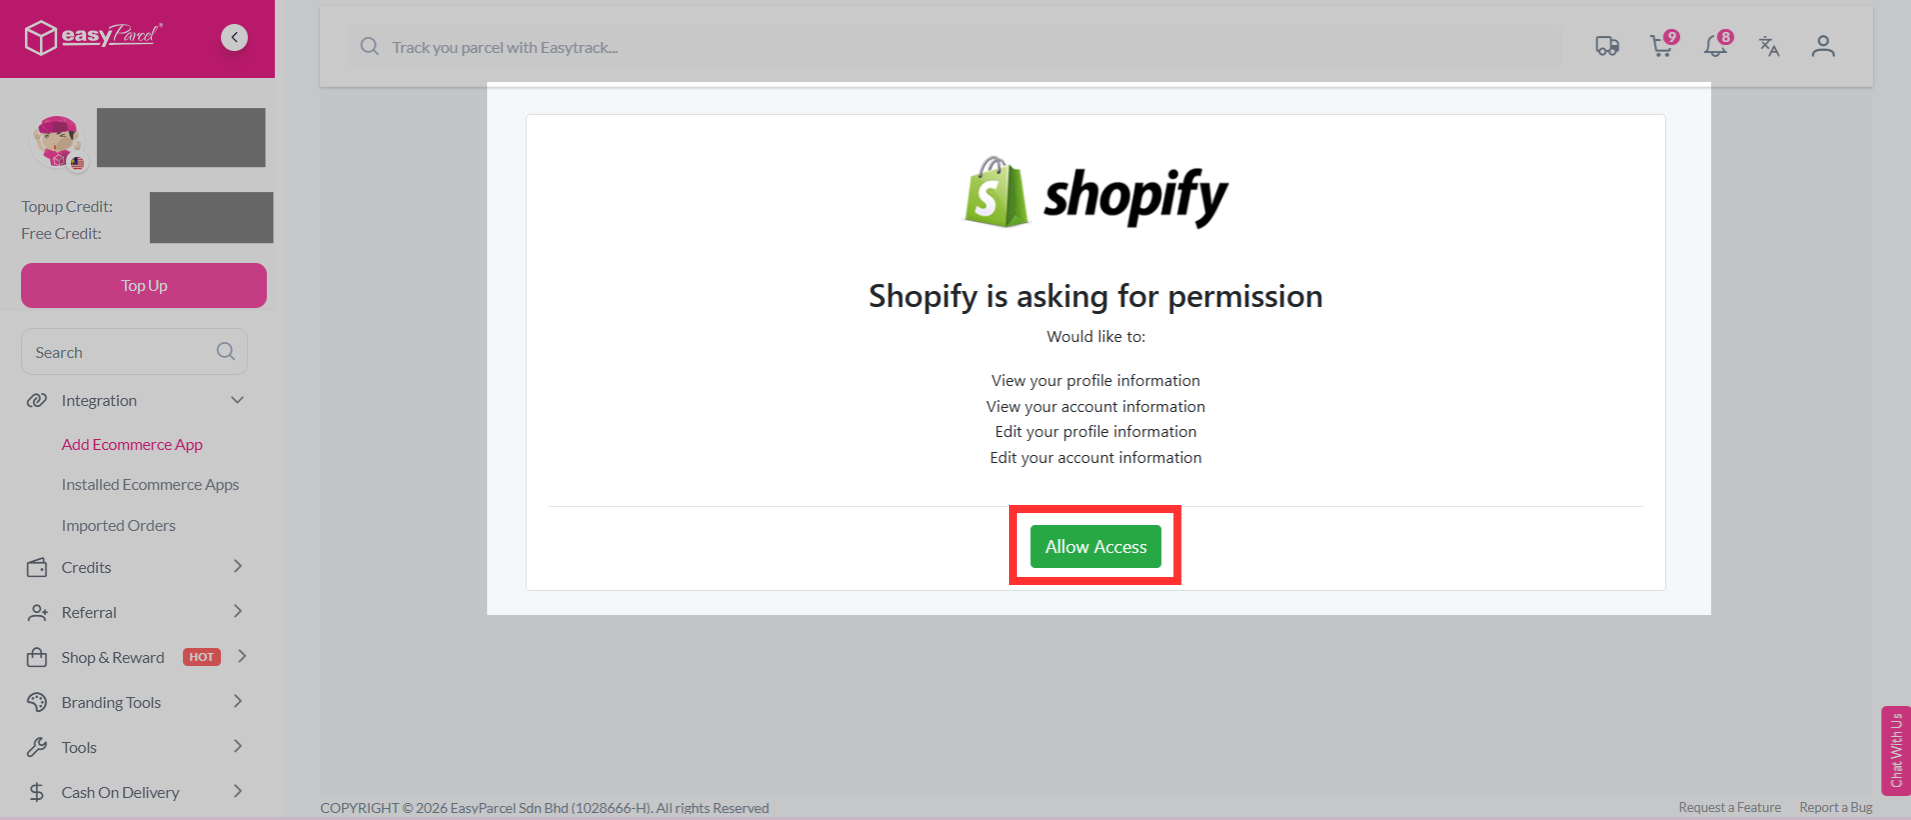
Step 4: Shopify will ask for permission to connect with EasyParcel. Review the requested permissions, then click "Allow Access" to continue.
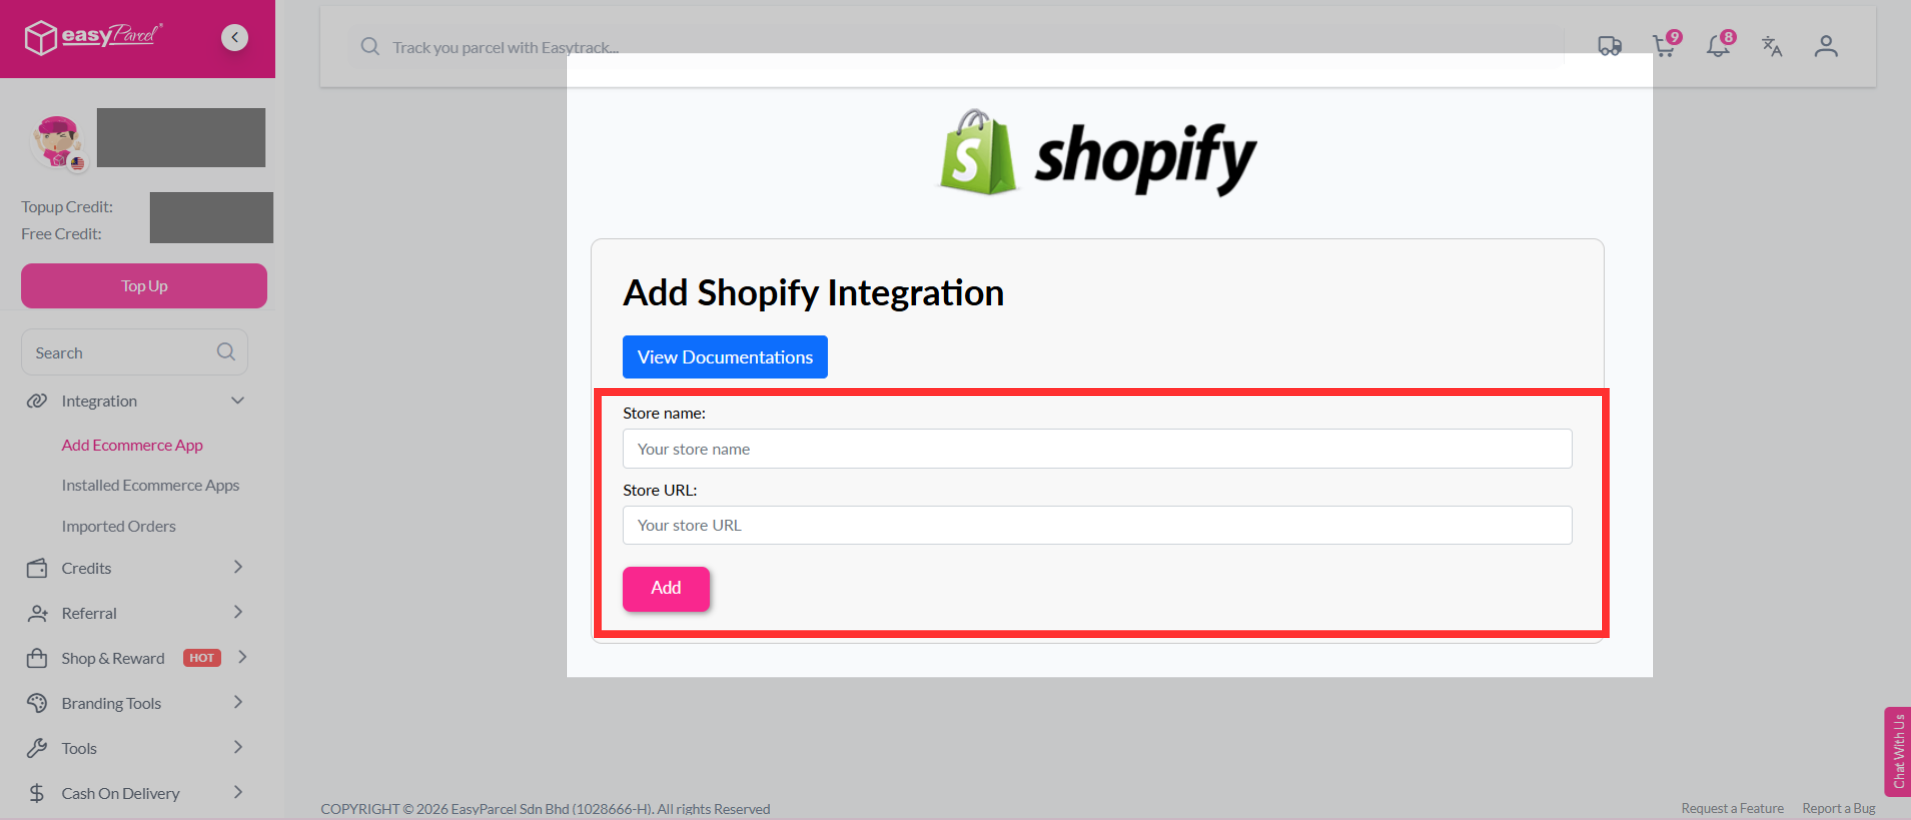
Step 5: Fill in your store’s name and store URL, then click "Add" to continue.
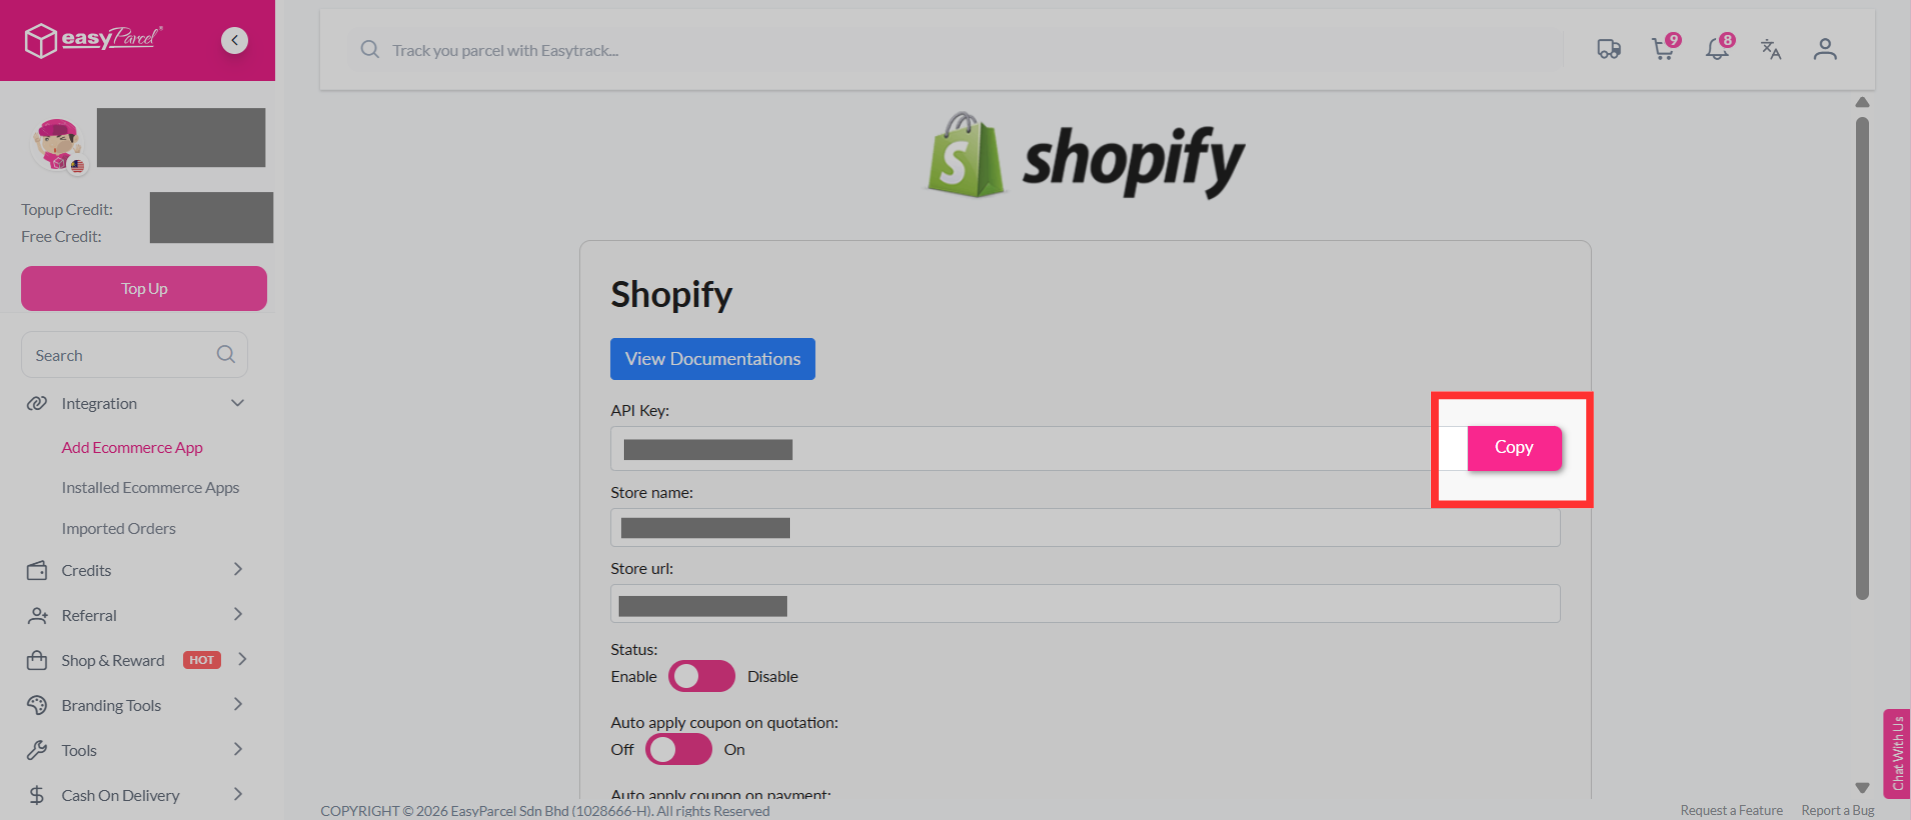
Step 6: EasyParcel will generate a unique Integration ID (API Key) for your store. Copy the Integration ID, as you will need to paste it into the Shopify.
Step 7: Go to your Shopify admin panel, click on "Apps", search for "EasyParcel- Delivery Made Easy" and click "Install".

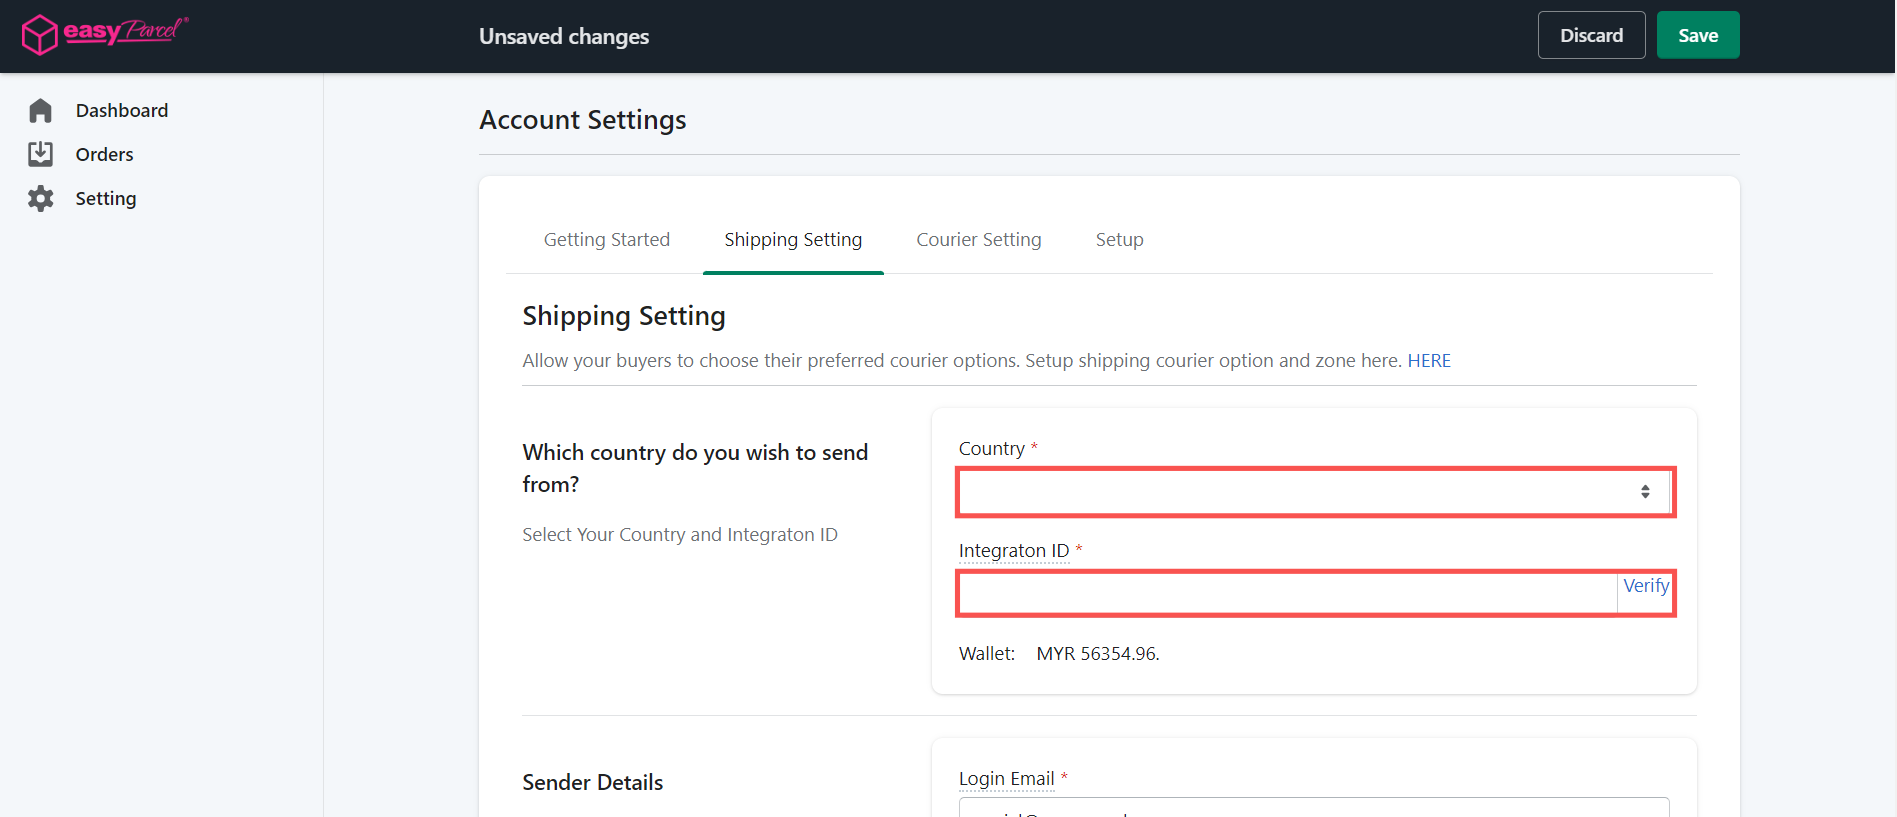
Step 8: You'll be brought to the "Shipping Setting" tab to fill in your details. Choose which country you'd like to ship from and insert your integration ID. Copy the integration ID to paste on the "Shipping Setting" tab.
Refer below image to learn how to get the integration ID from the EasyParcel platform.
Step 9: Please review the auto-filled "Sender's Details" to ensure accuracy. If any information requires editing, kindly make the necessary adjustments. Once you have verified the details, please click "Save" to store the information.
Step 10: Go to your Shopify admin panel, click "Settings", click "Checkout" then under "Shipping address phone number" choose "Required" to ensure your customer's contact number is able to be captured by EasyParcel's Shopify APP.
Note: Failure to adhere to these steps may result in the buyer's contact number not being captured by EasyParcel app. Consequently, when the order is imported into EasyParcel, it may indicate a failed import due to an empty receiver_contact field. Additionally, for APP versions, successful order fulfillment may occur, but no AWB will be generated or provided to the customer due to the receiver_contact having an empty value.


2.2: Import Version
Step 1: From the dashboard, navigate to "Integration" and select it. Then, click "Add Ecommerce App".
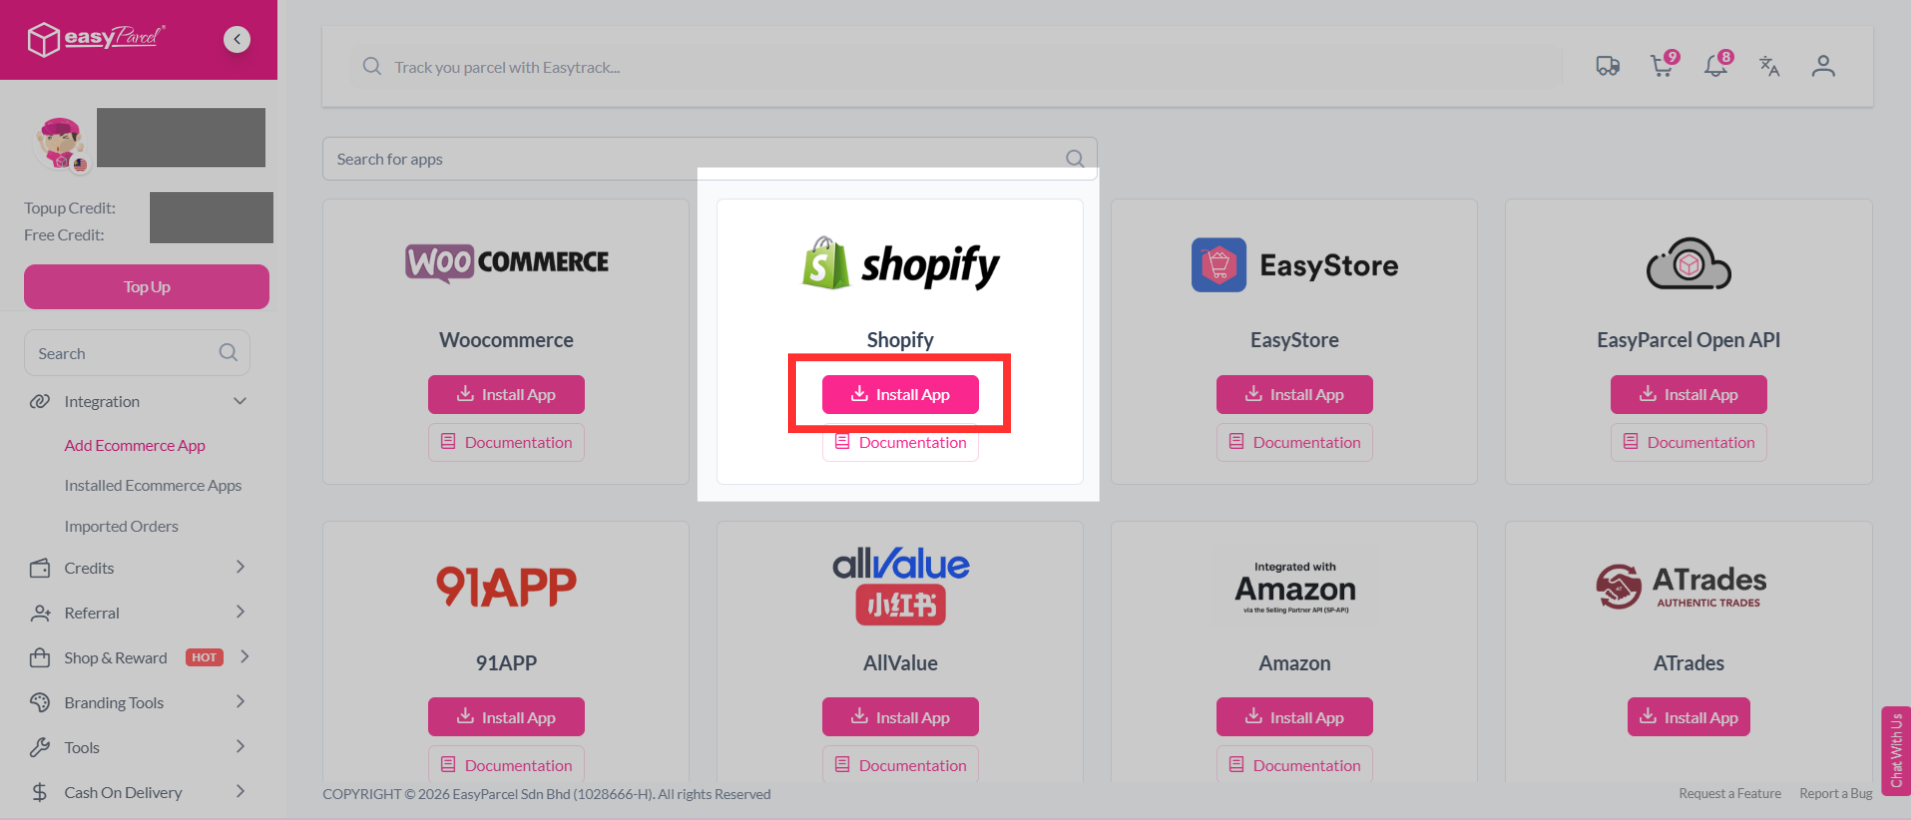
Step 2: Find "Shopify" from the list, and click "Install App".
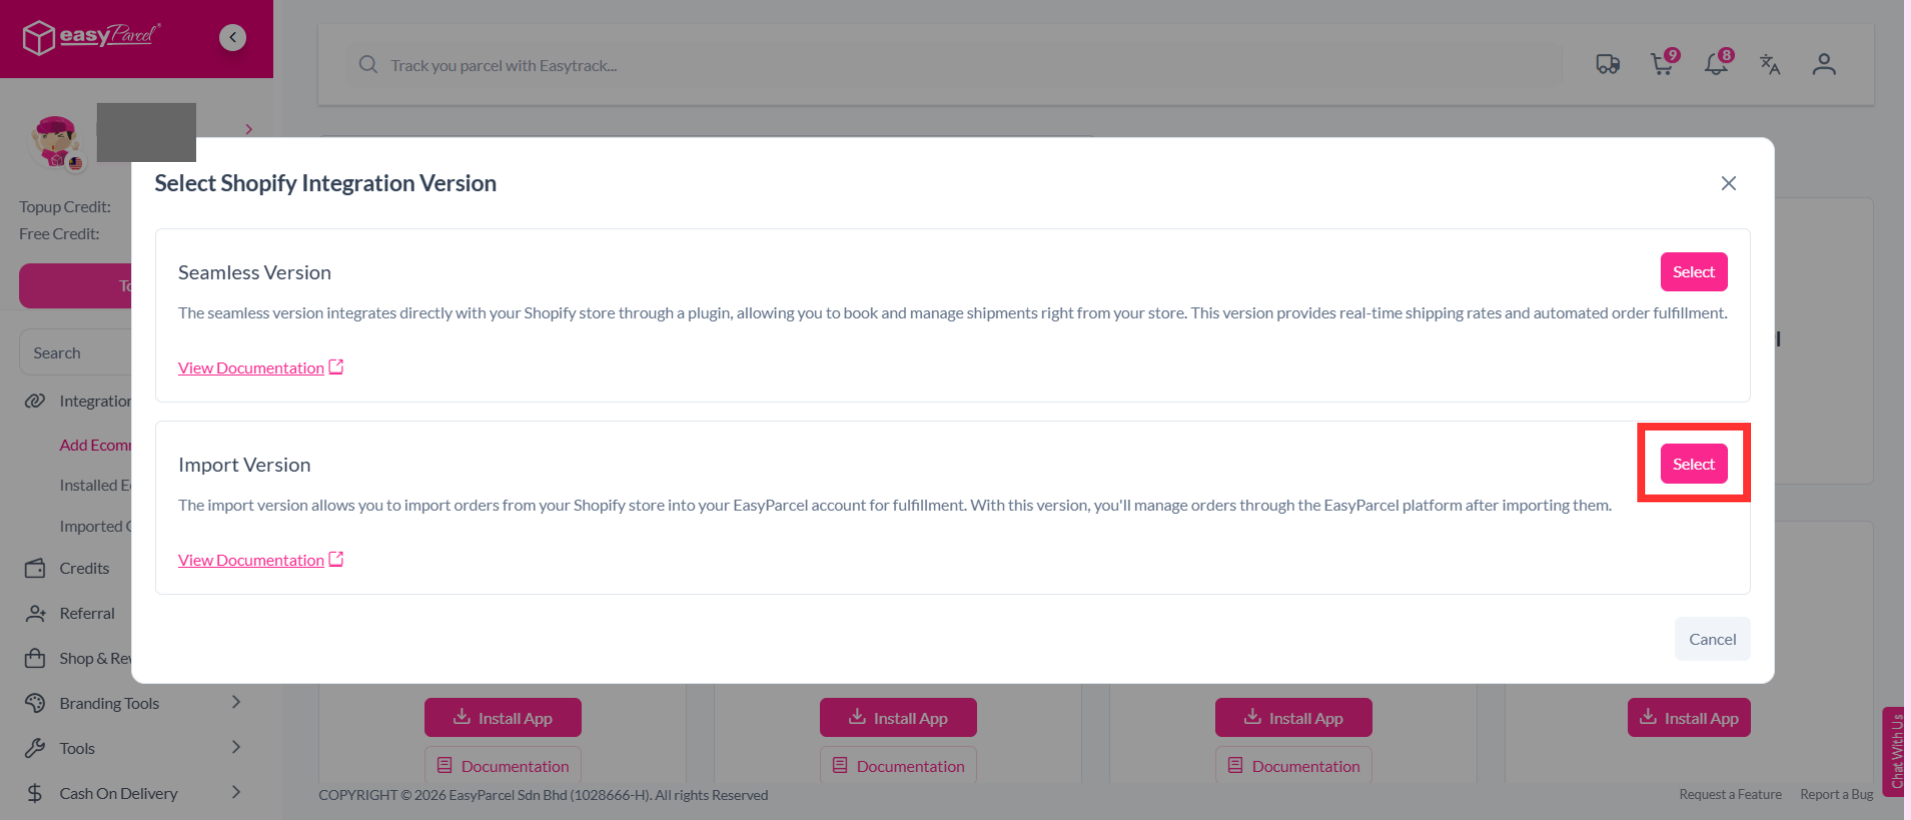
Step 3: Select "Import Version".
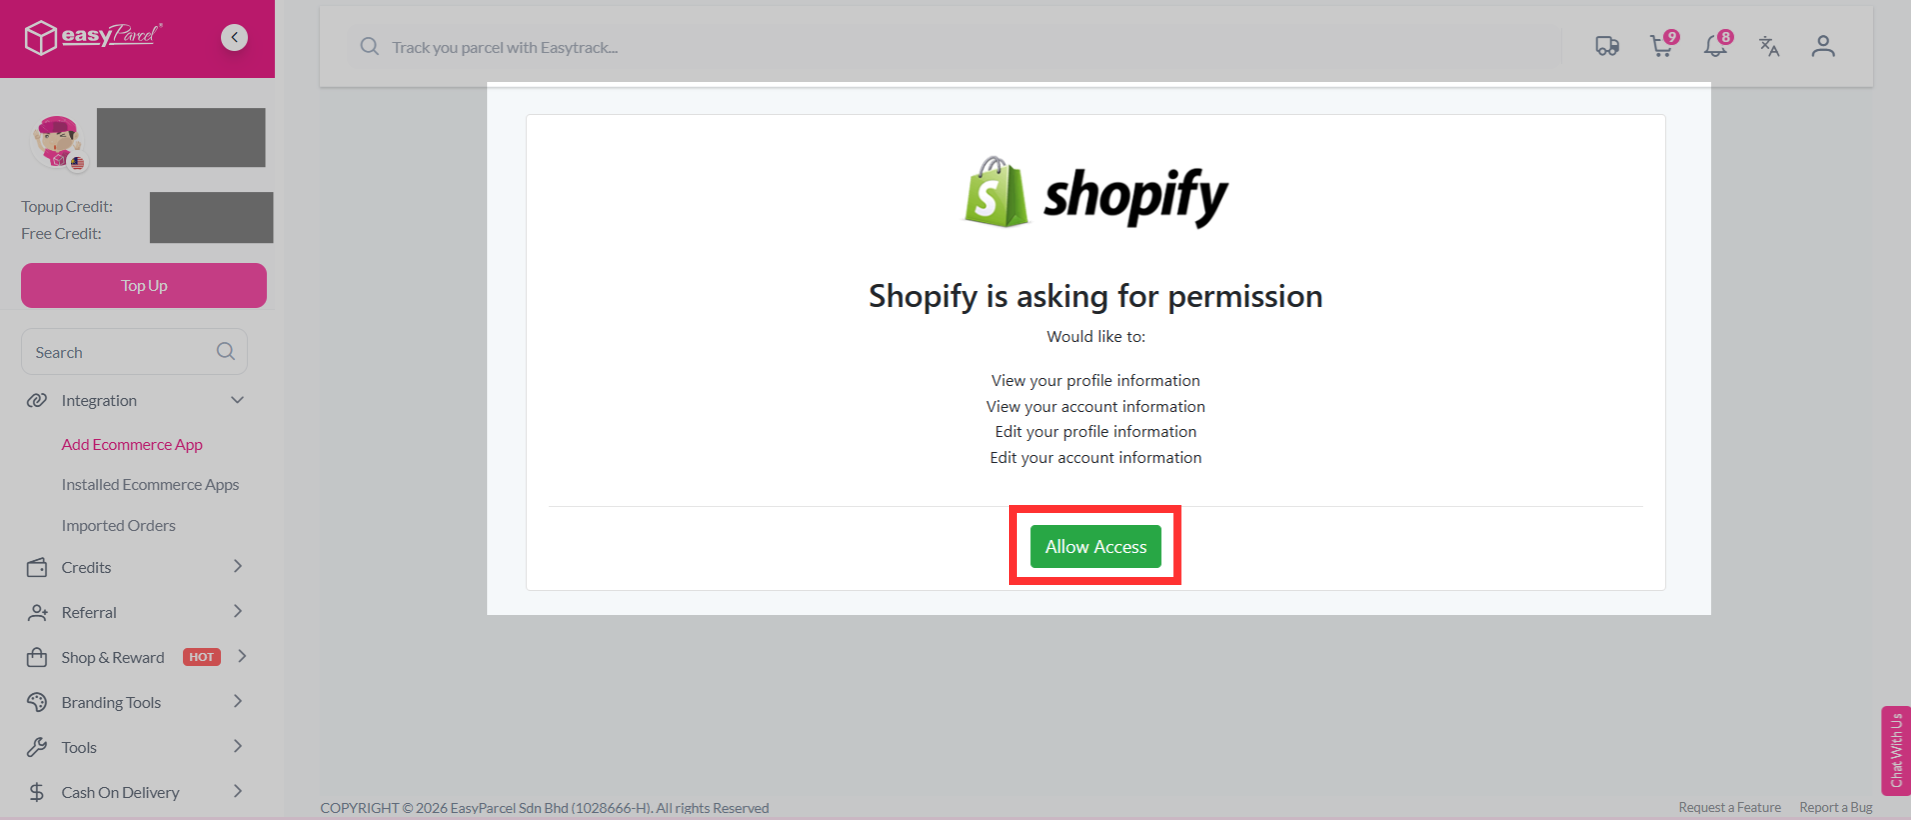
Step 4: Shopify will ask for permission to connect with EasyParcel. Review the requested permissions, then click "Allow Access" to continue.
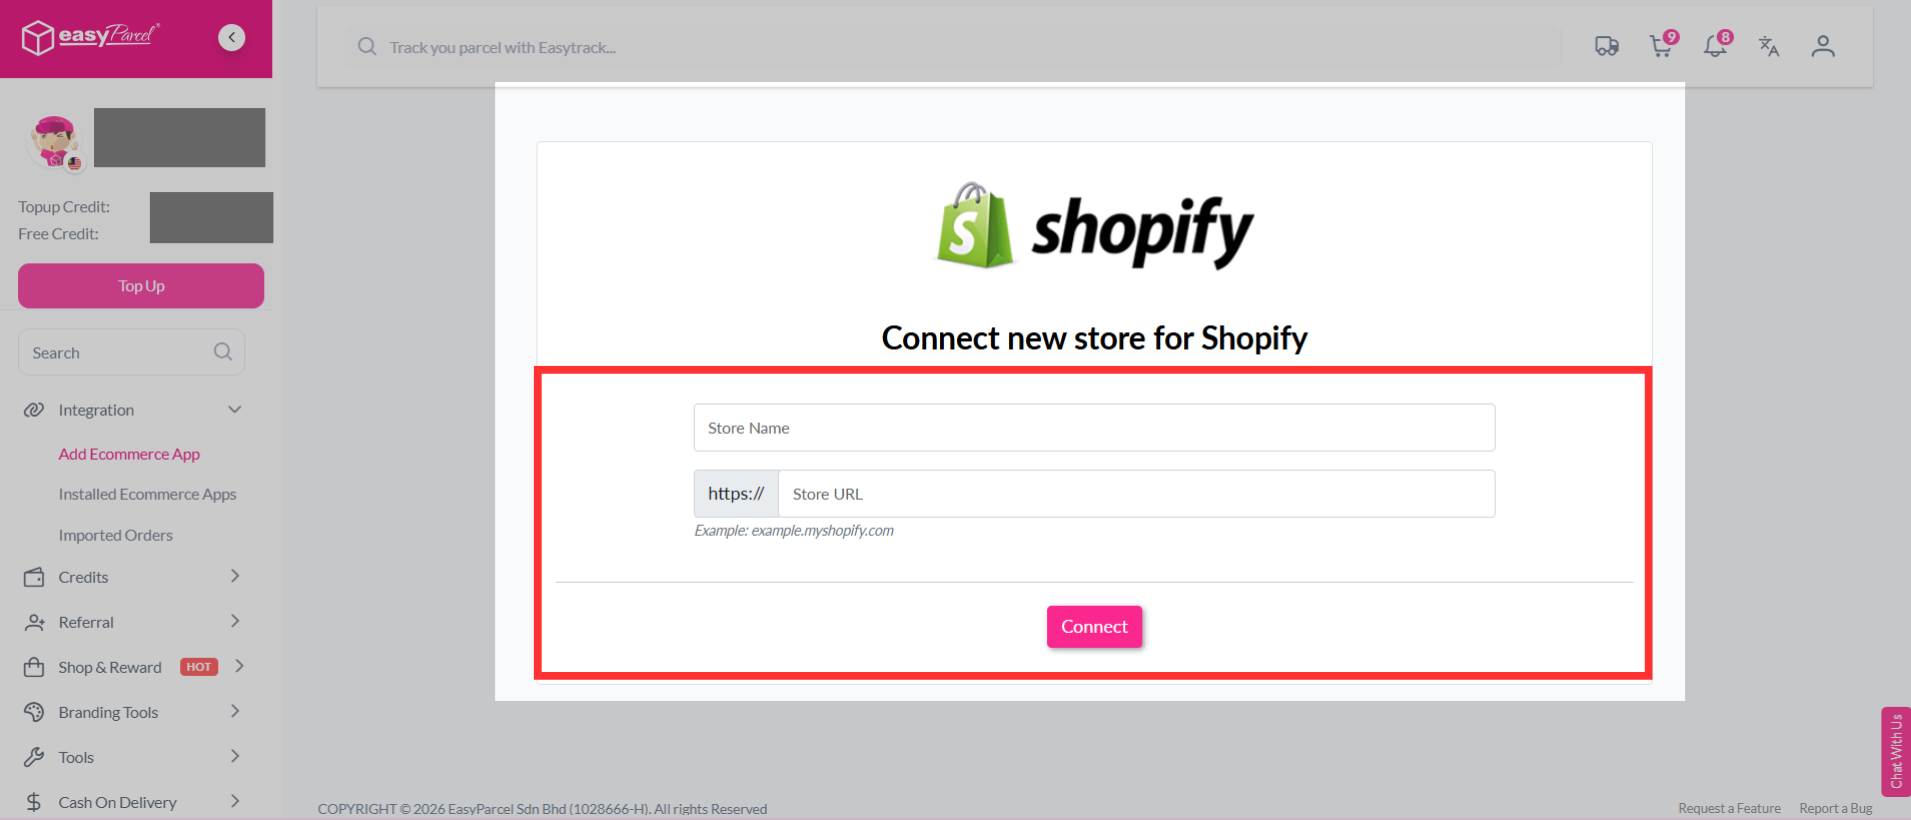
Step 5: Fill in your store’s name and store URL, then click "Connect" to continue.
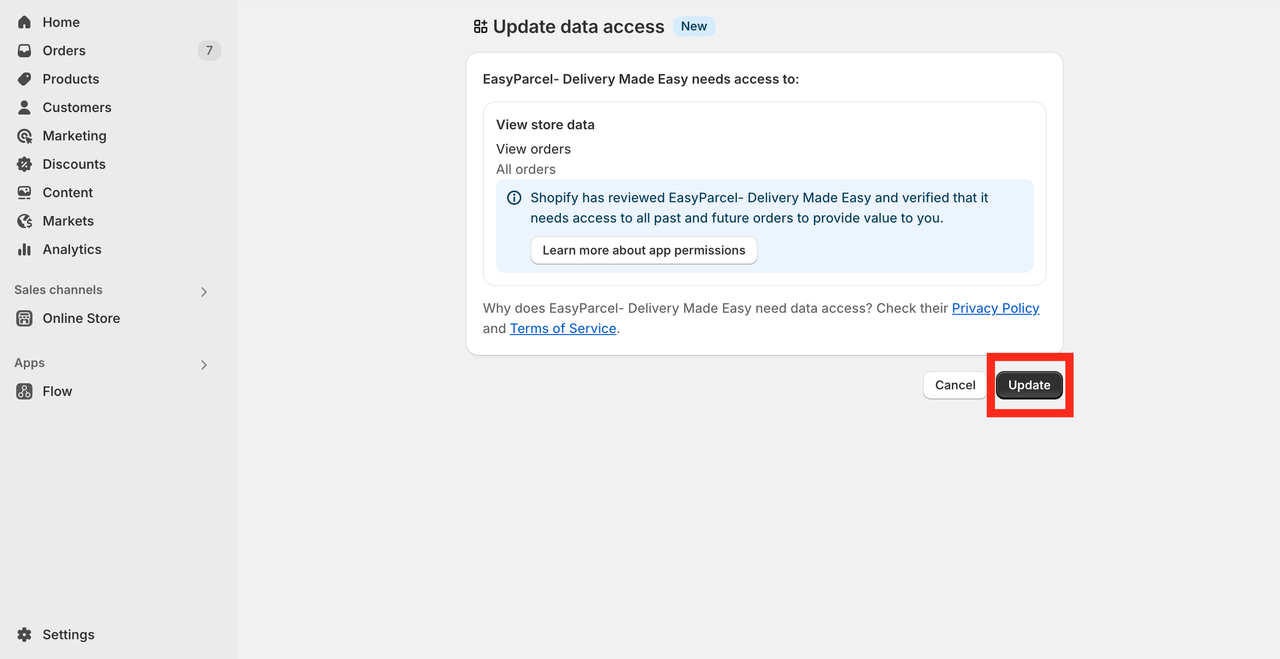
Step 6: You will then be redirected to your Shopify admin page, and click on the "Update" button.
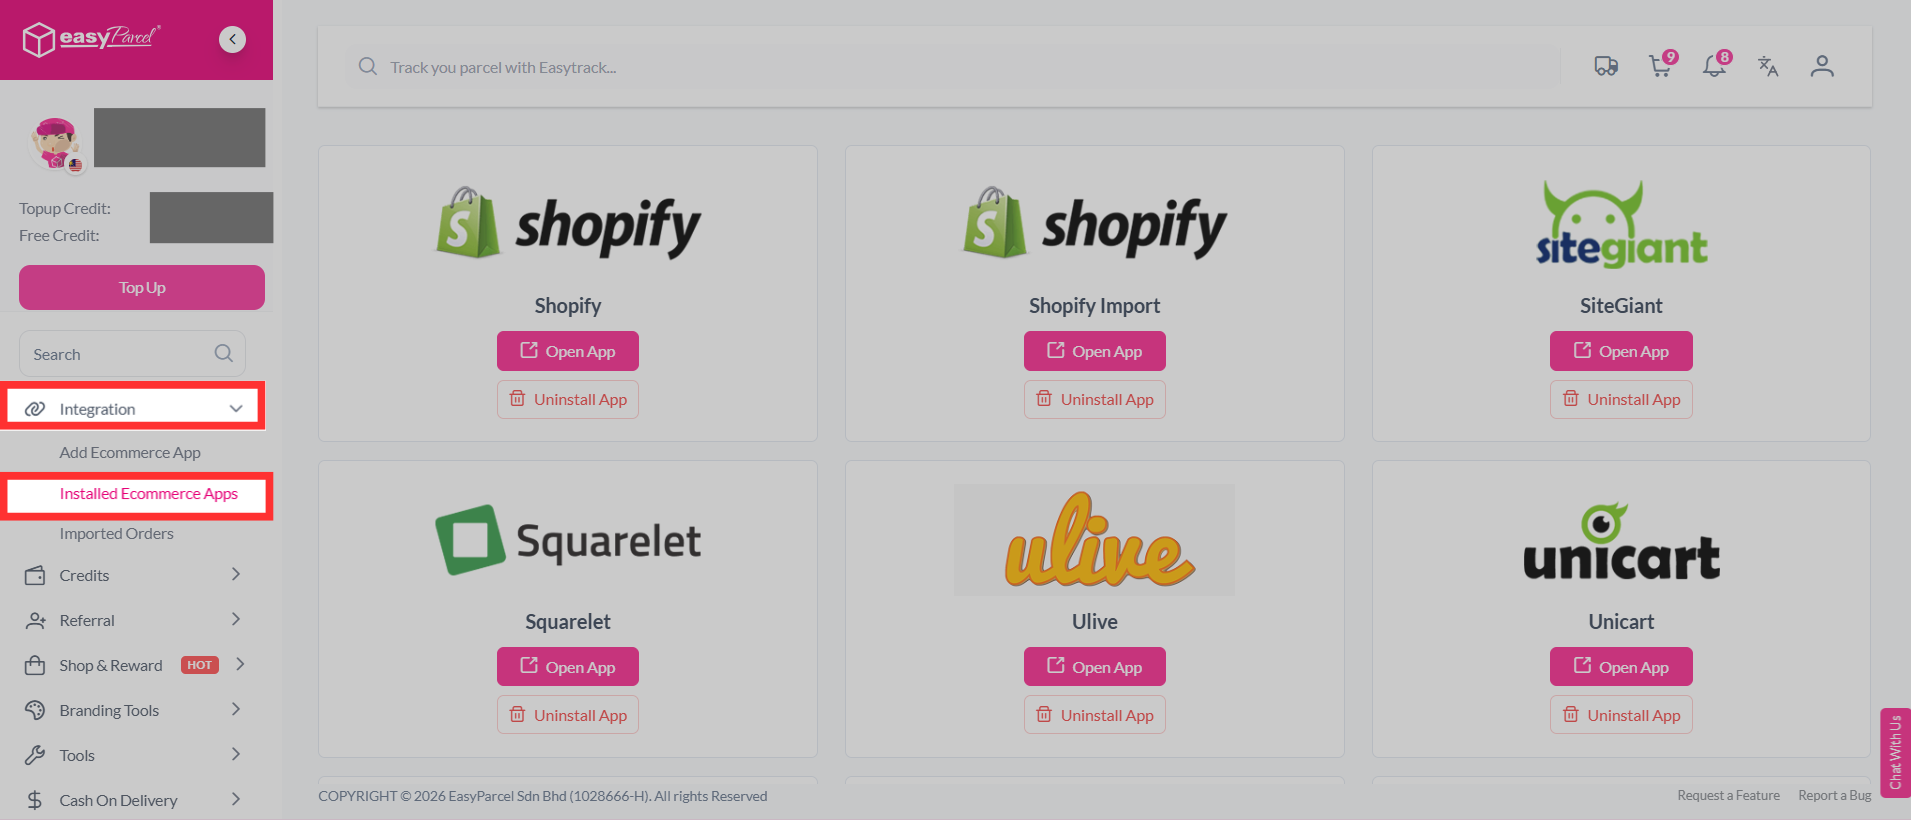
Step 7: Under "Integration", click "Installed Ecommerce Apps".
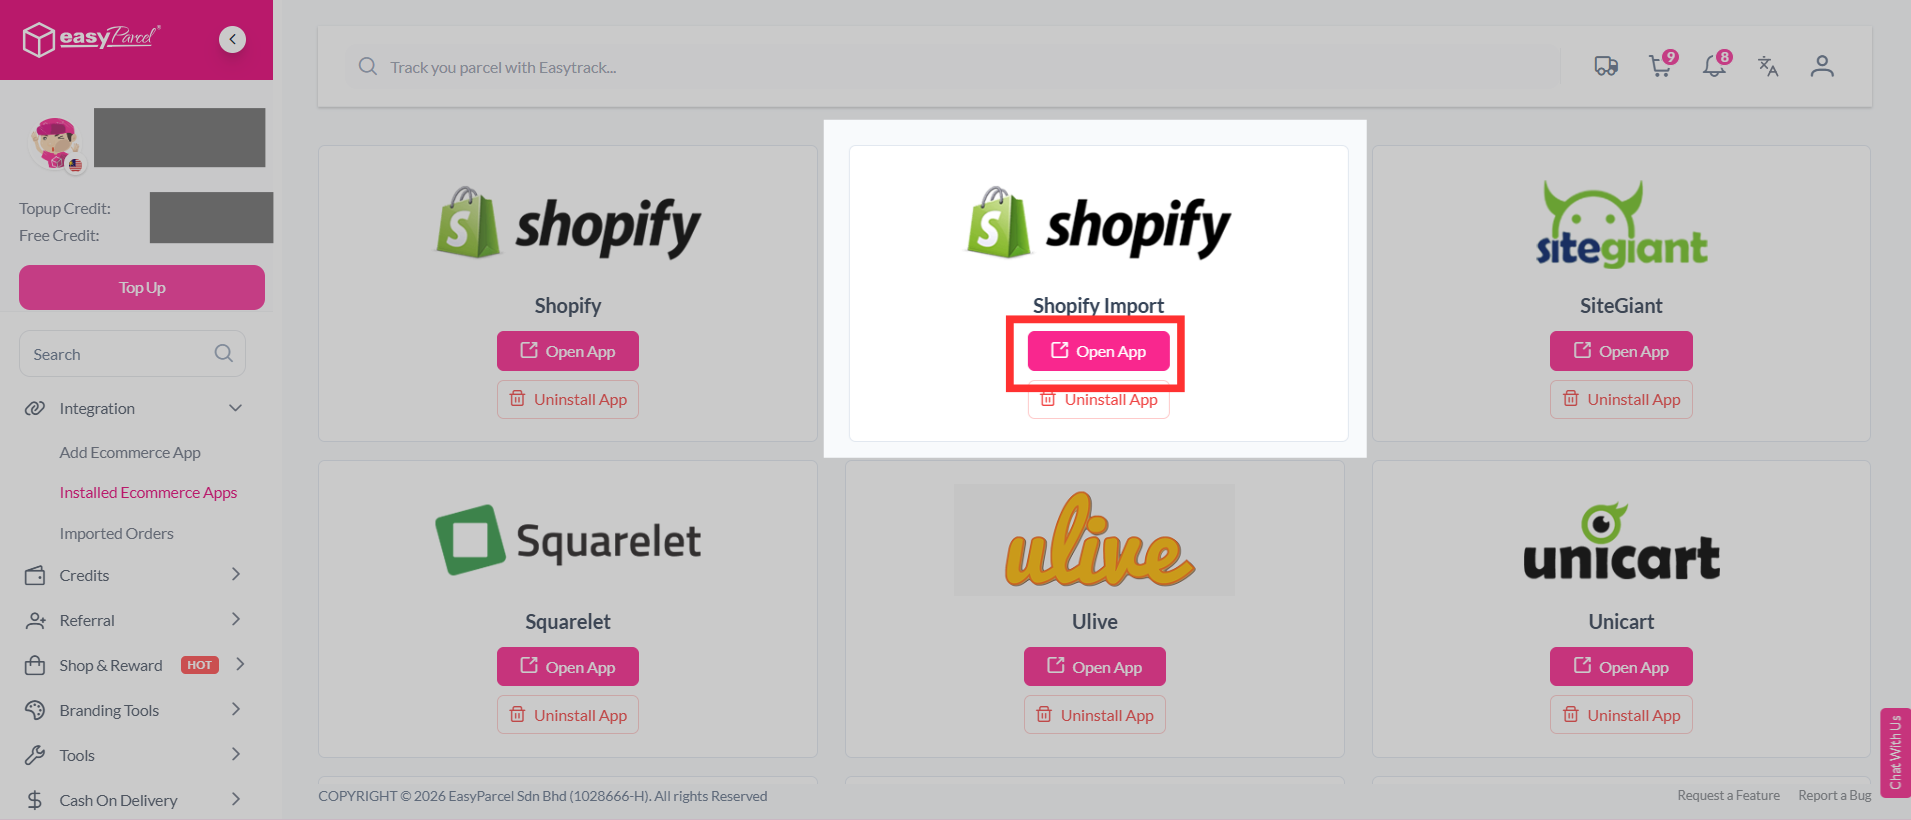
Step 8: Find "Shopify Import". Click "Open App".
Step 9: In your store, click "Sender Address", fill in your sender details, then click "Update".
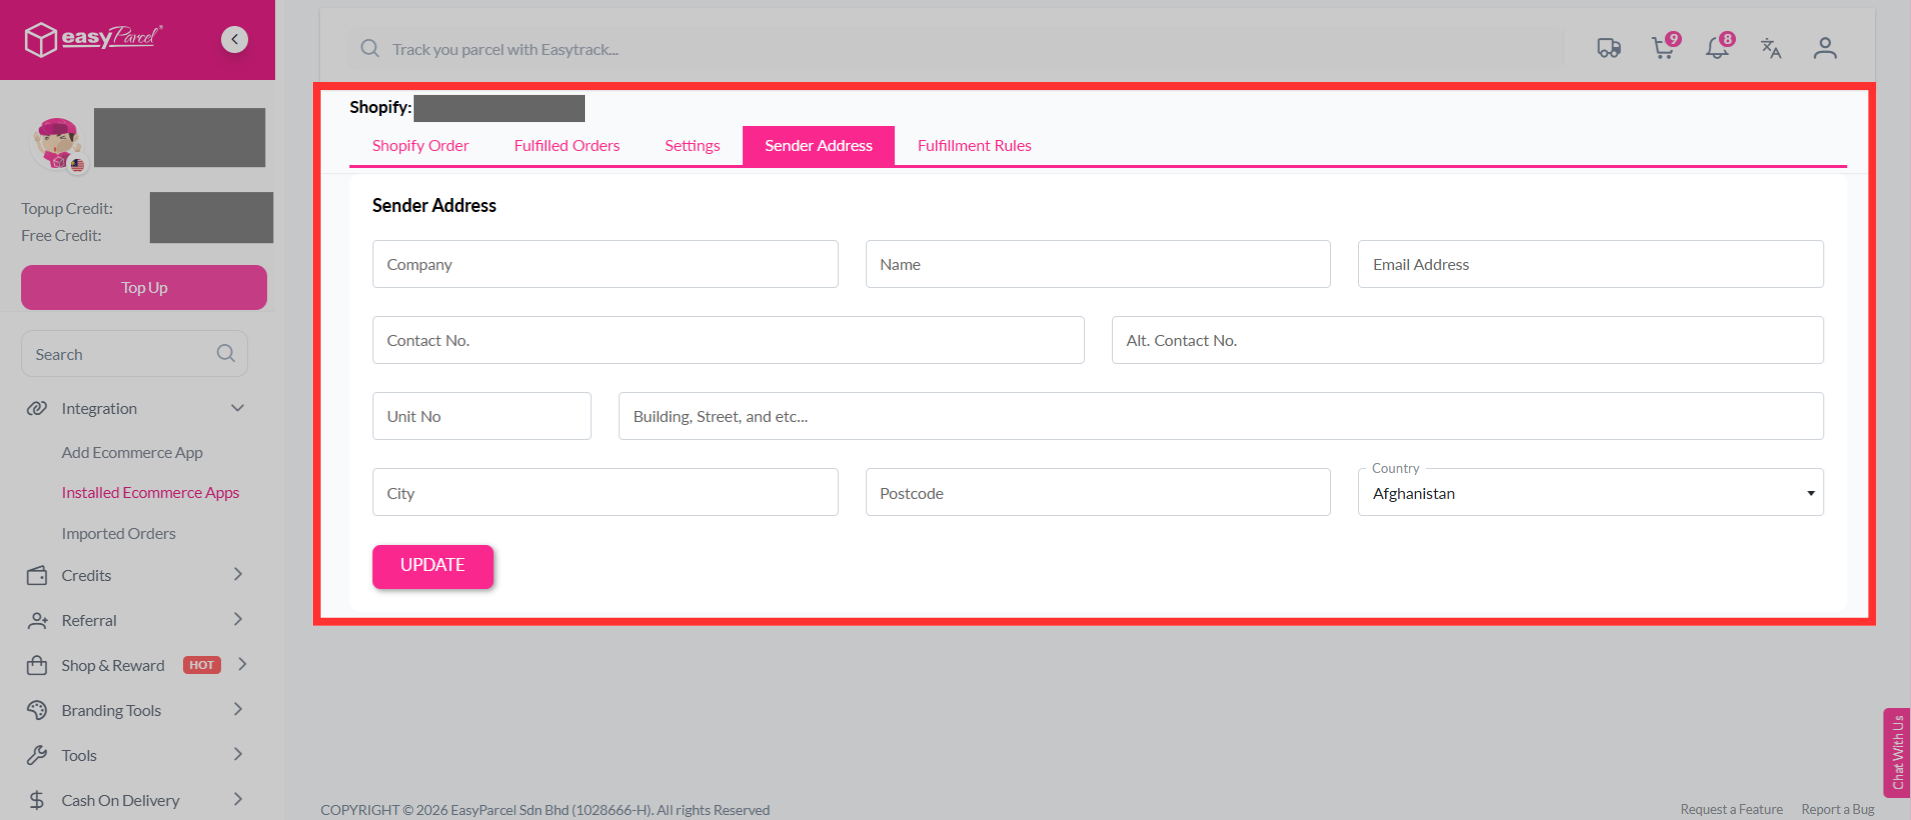
Step 10: Done! You have successfully set up the Shopify Import app in EasyParcel.