We'll Cover:
What is EasyTrack?
Are you aware that it's the courier tracking page that your customer is opening over and over again? Psst… you can now lead your customers to a tracking page where you can feature your brand: your logo, your links, your Facebook page and even your latest promotion. Let us introduce you the marketing tool - EasyTrack Branding:-
 |  |
 |  |
How much is EasyTrack Branding?
| Custom EasyTrack Branding Template | Remove EasyParcel Branding |
| RM0.15/shipment | + RM0.05/shipment |
How to Custom EasyTrack Branding?
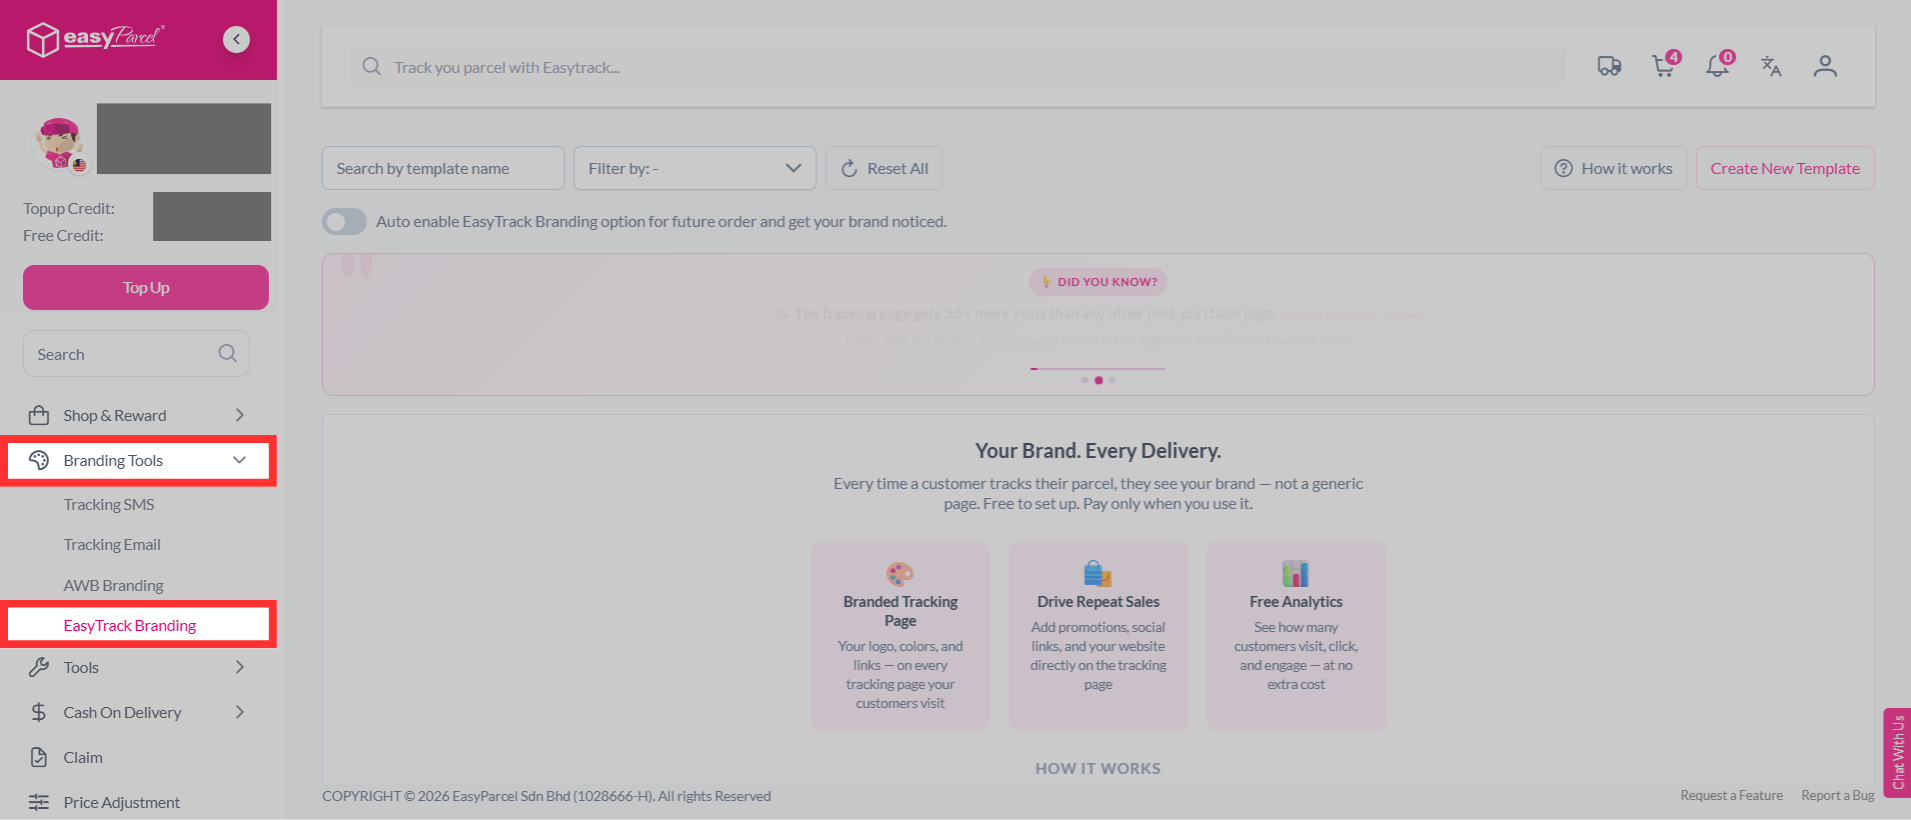
Step 1: Go to "Branding Tools" on the sidebar of your dashboard and click on "EasyTrack Branding".
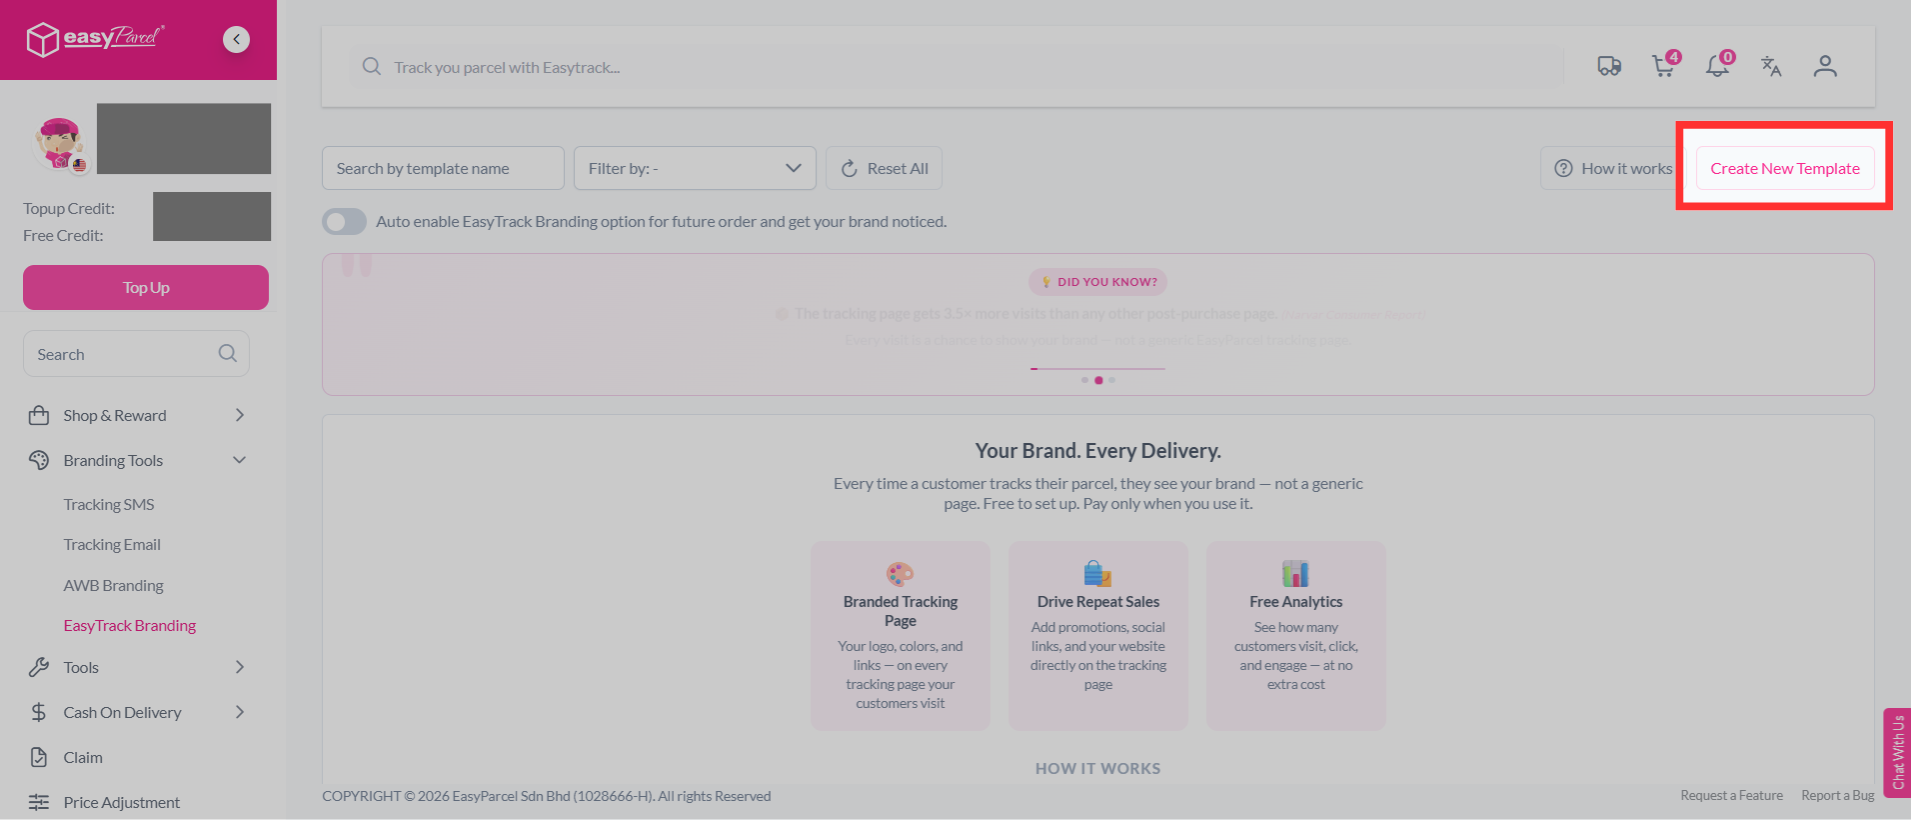
Step 2: Click "Create New Template" to start creating your custom EasyTrack branding template.
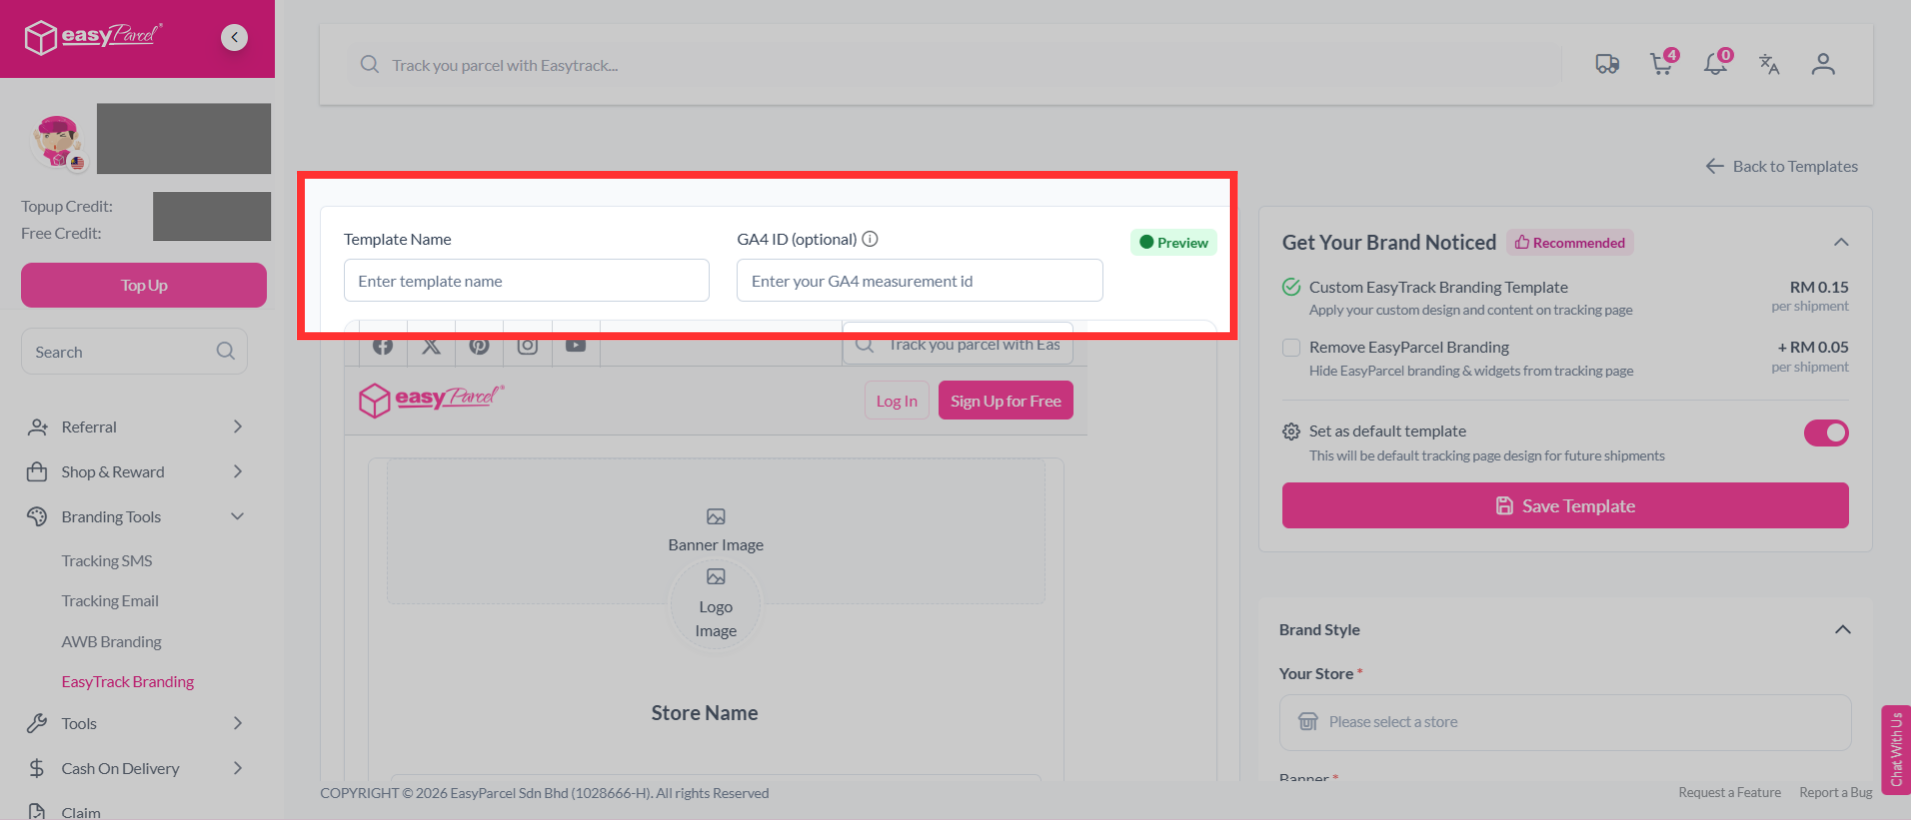
Step 3: Enter your template name. You may enter your GA4 Measurement ID if applicable. Enter your GA4 Measurement ID (G-XXXXXXXXXX) to track visitor clicks on your template and view the data and reports in Google Analytics.
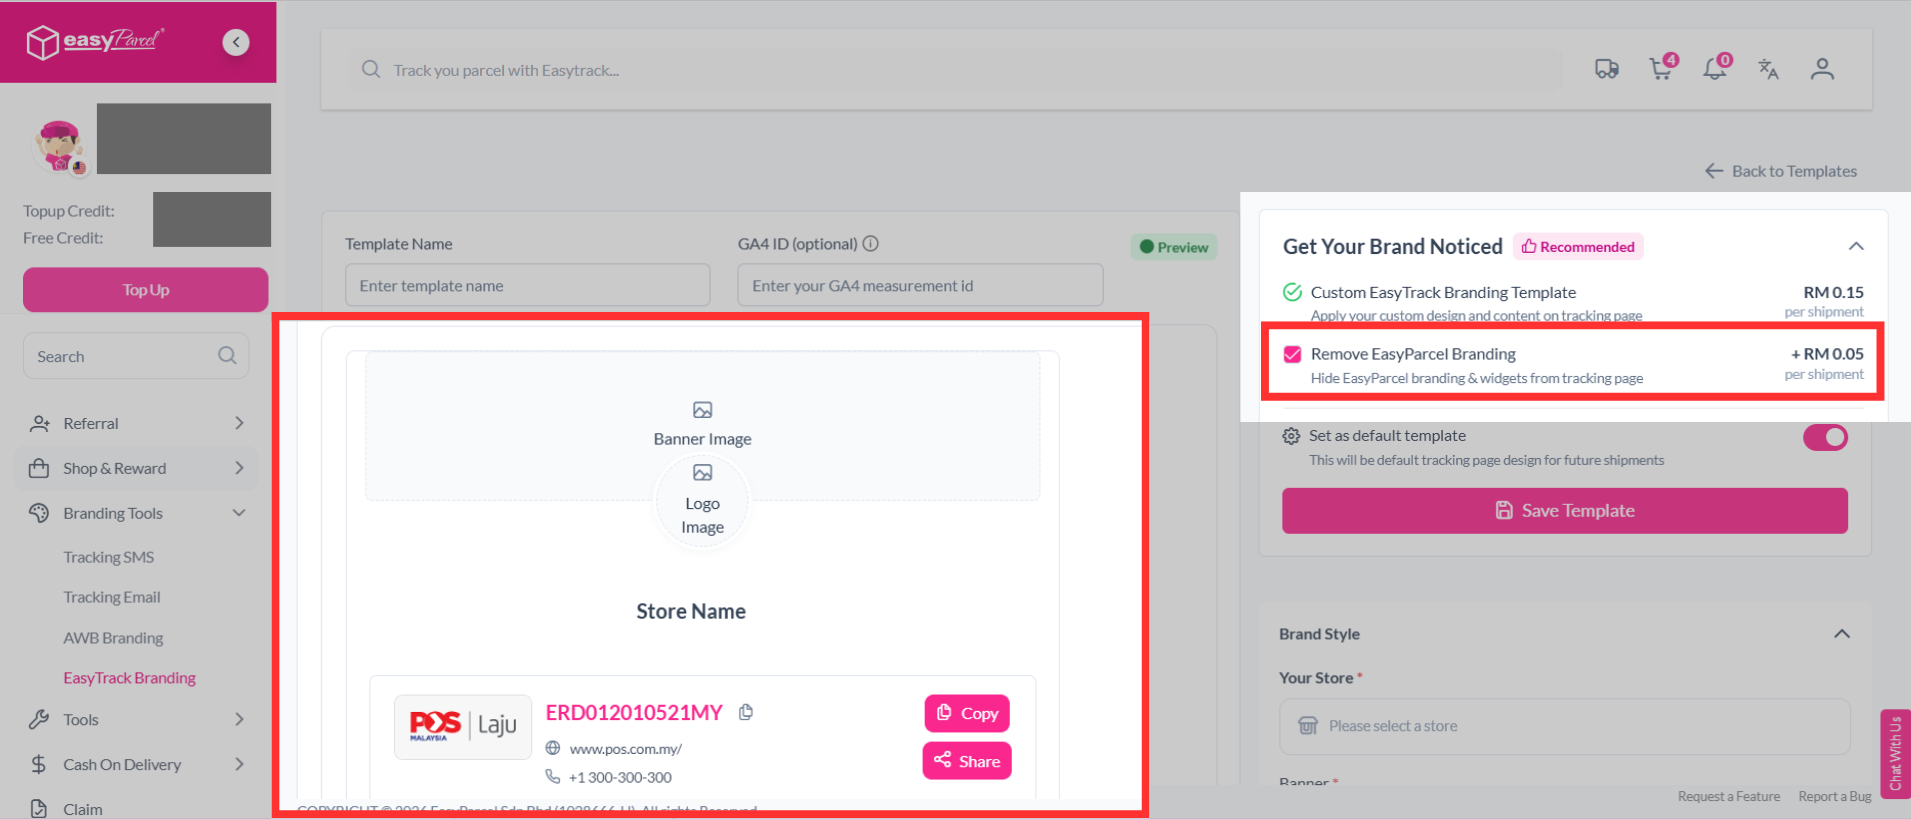
Step 4: You can choose to remove EasyParcel branding in your EasyTrack landing page for RM0.05 per shipment.
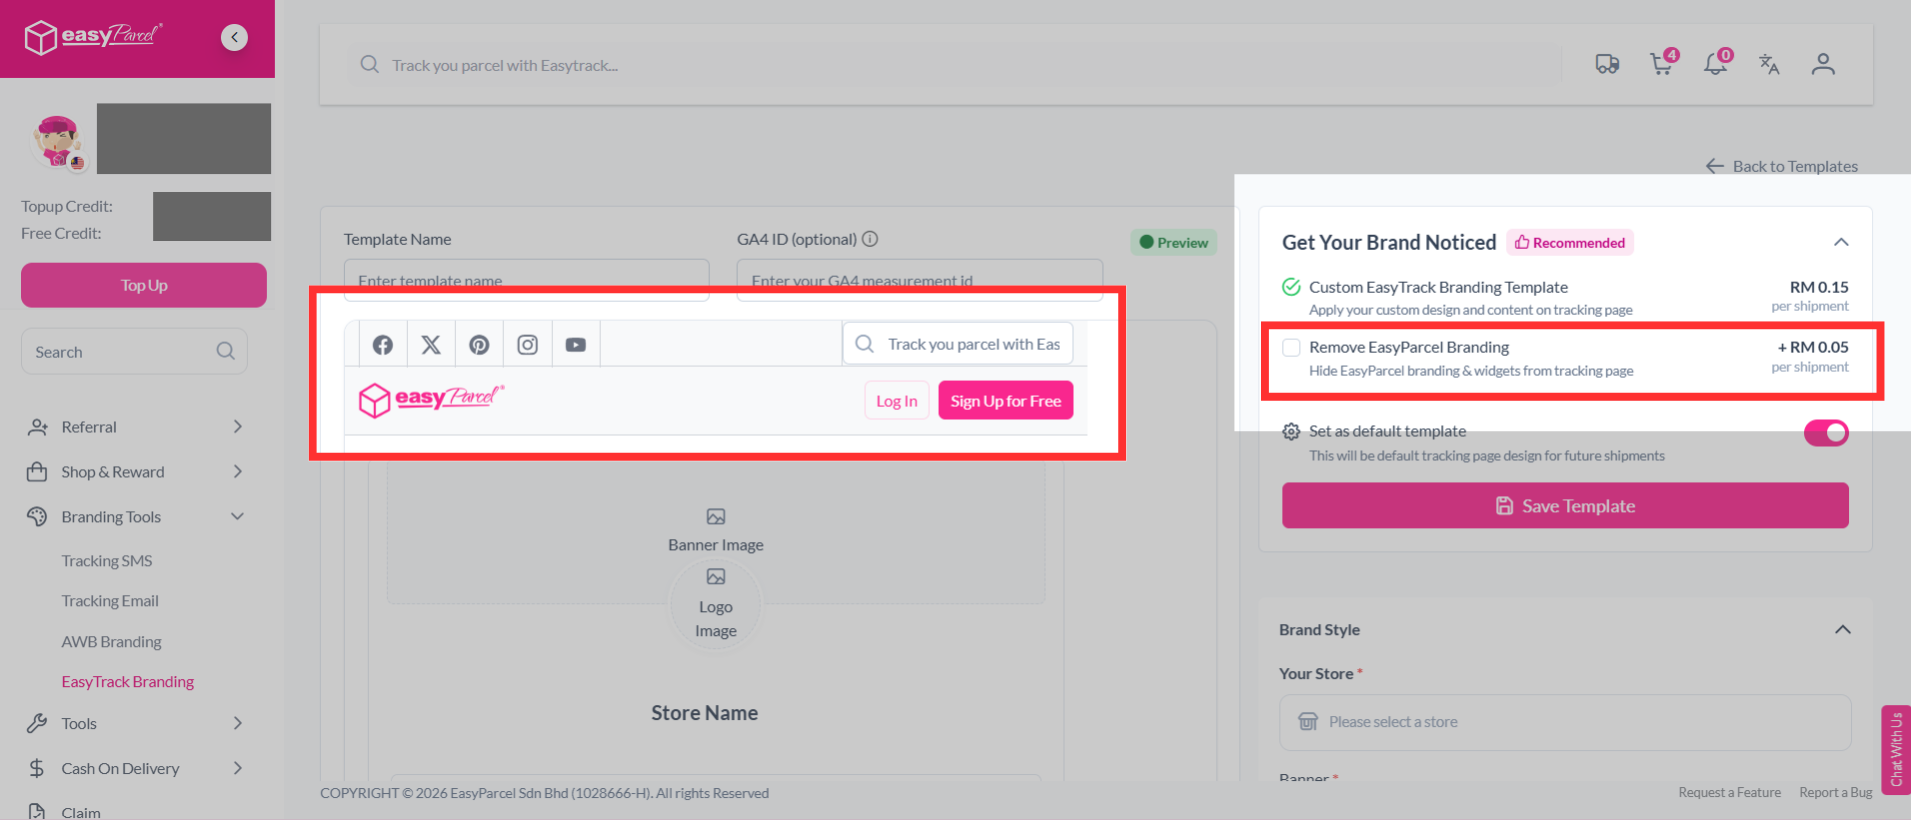
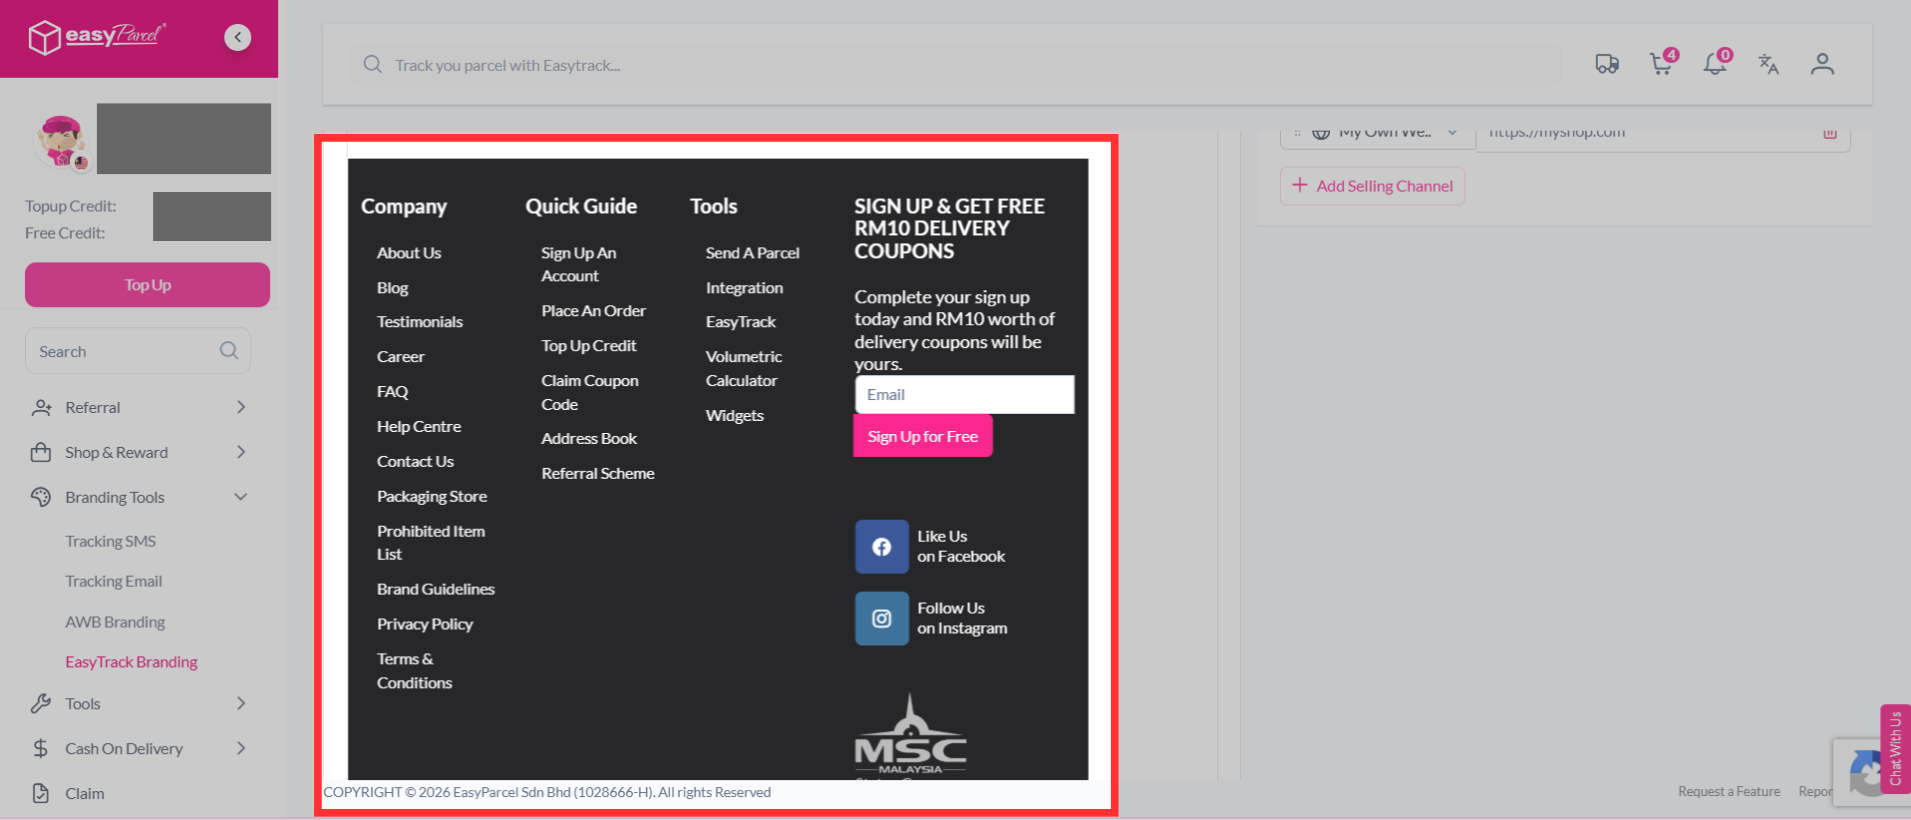
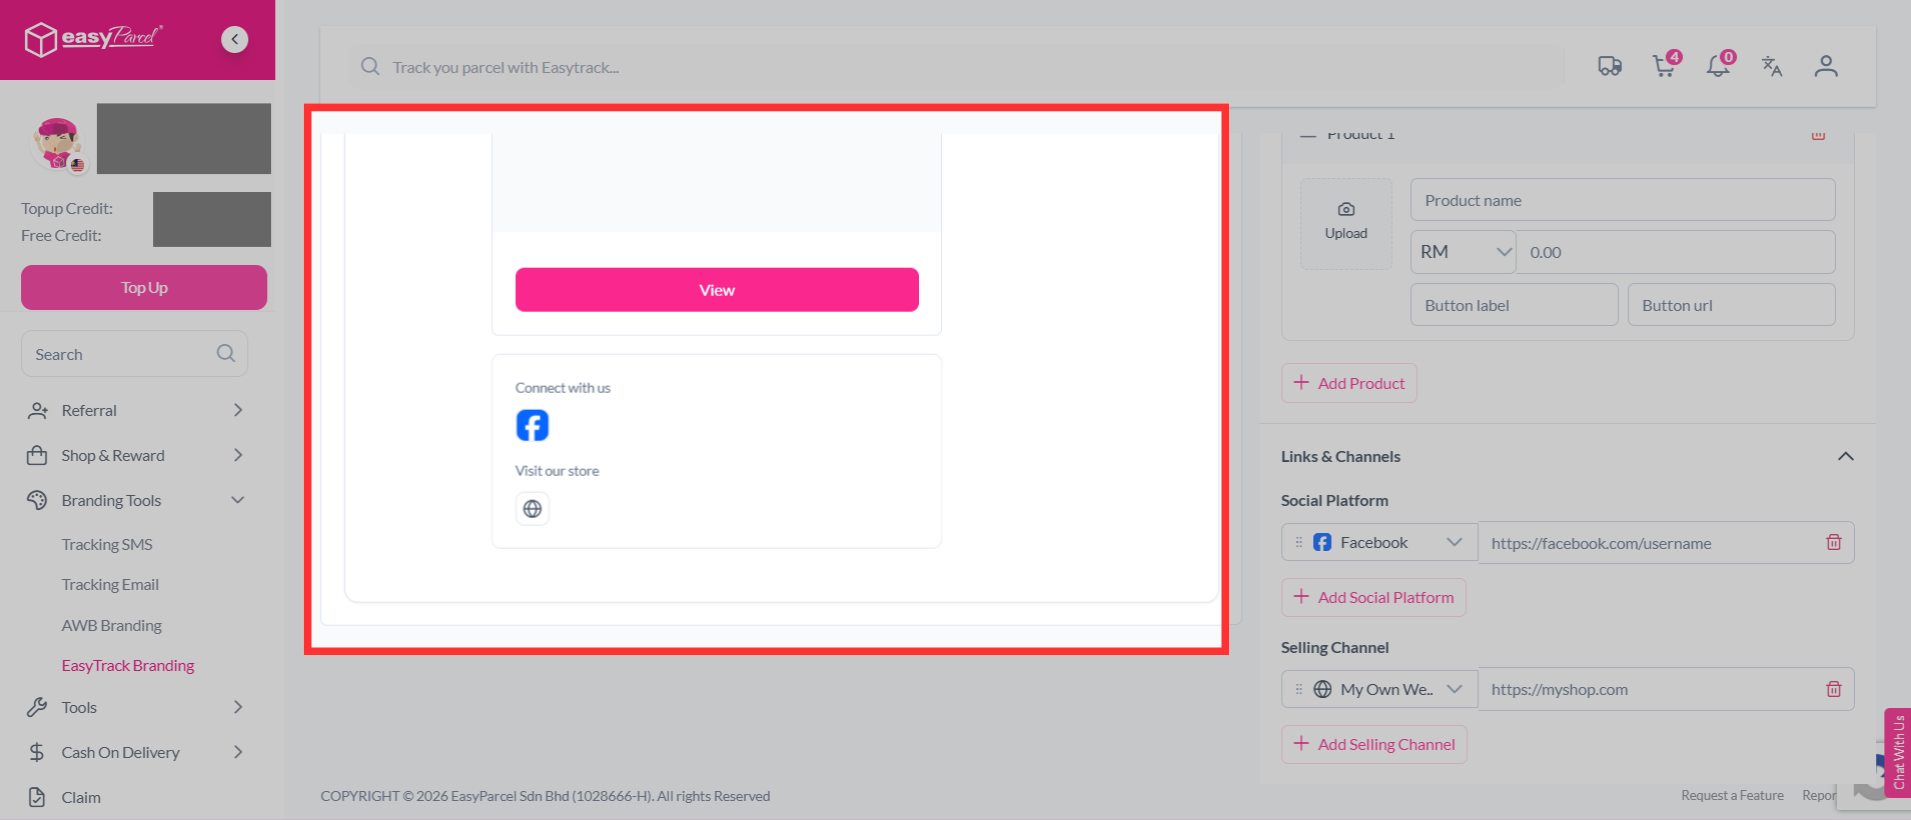
After clicking "Remove EasyParcel Branding", the EasyParcel branding and widgets will be removed from your EasyTrack landing page, as shown below.
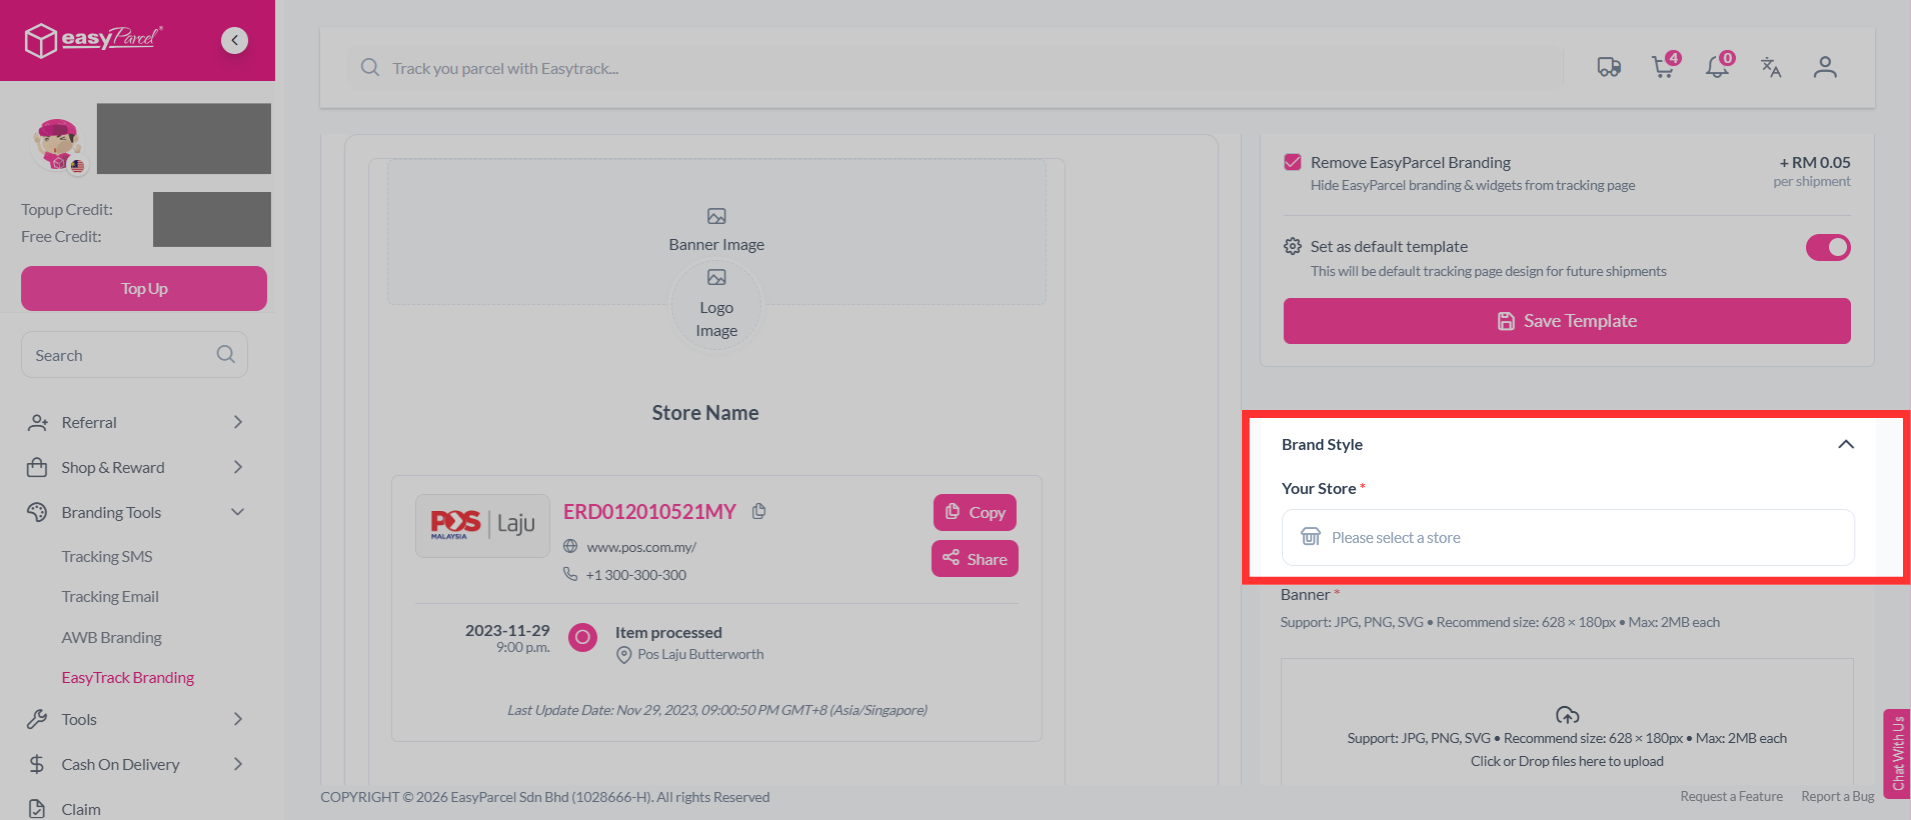
Step 5: First, select your store to start designing your EasyTrack landing page.
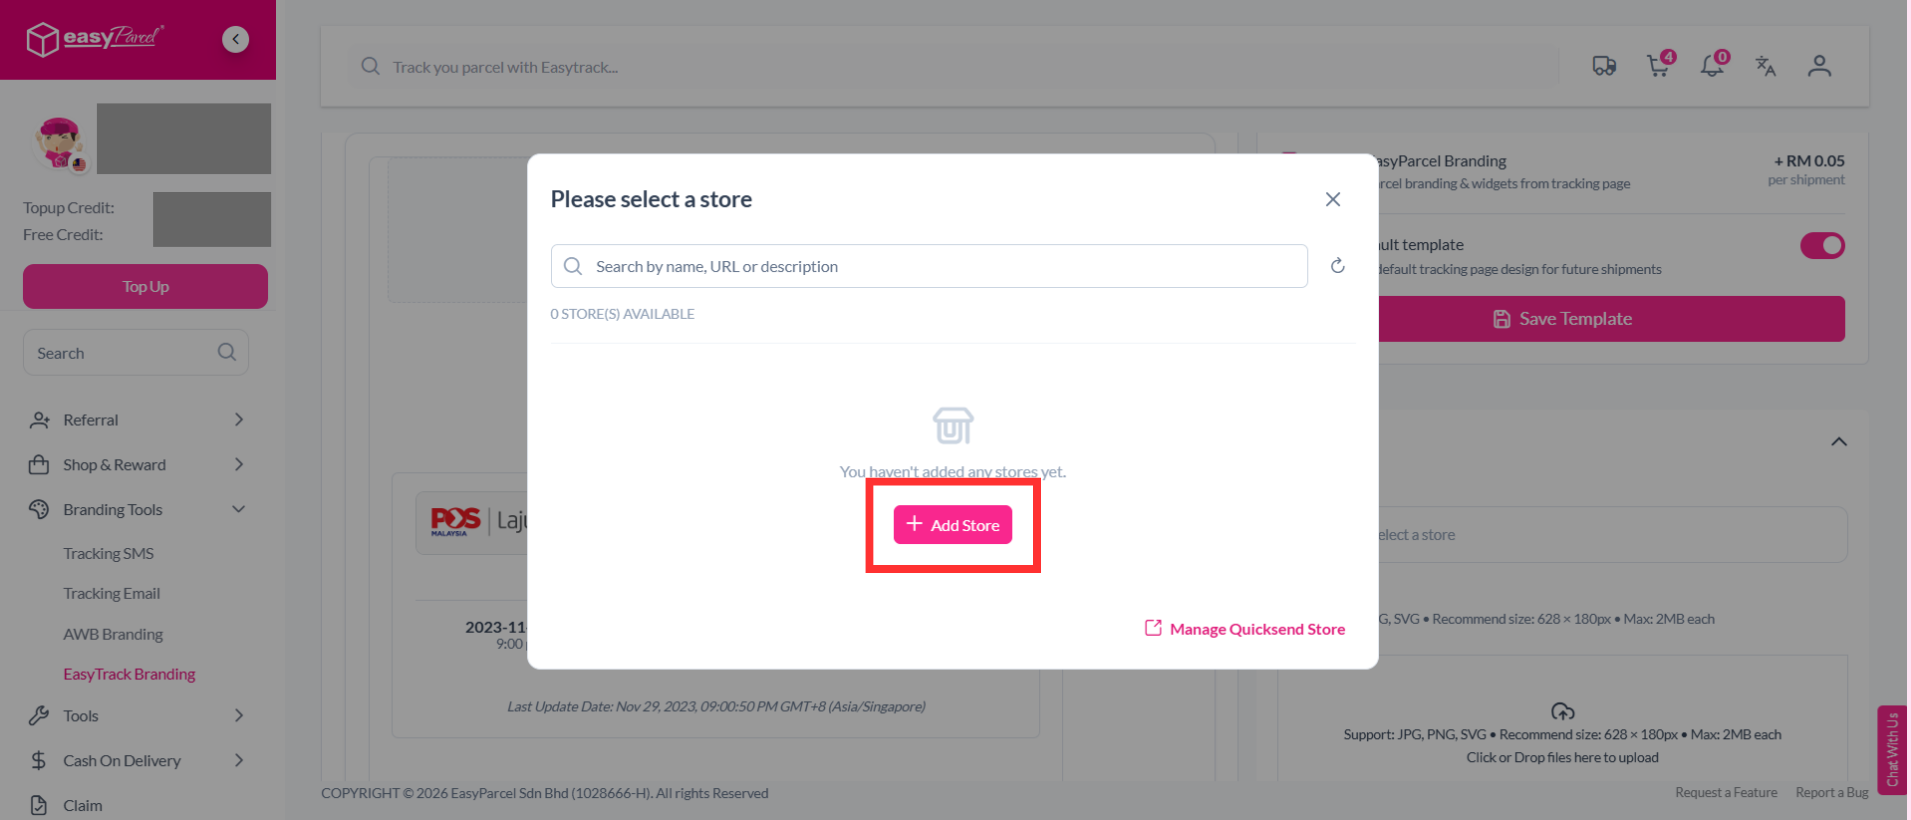
Step 6: If you don't have a store yet, click "Add Store" to add one.
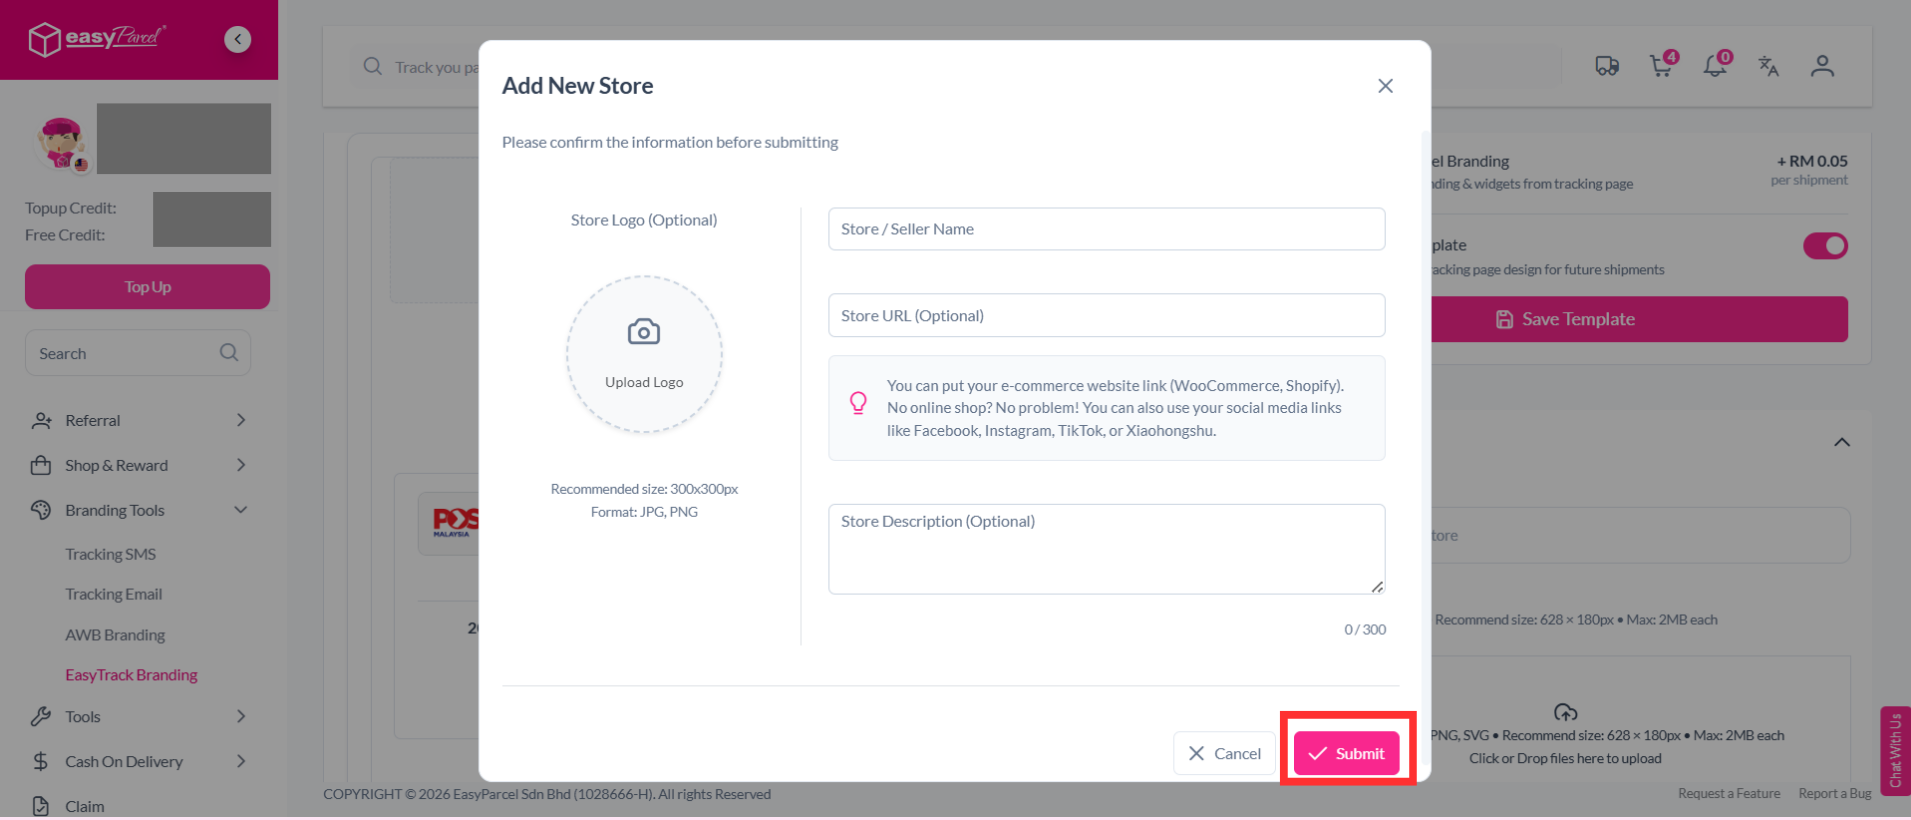
Step 7: Add your store logo and store name. If available, you may also add store URL and a store description. Once you’re done, click "Submit".
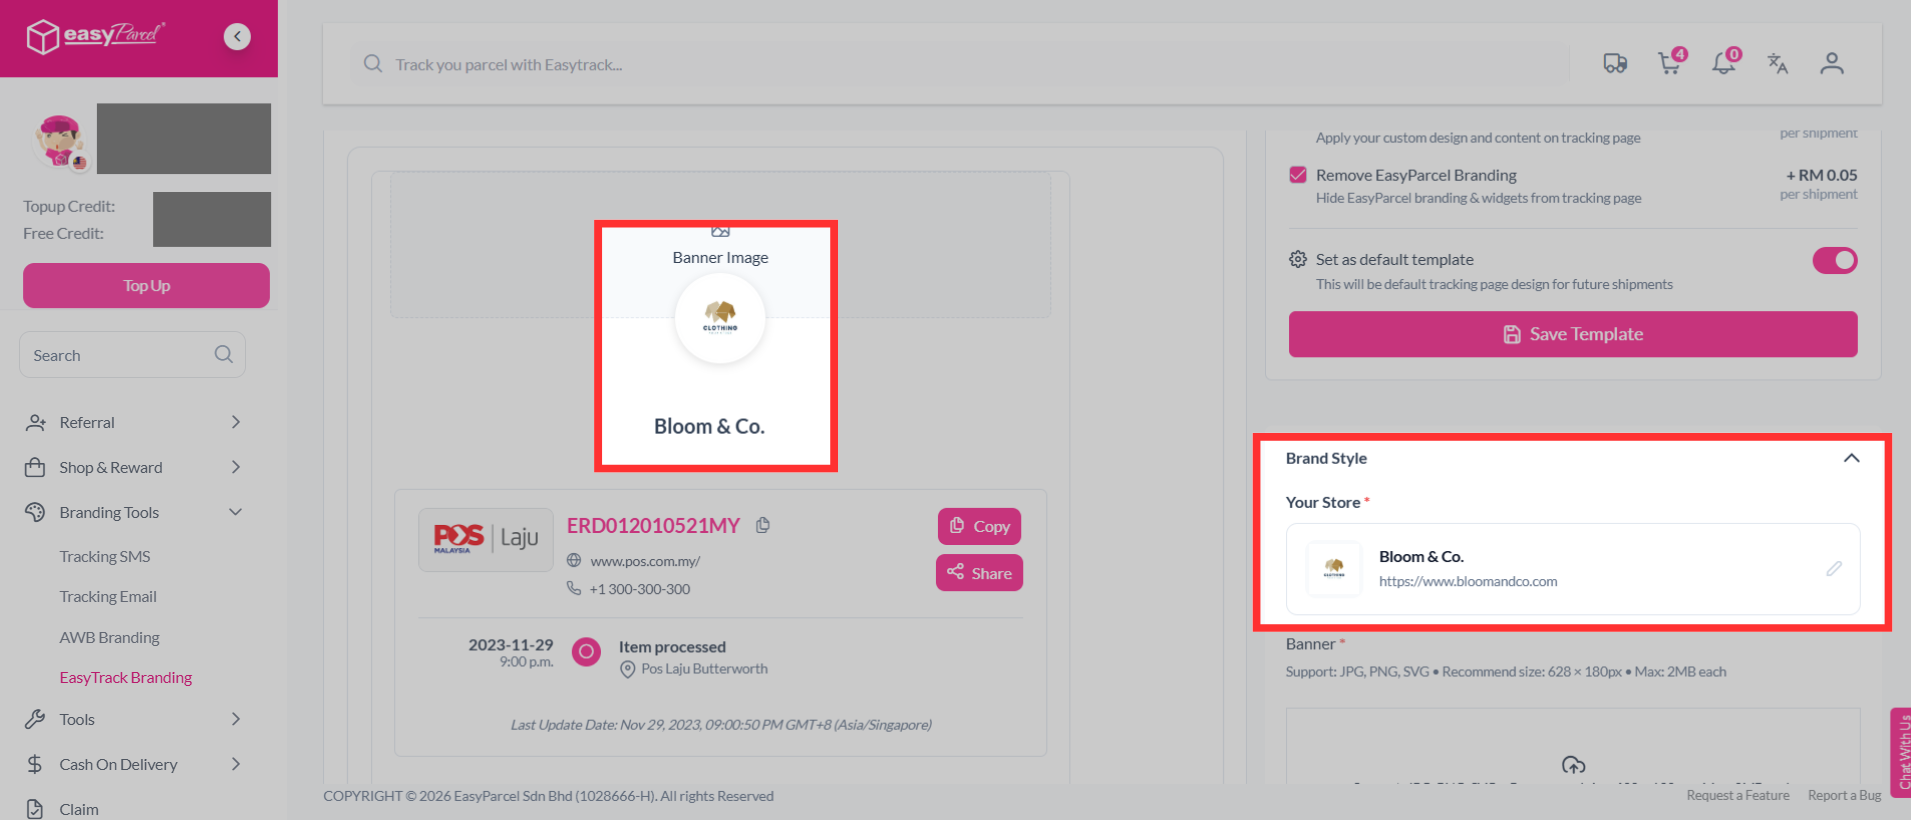
Step 8: Your store has been added, and you can preview beside the page.
Step 9: Next, add your banner.
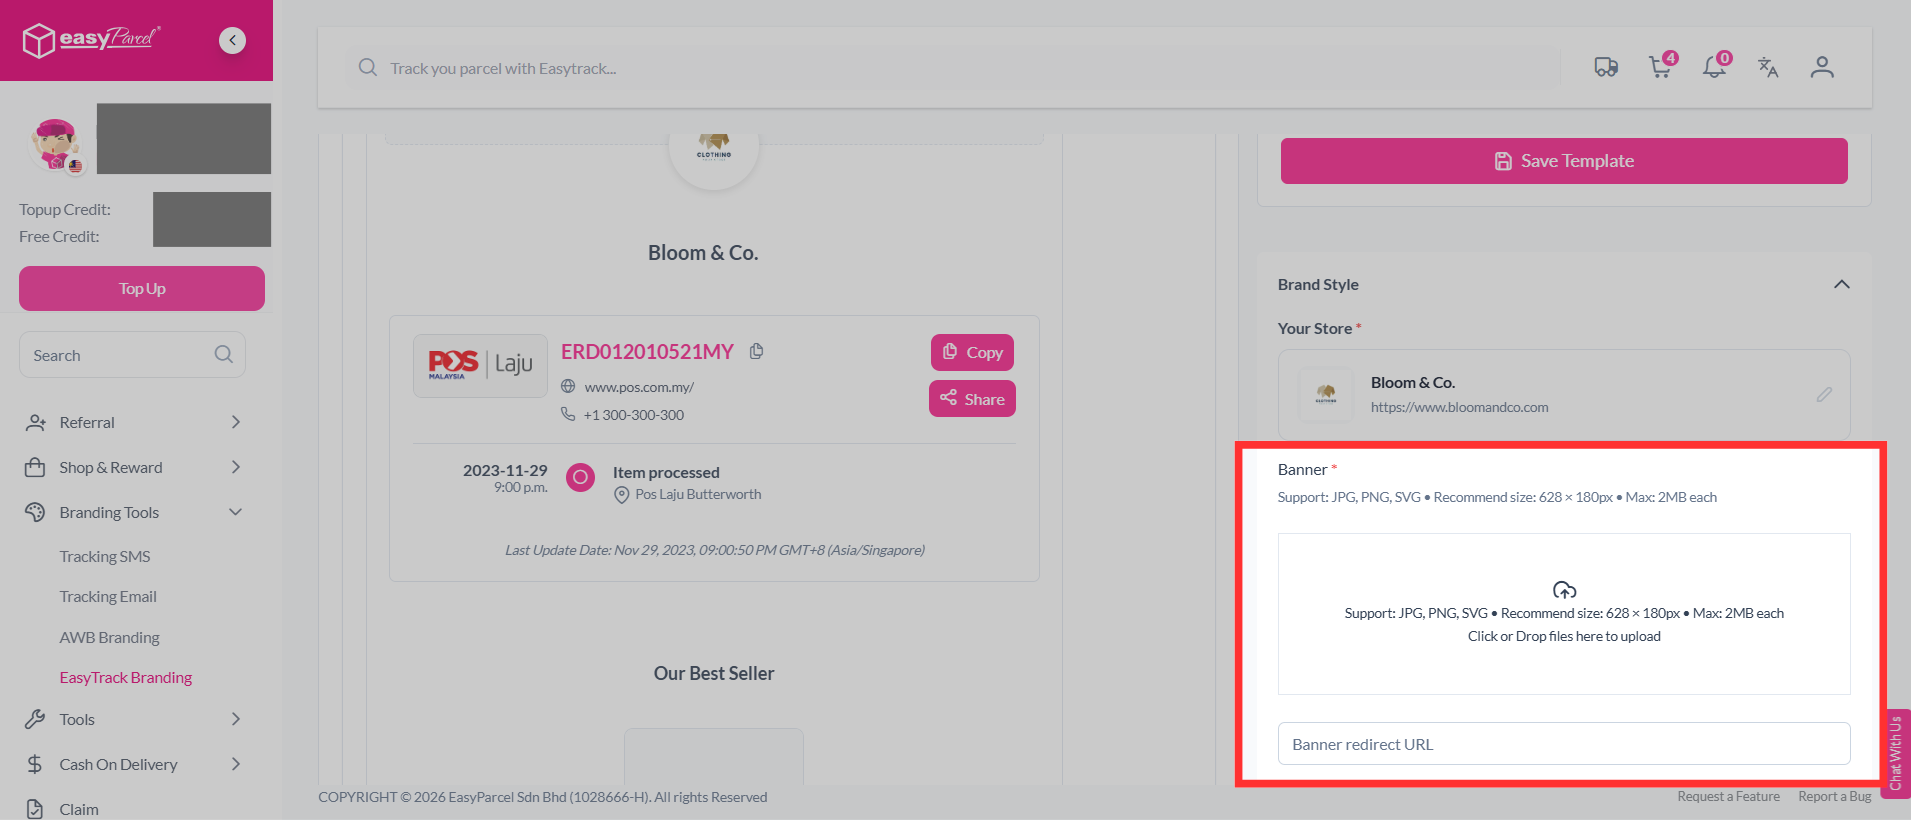
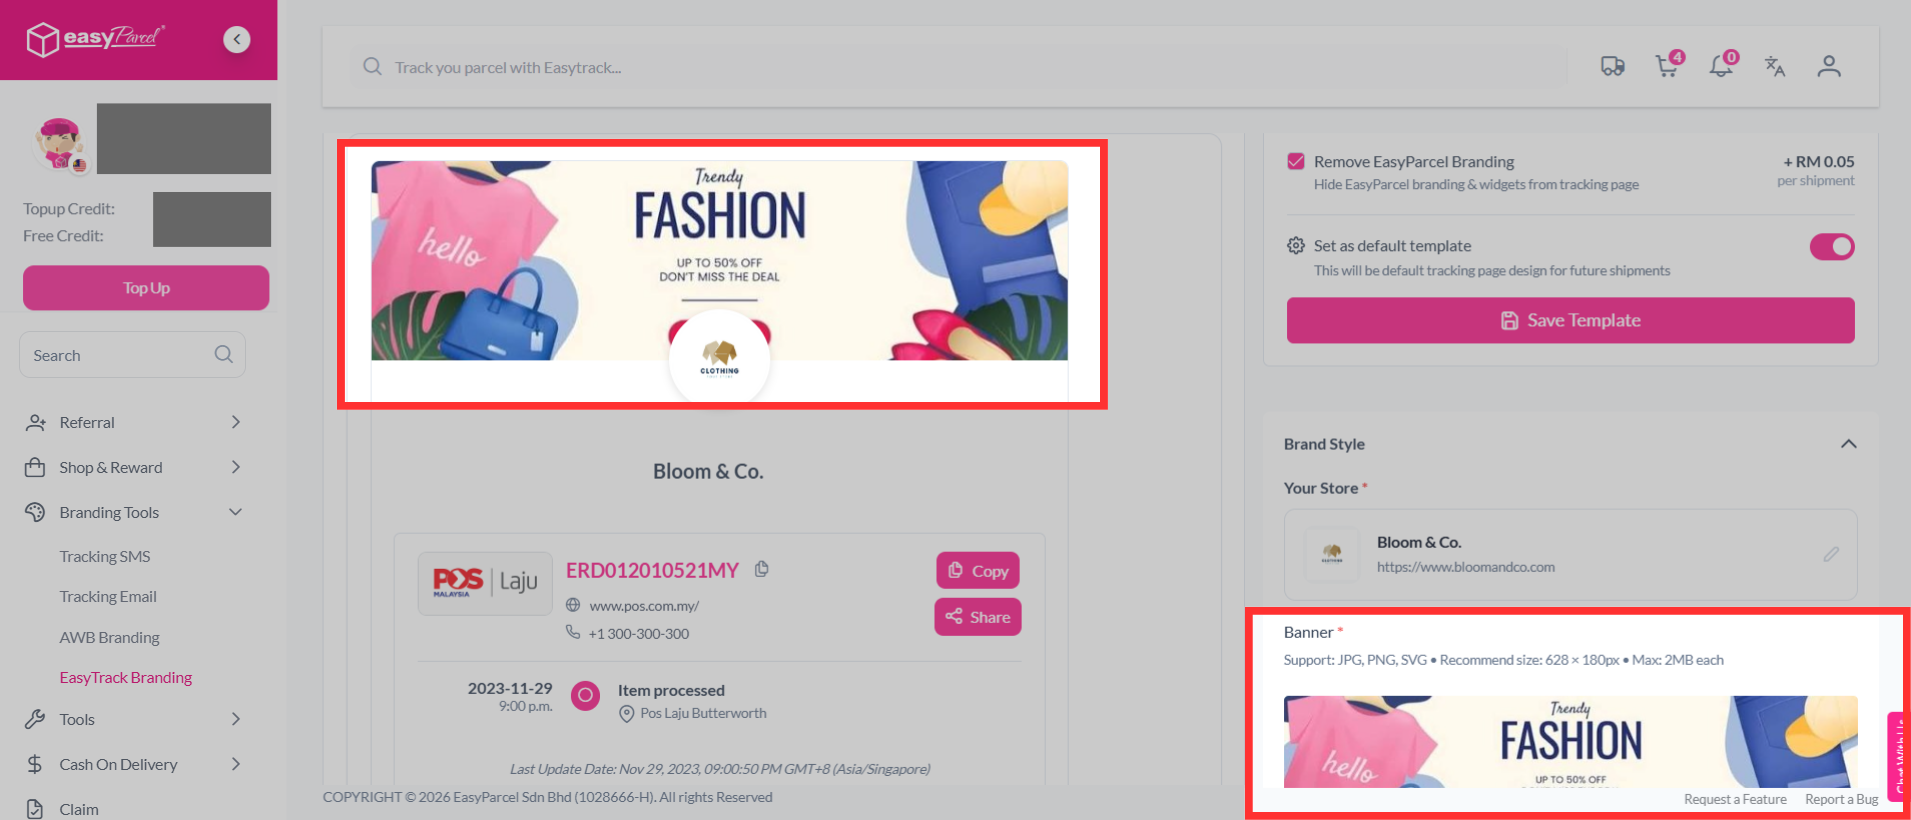
Step 10: Once your banner is added, you can preview it beside the page.
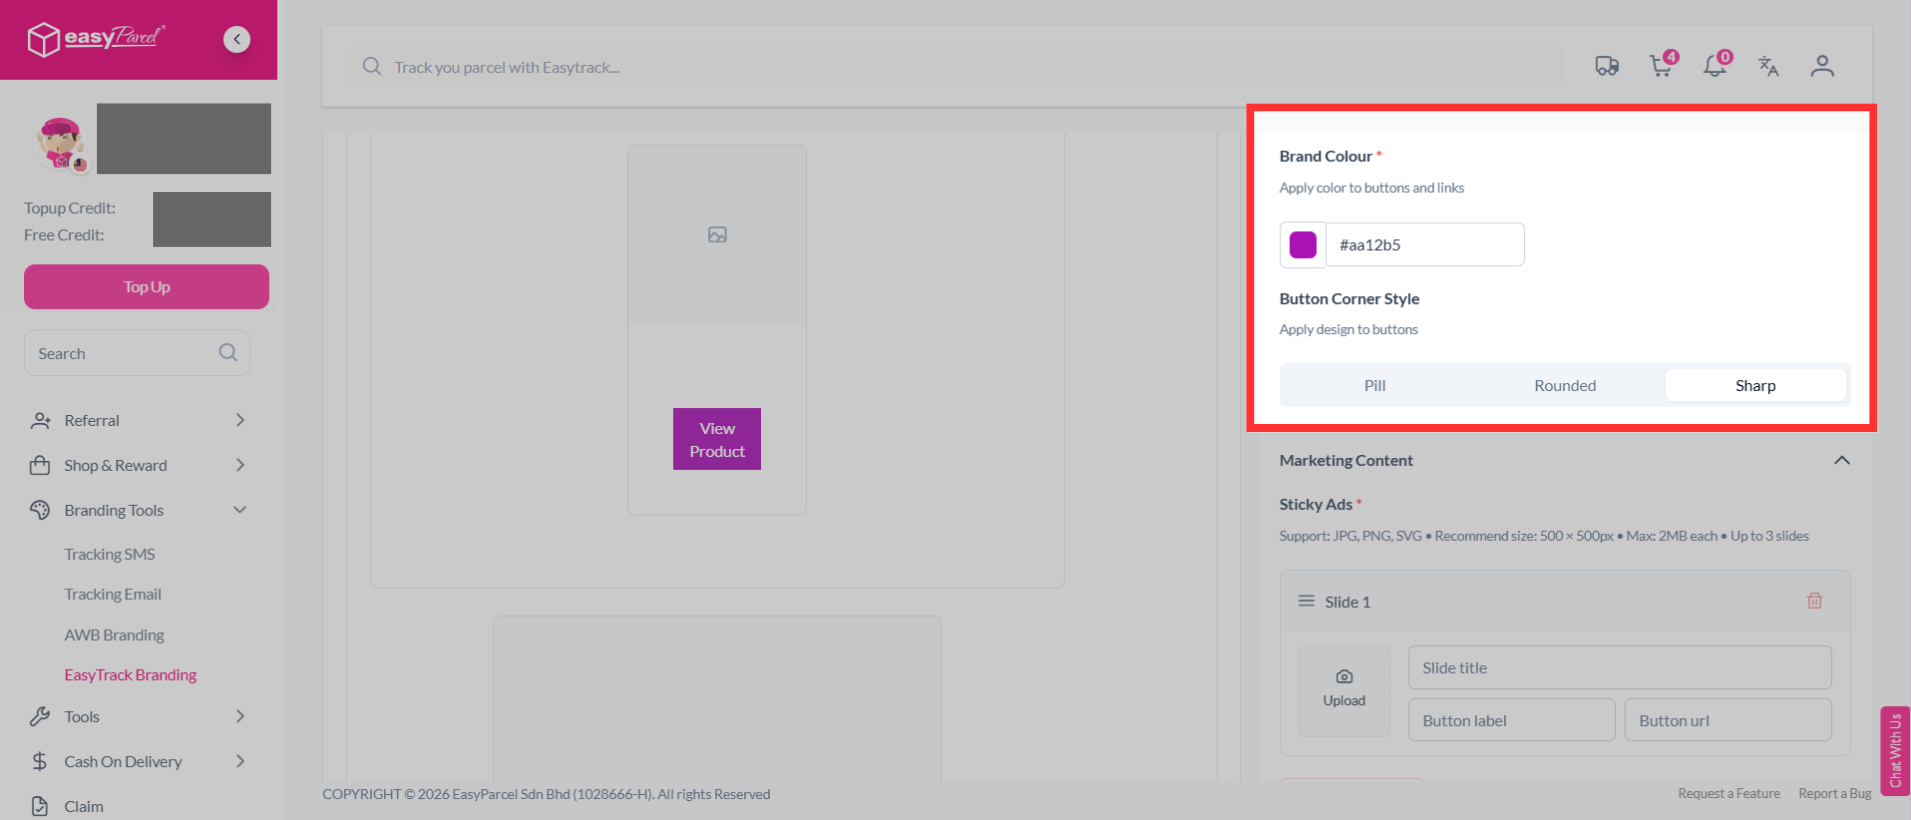
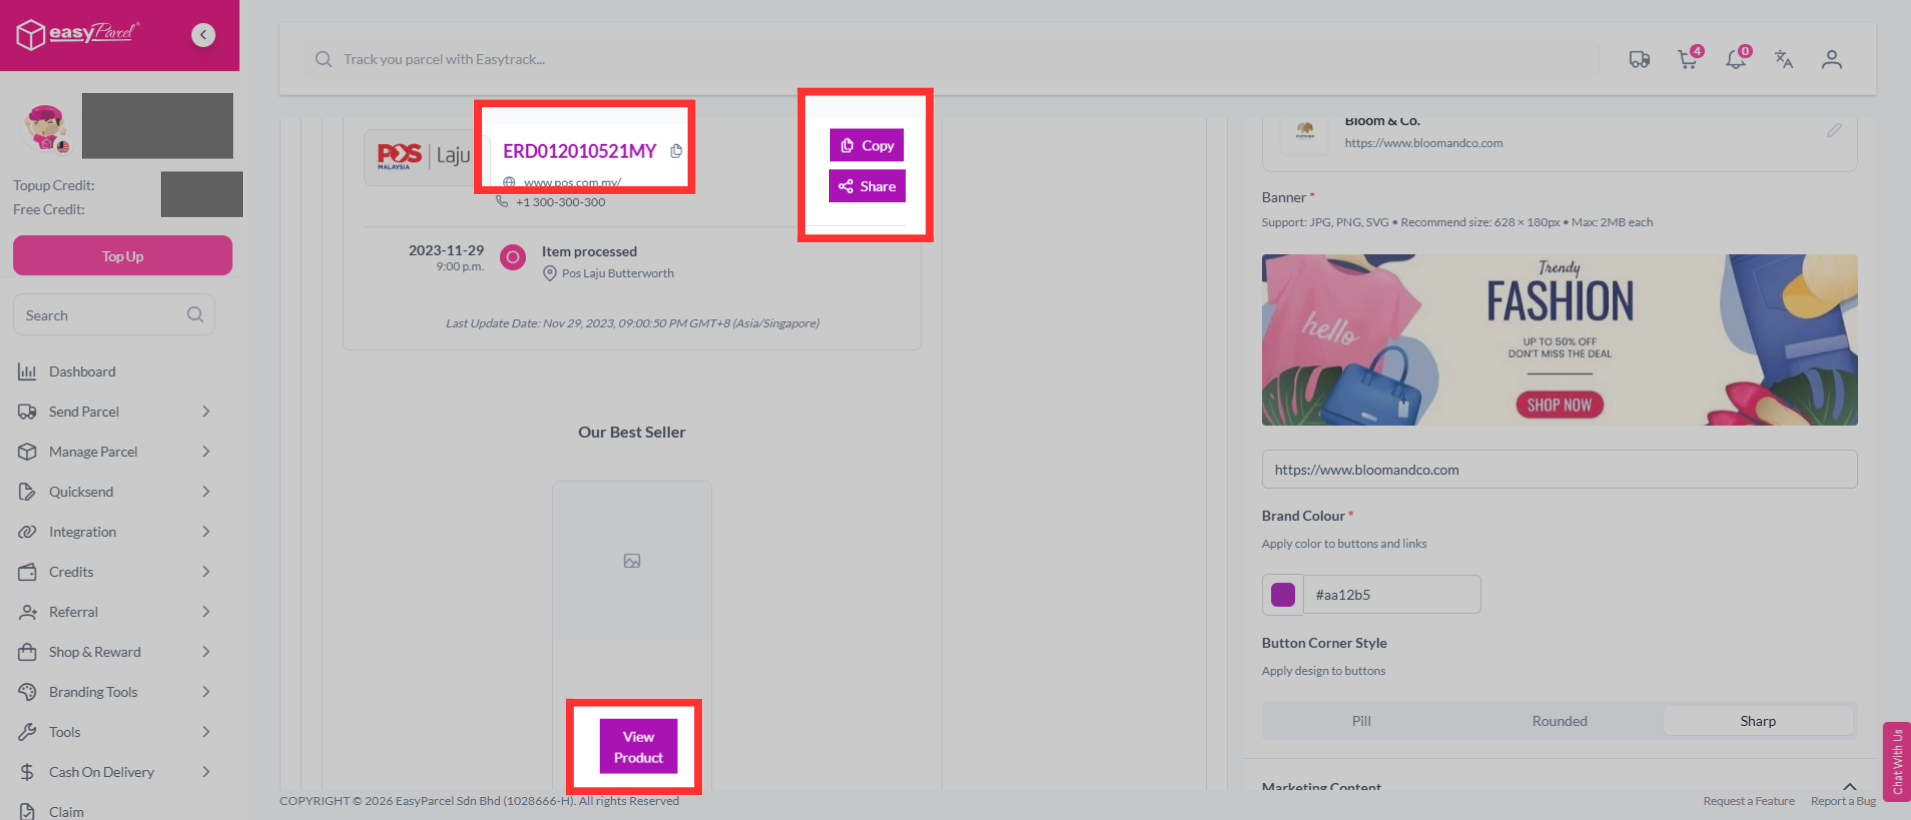
Step 11: Choose your brand colour for the buttons and links. You can also customize the button corner style, such as pill, rounded, or sharp.
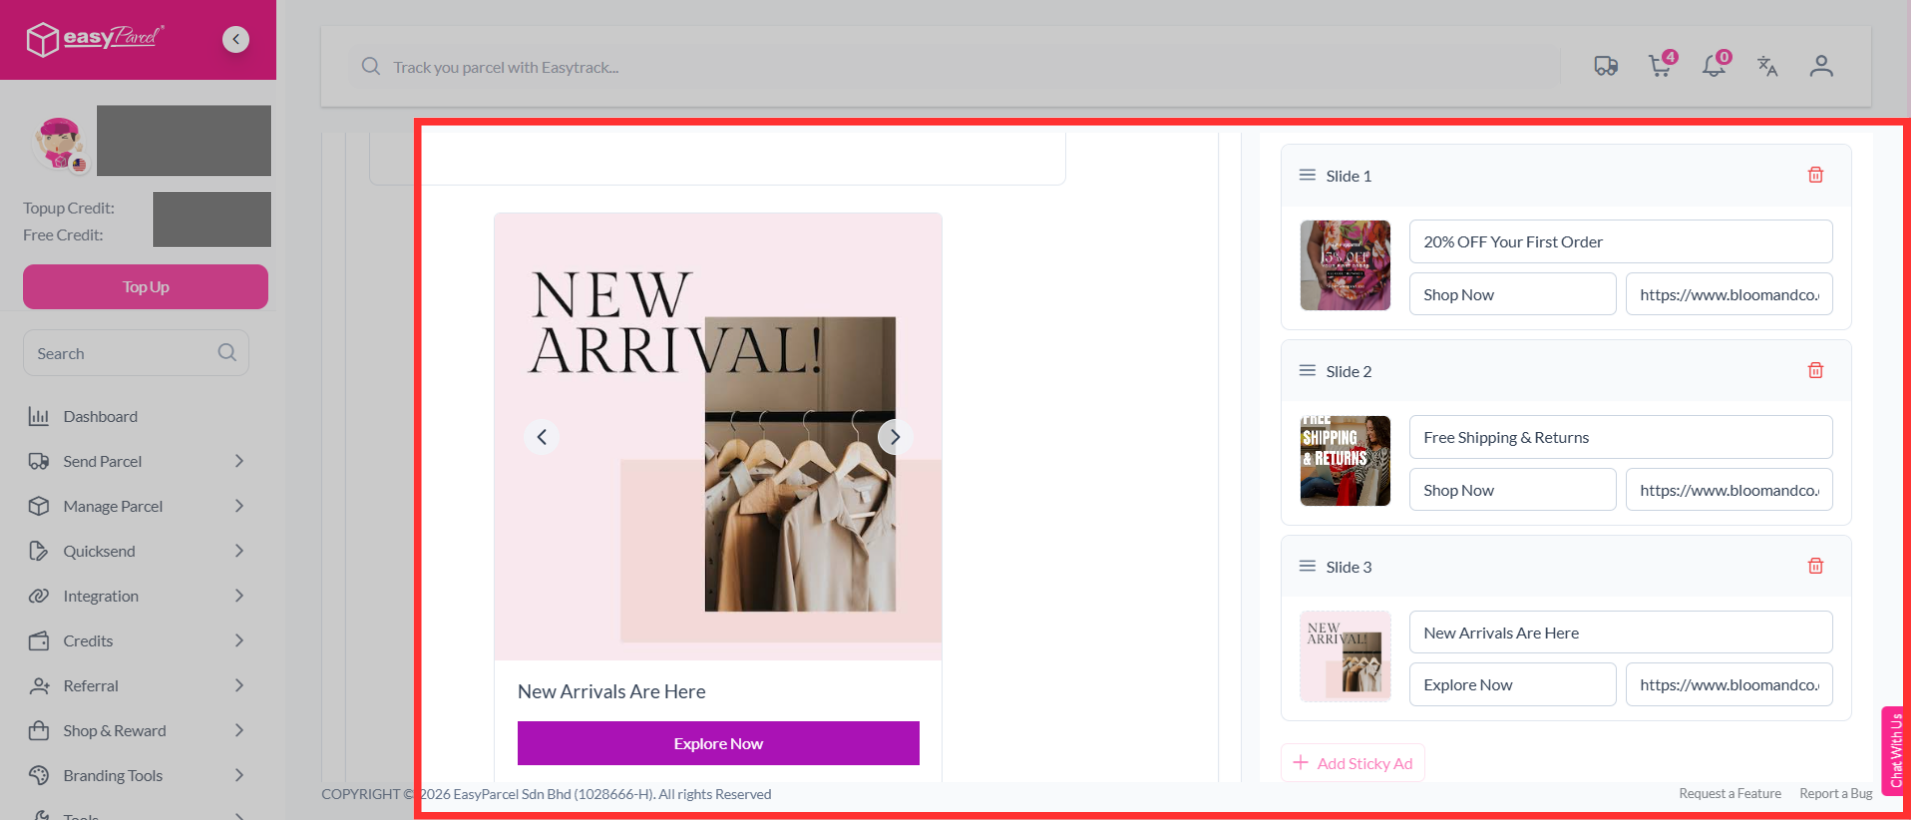
Step 12: Add Sticky Ads to display promotional ads on the tracking page.
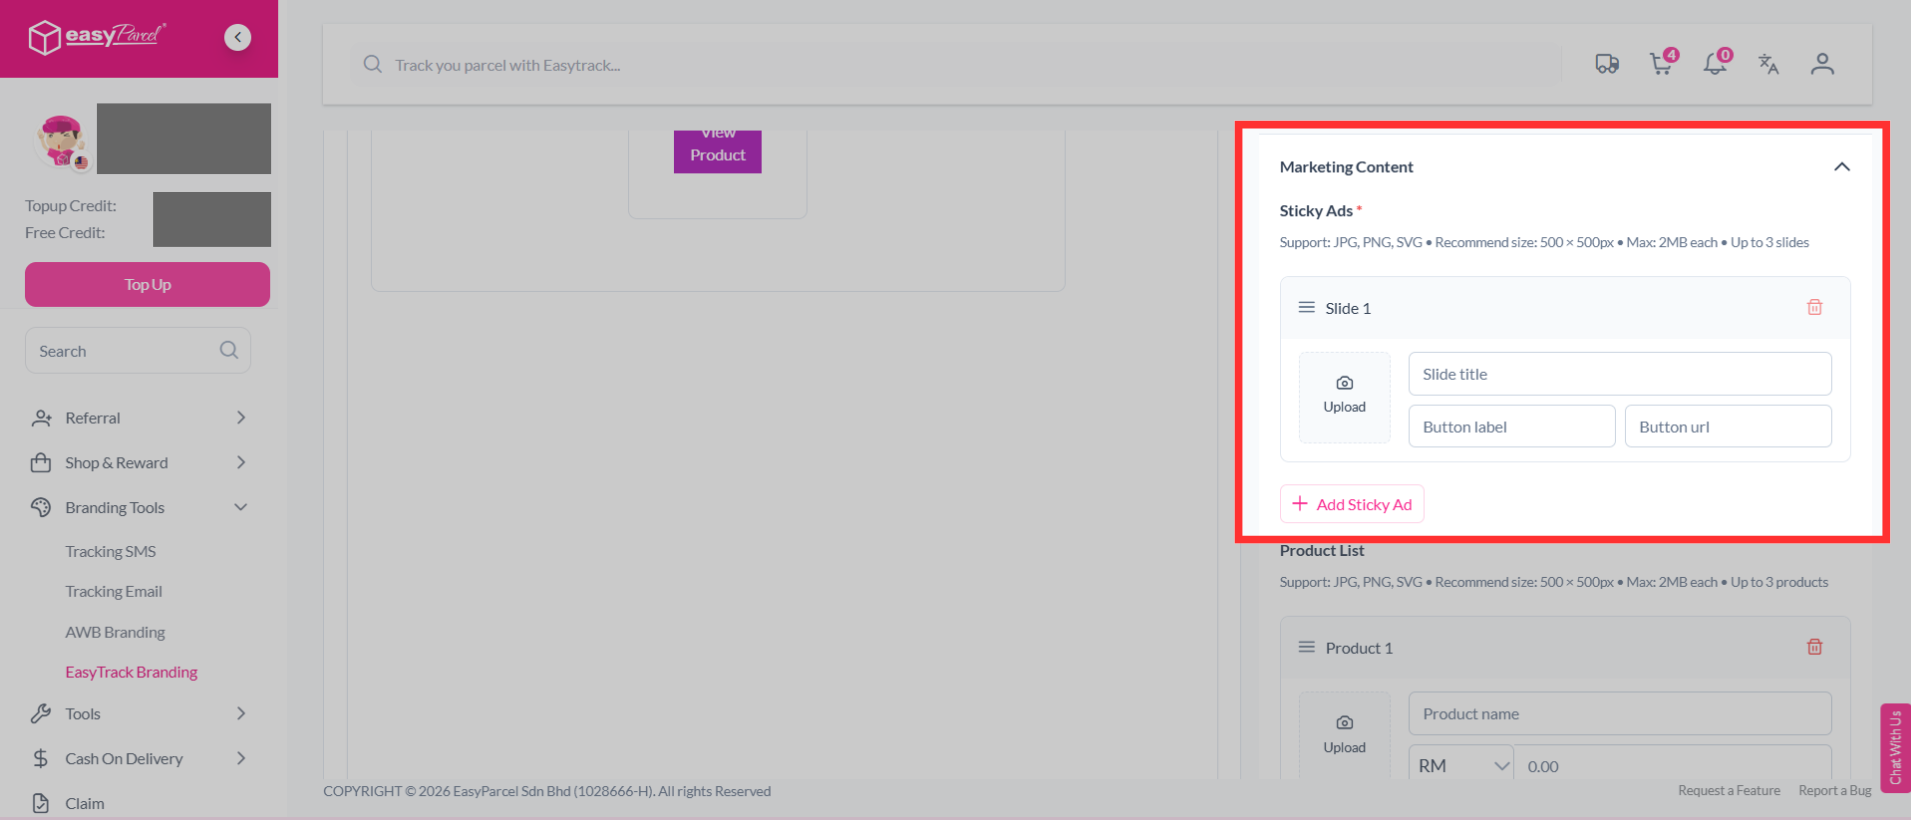
You may add up to three slides.
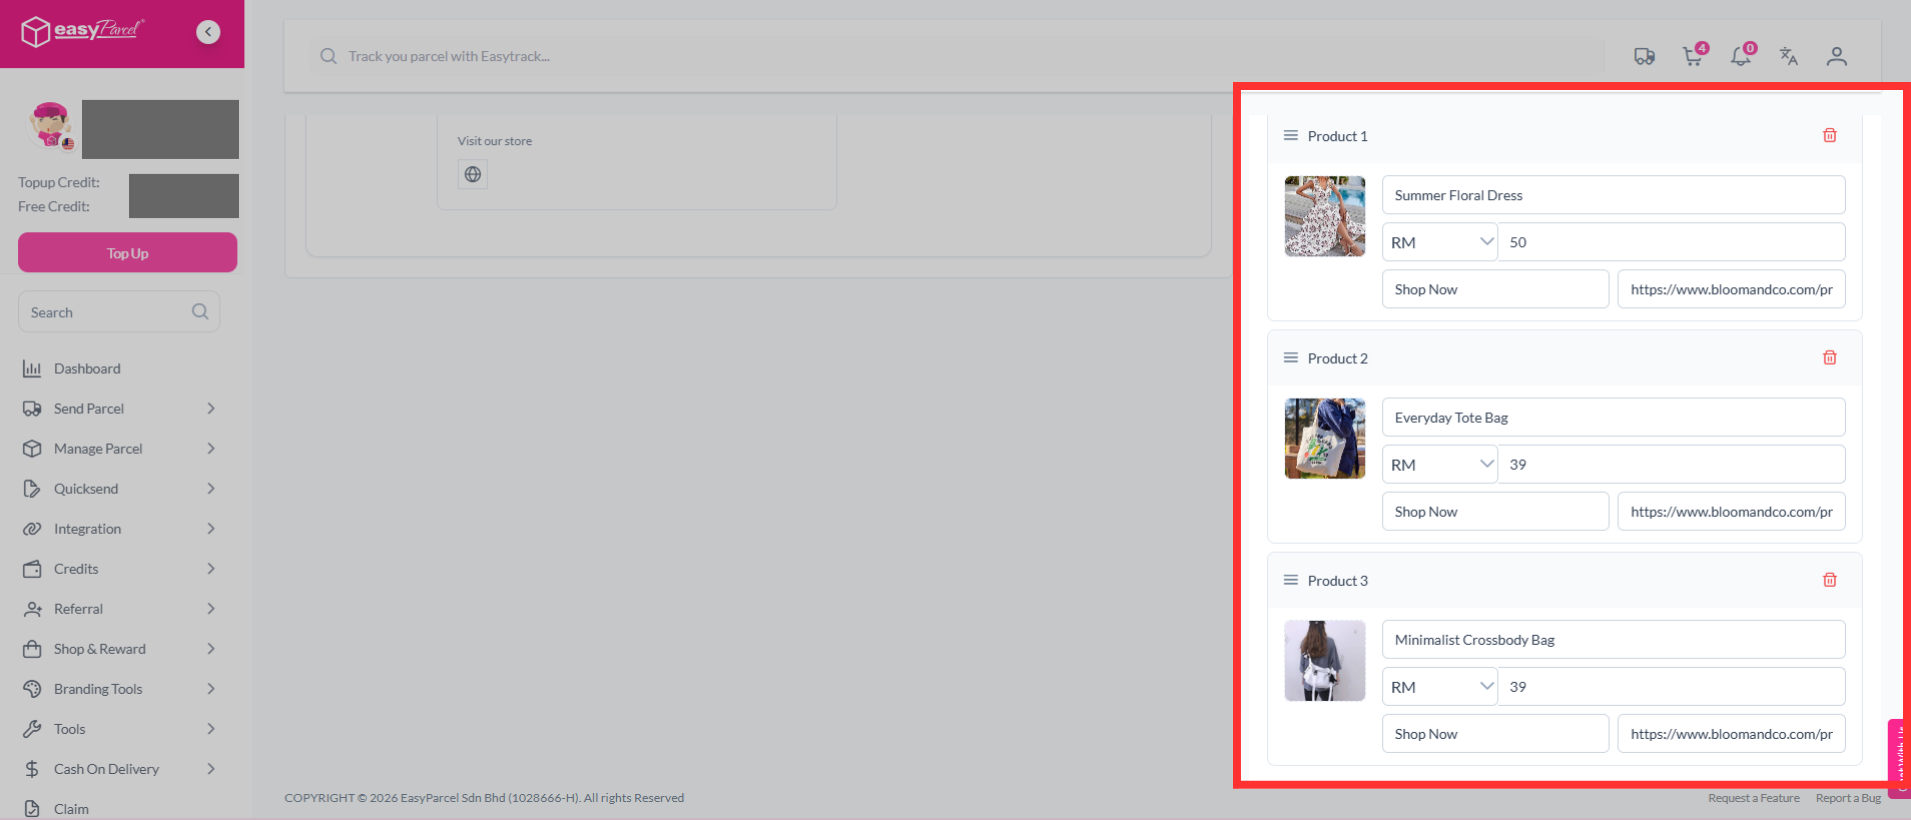
Step 13: You can also add your product list to showcase your products on the tracking page.
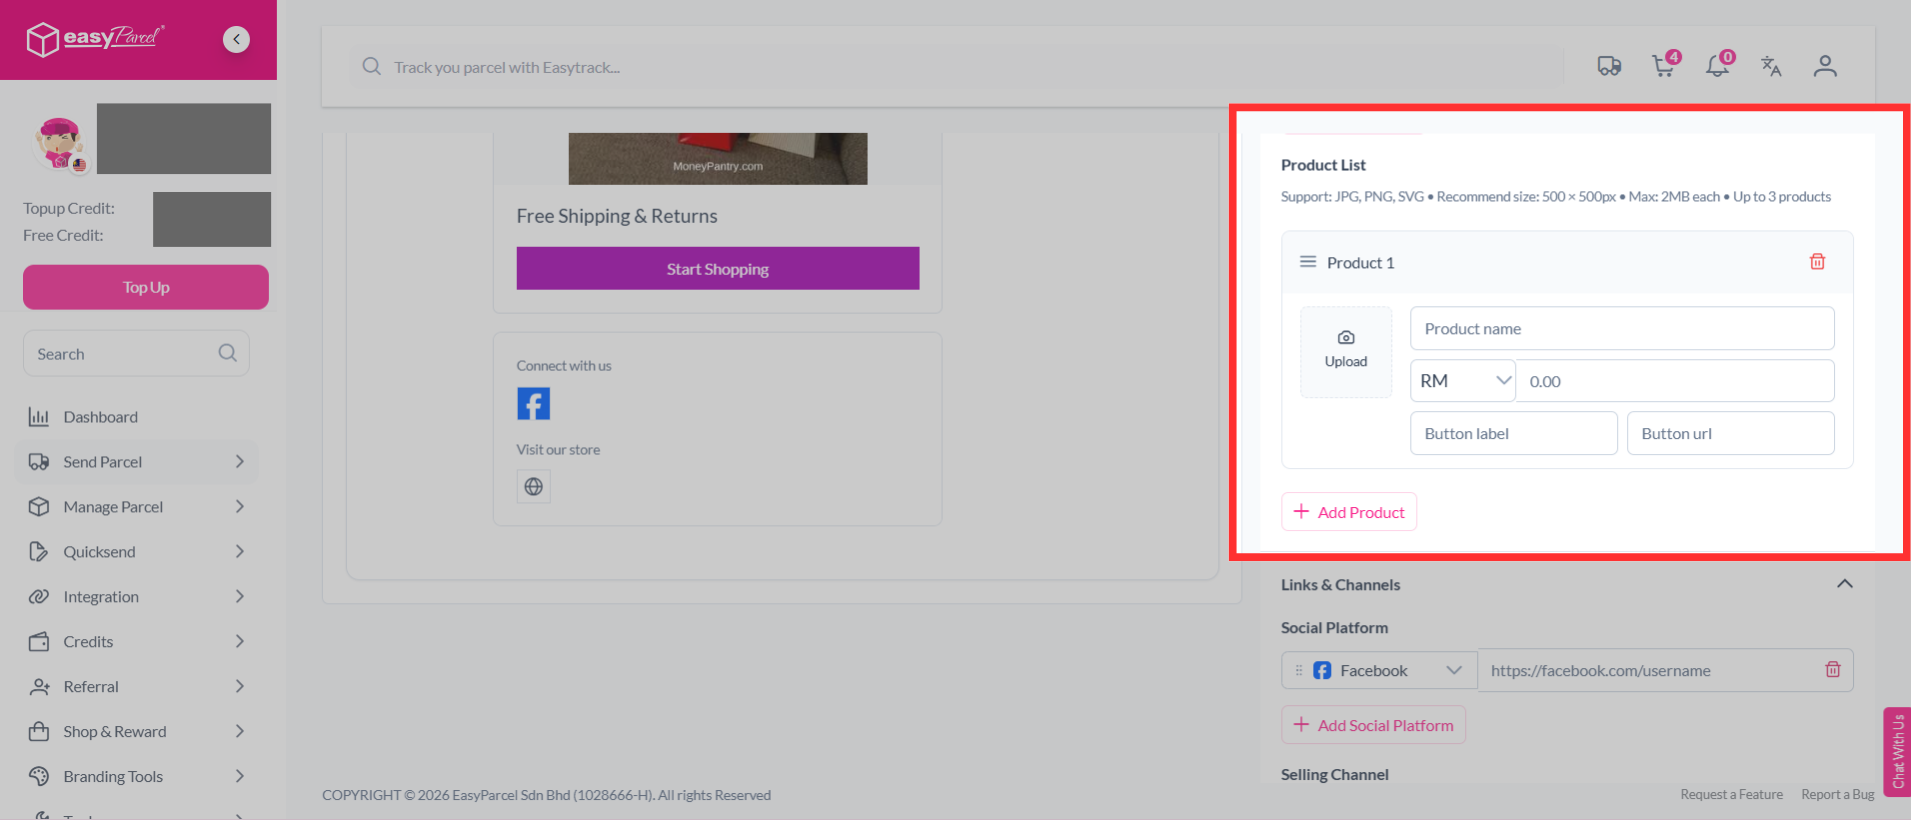
You may add up to three best-selling products to showcase on the tracking page.
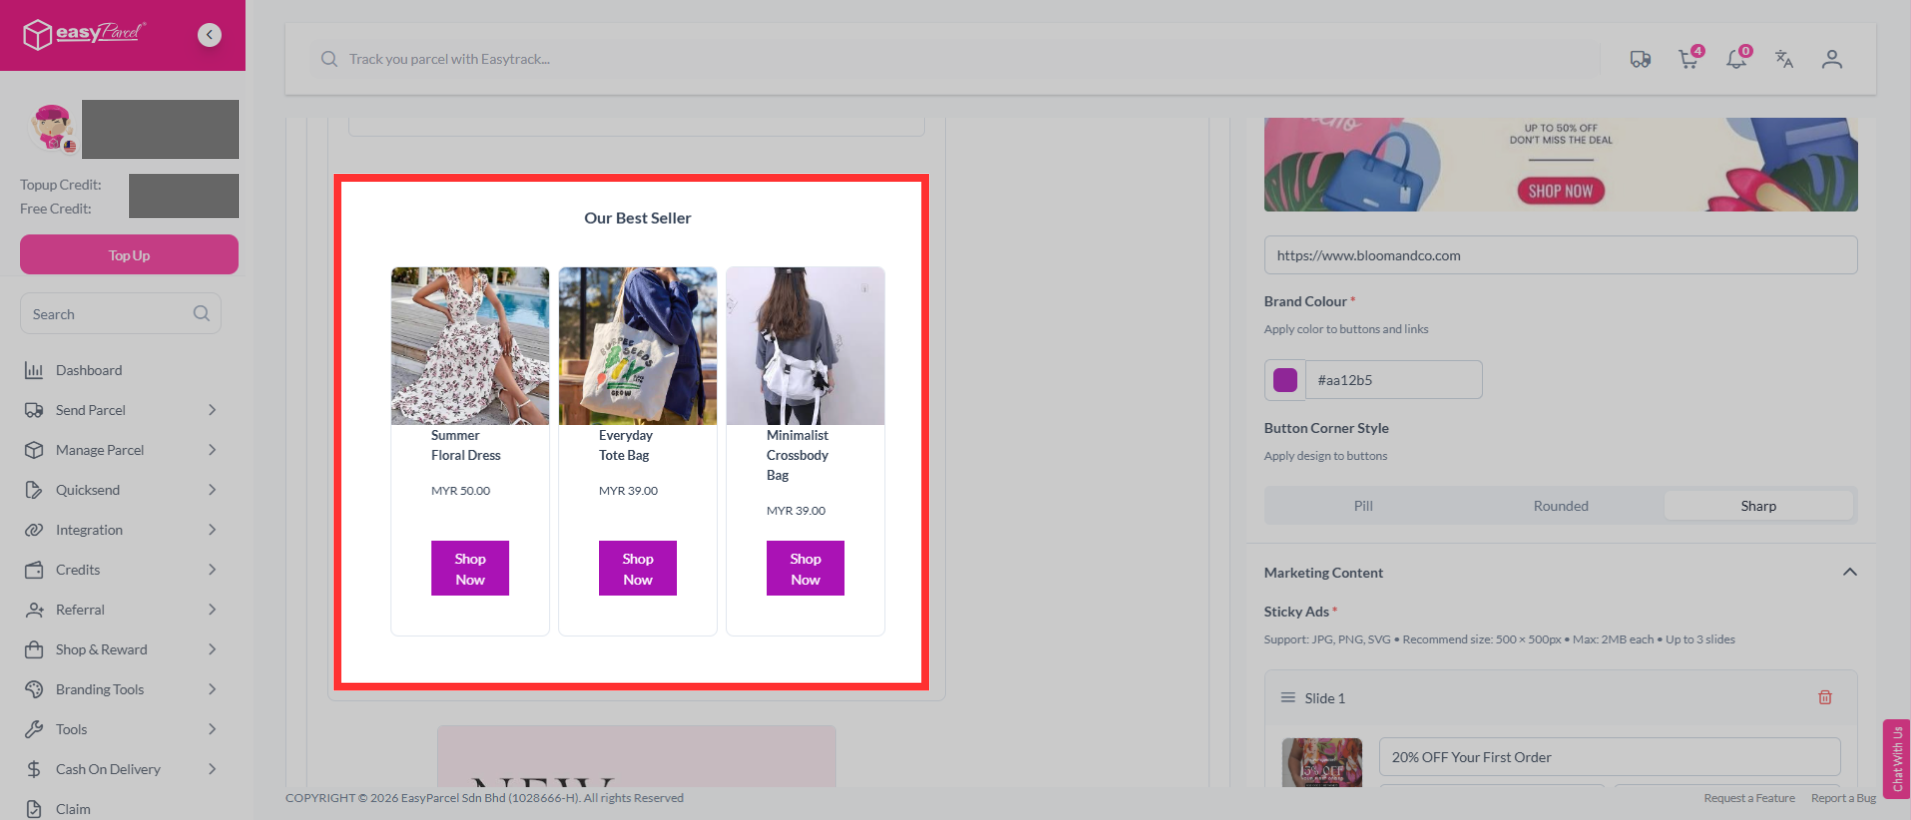
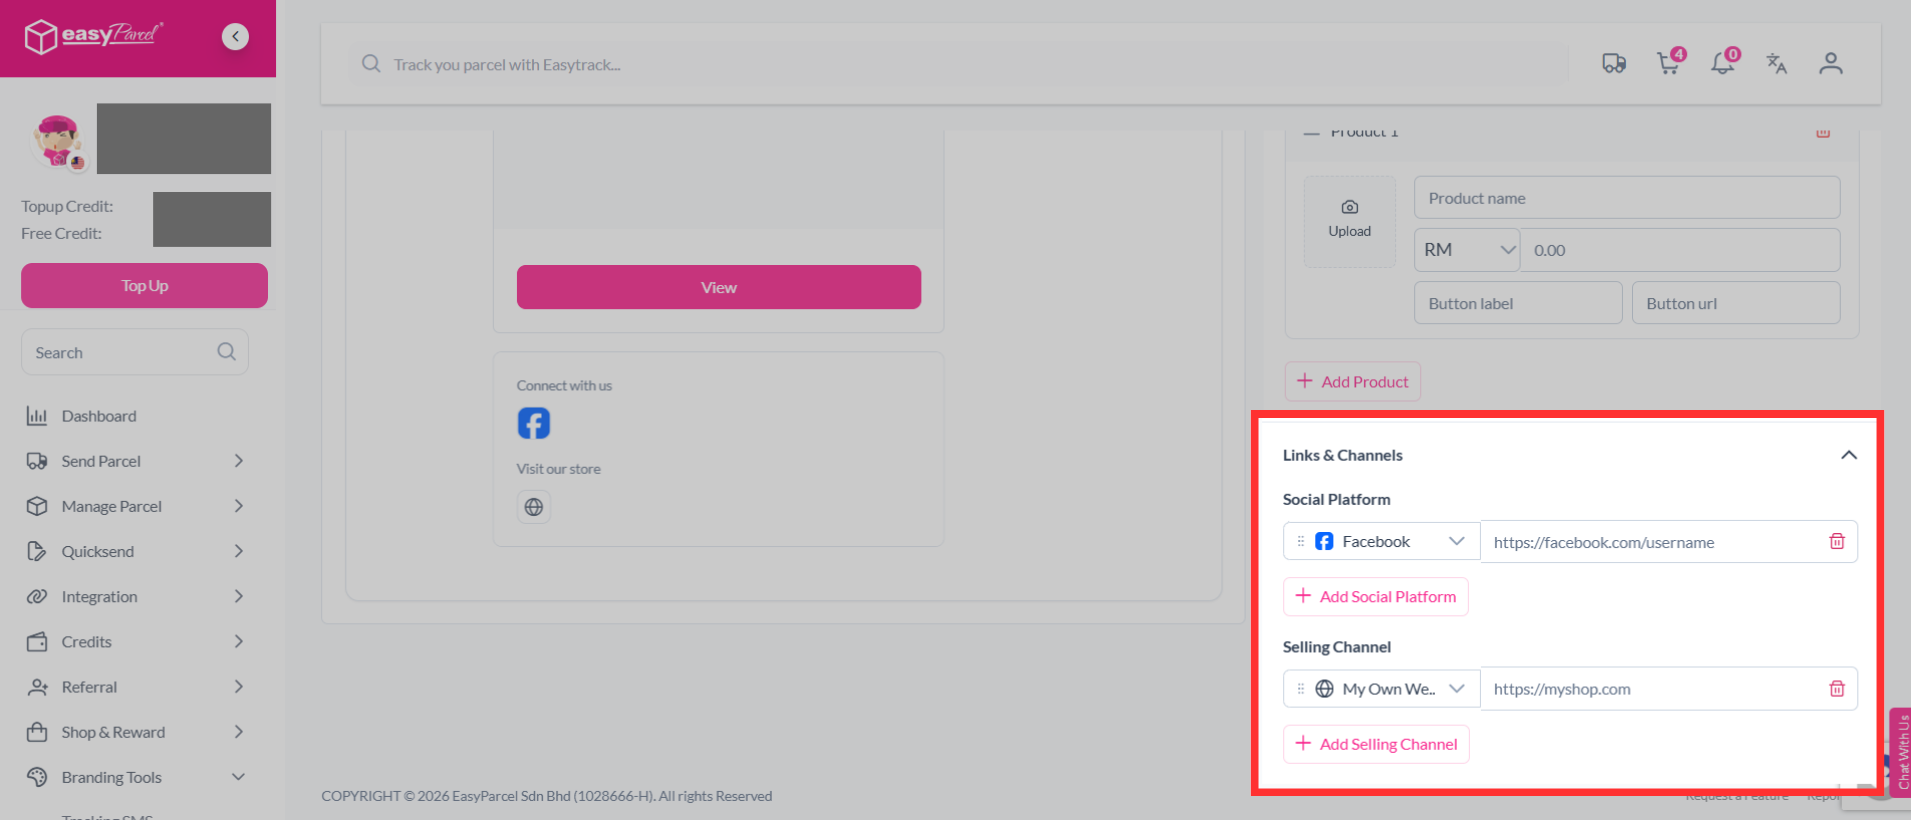
Step 14: Next, add your social media platforms and selling channels to your EasyTrack page.
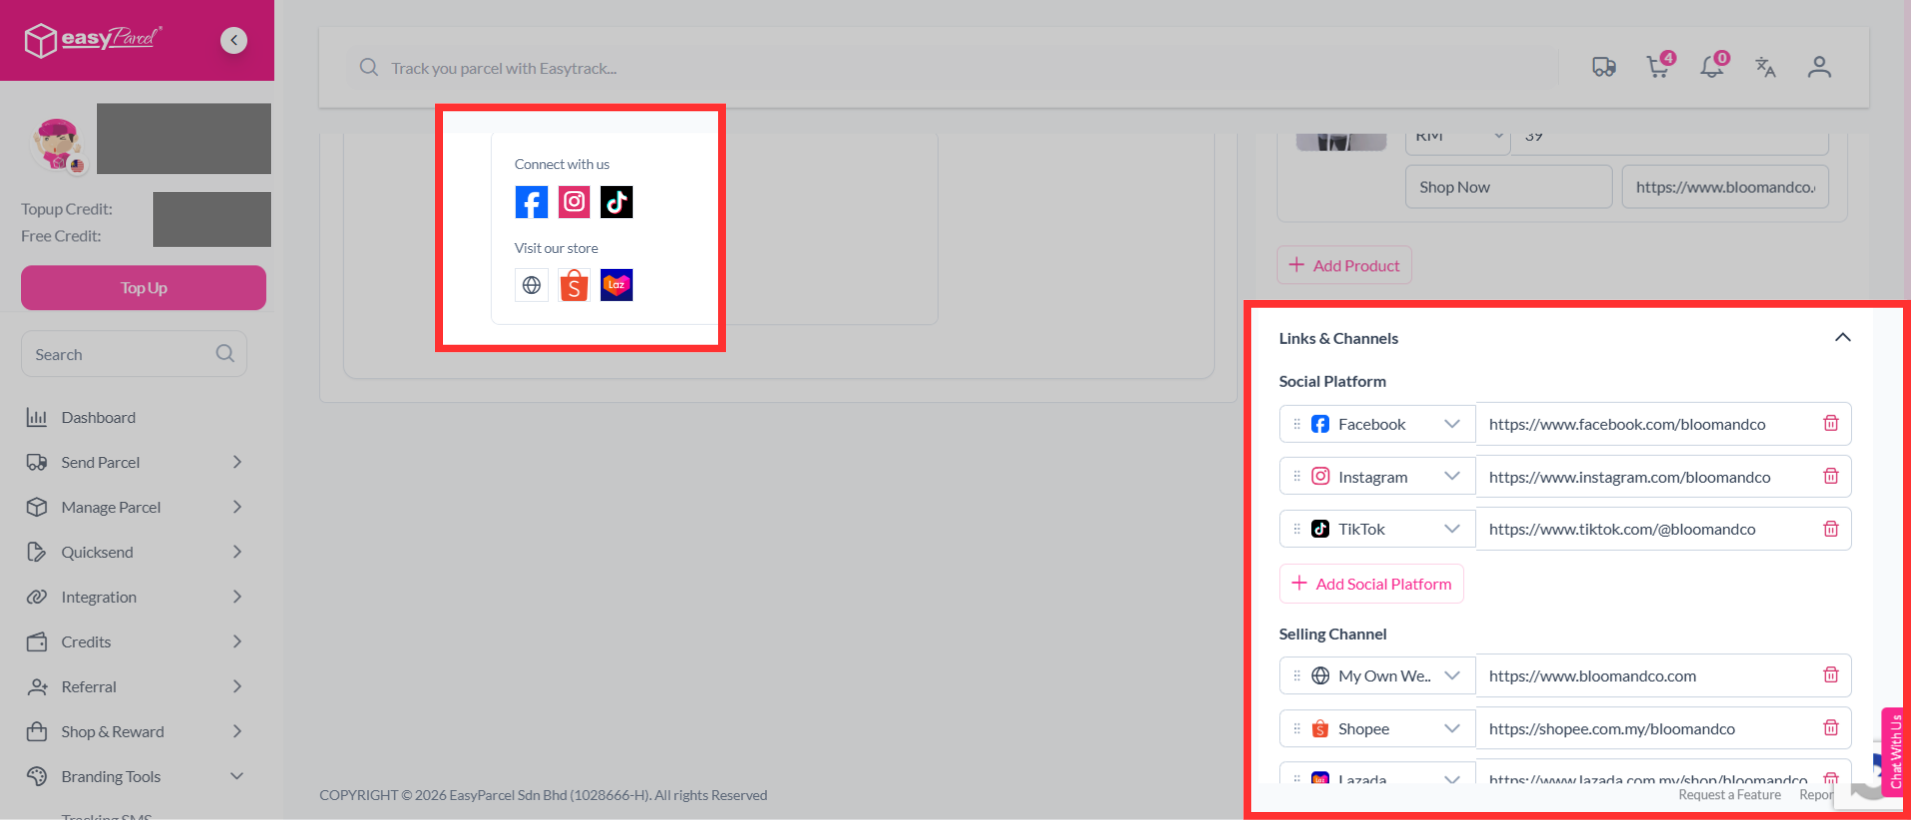
Step 15: You’re done! You can preview your EasyTrack page beside it.
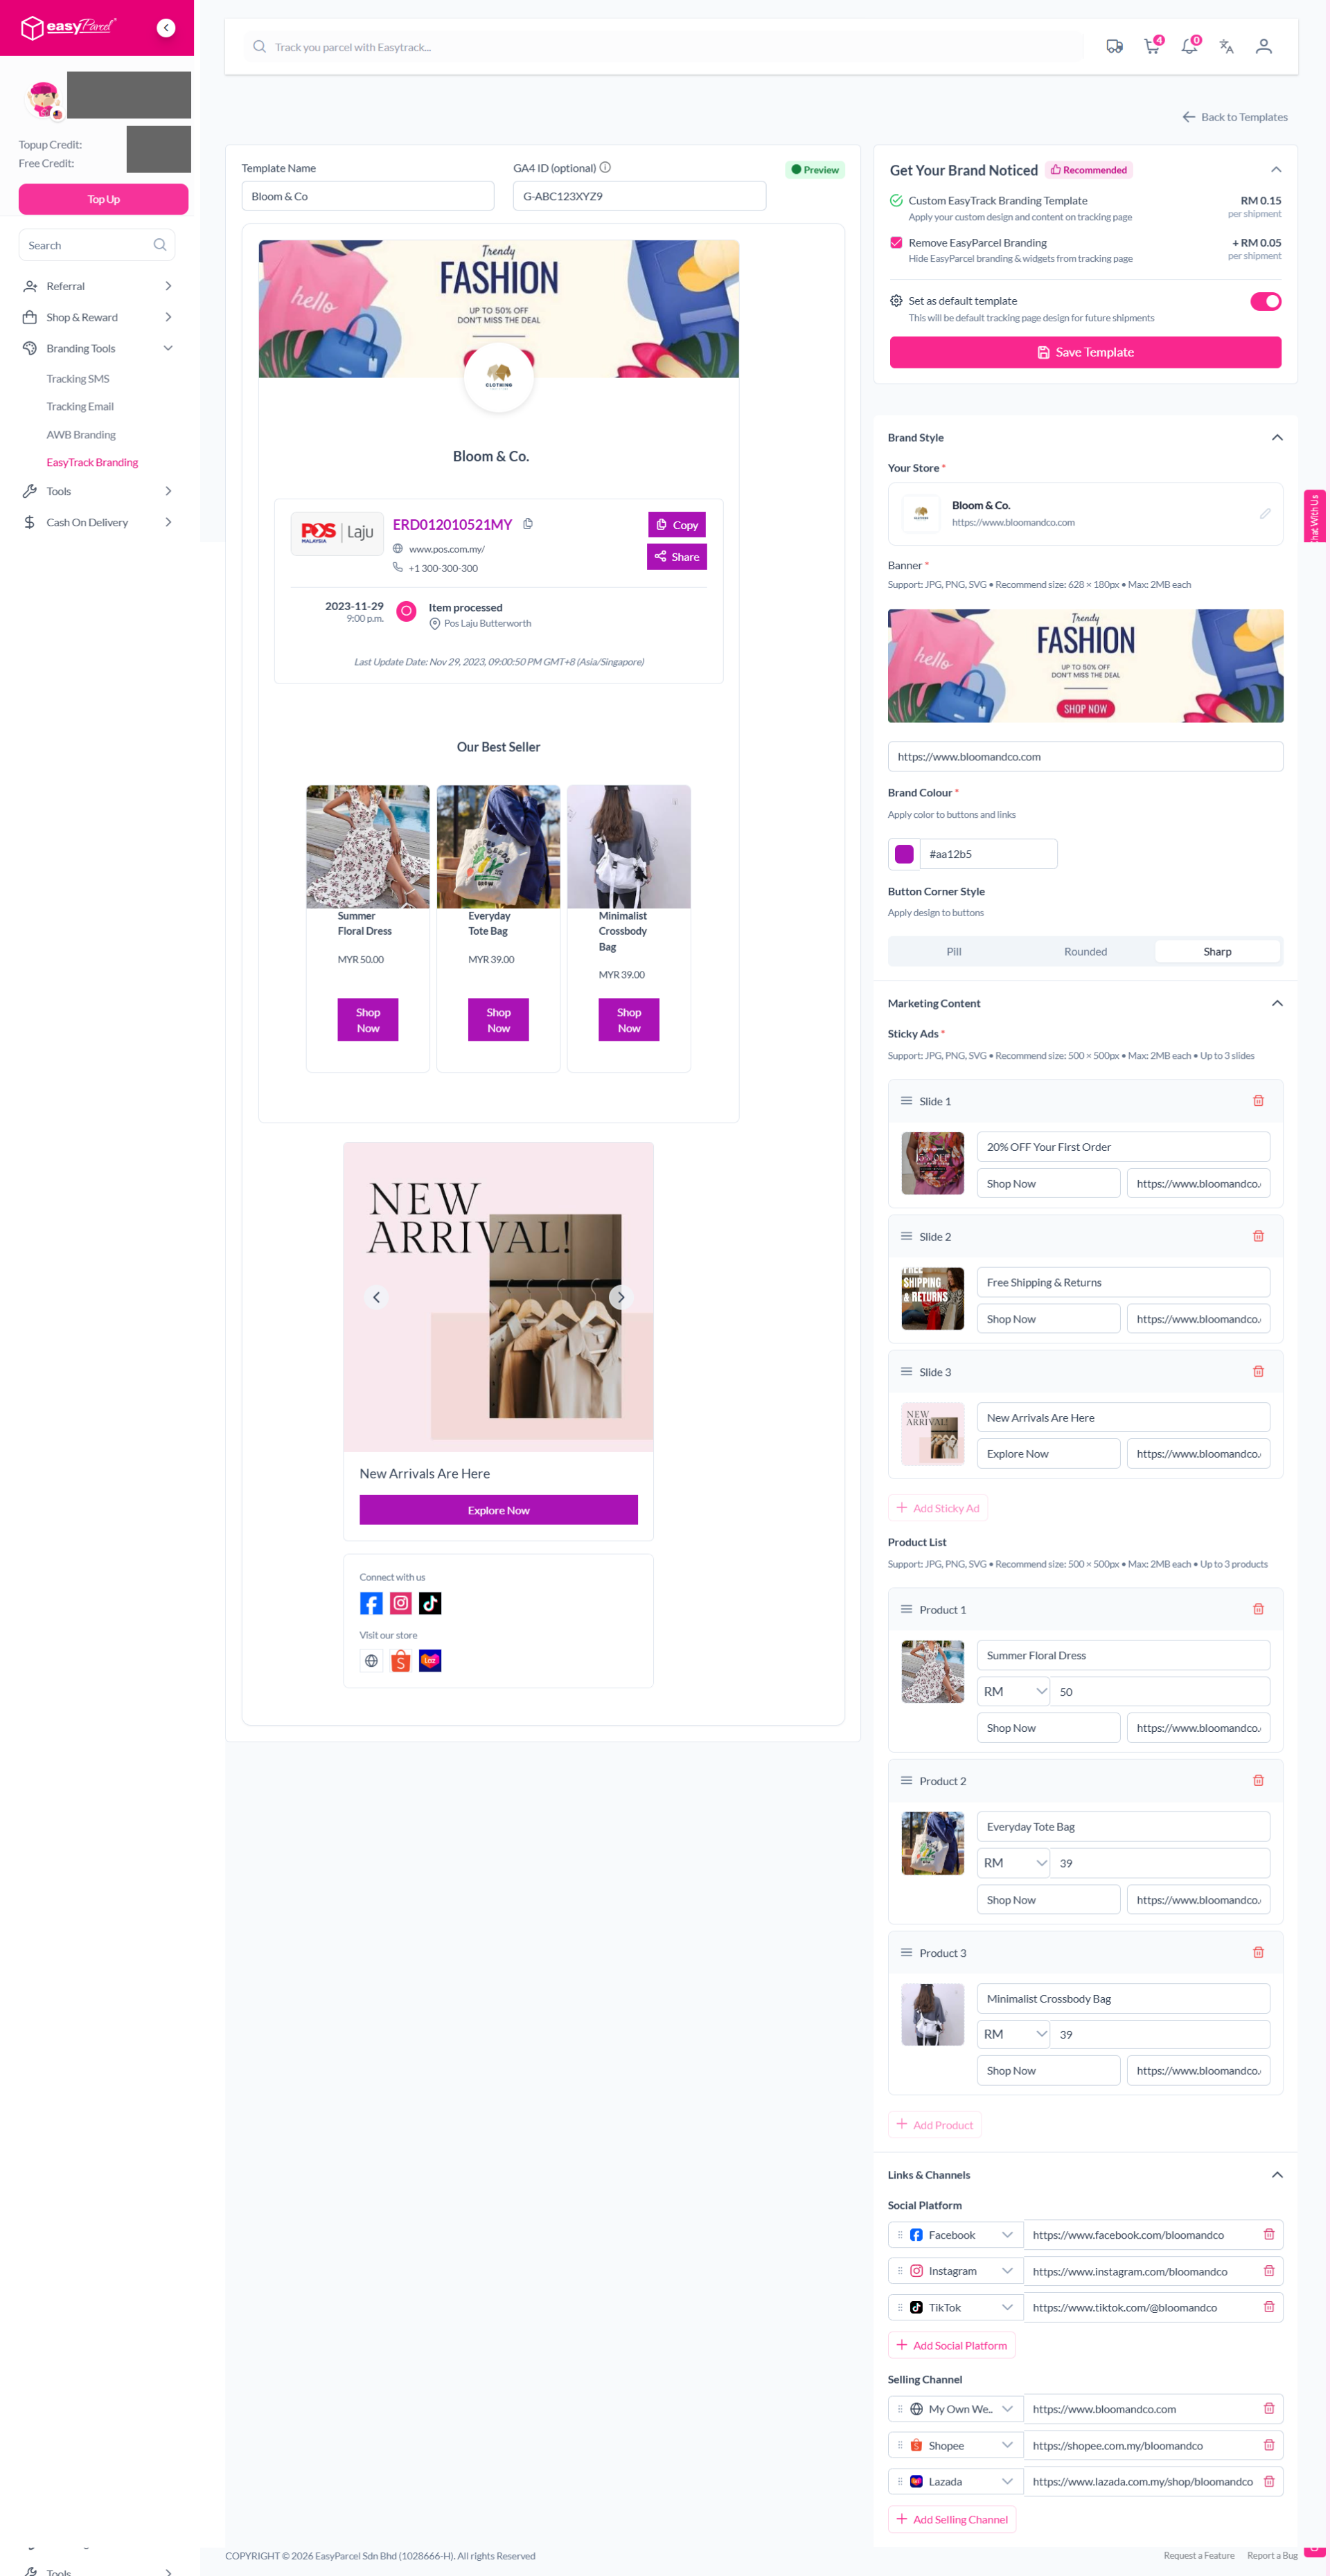
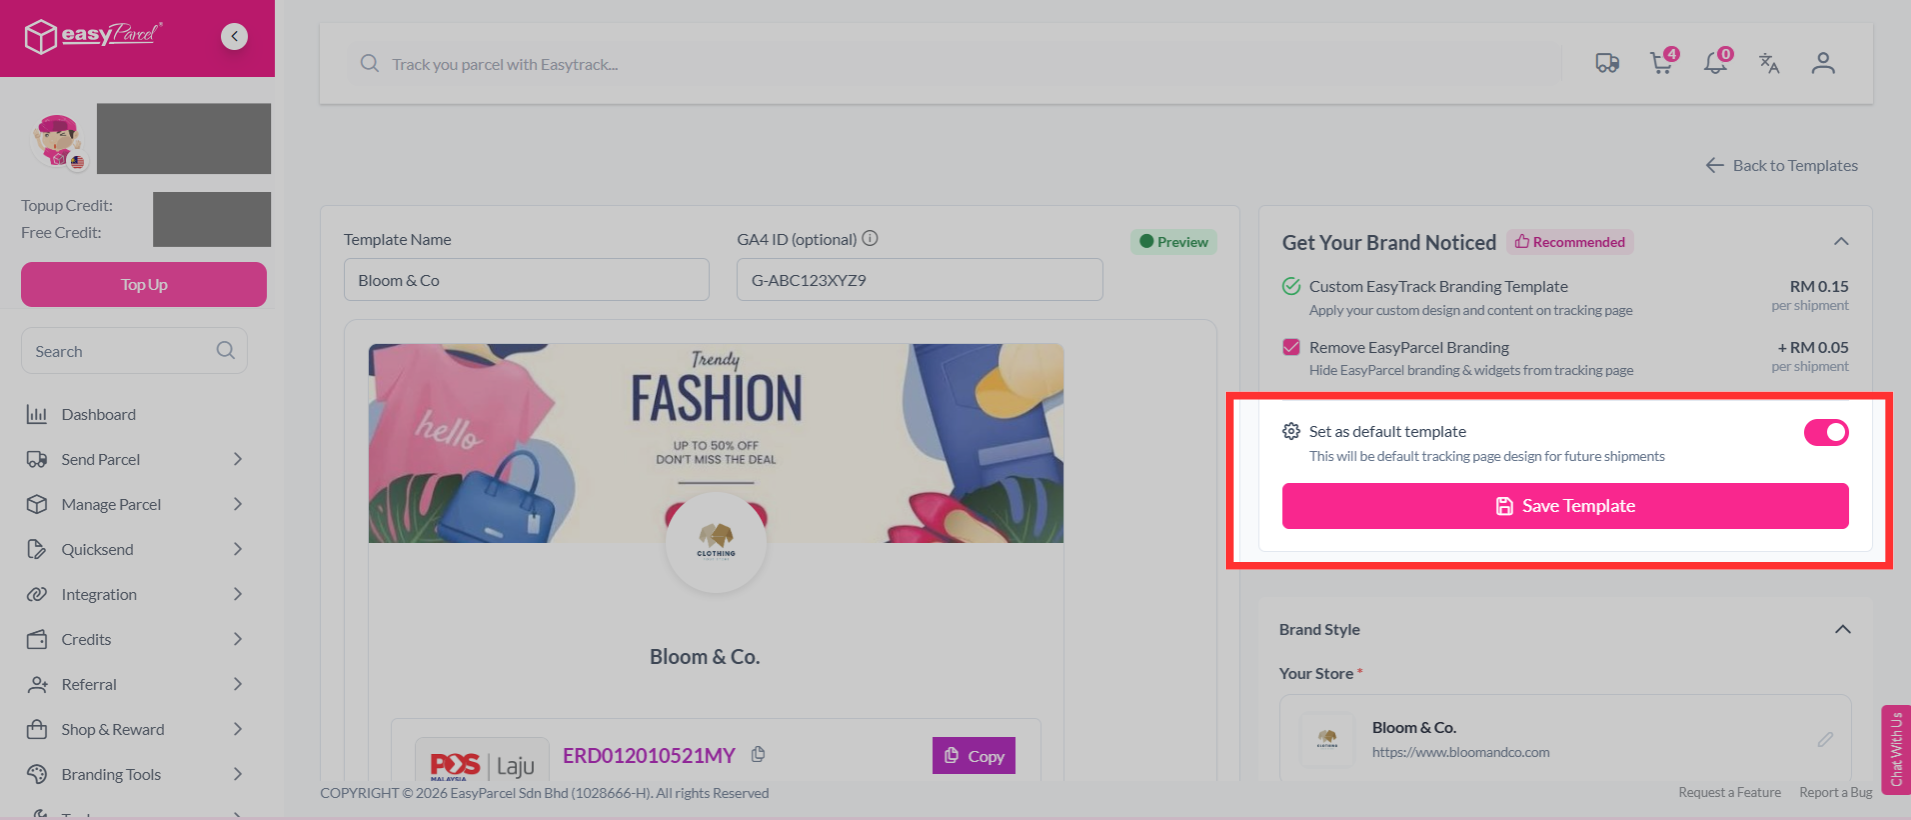
Step 16: You can enable "Set as default template" to use this design as the default tracking page for future shipments. Once done, click "Save Template".
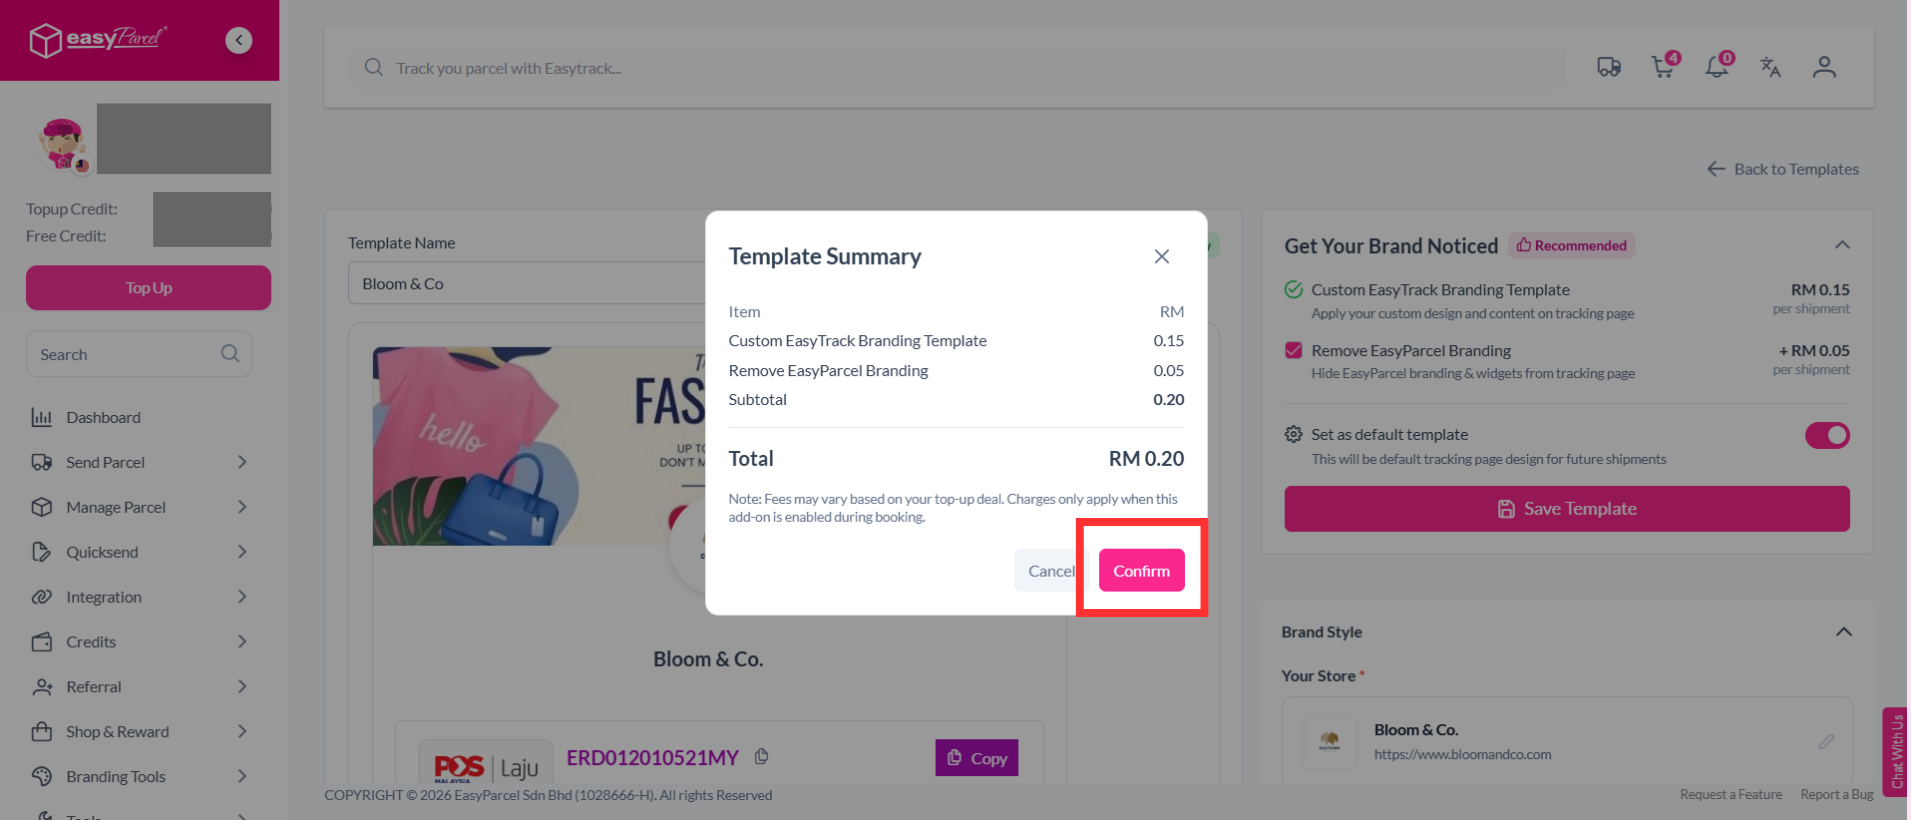
Step 17: You can review the template summary and price breakdown, then click "Confirm".
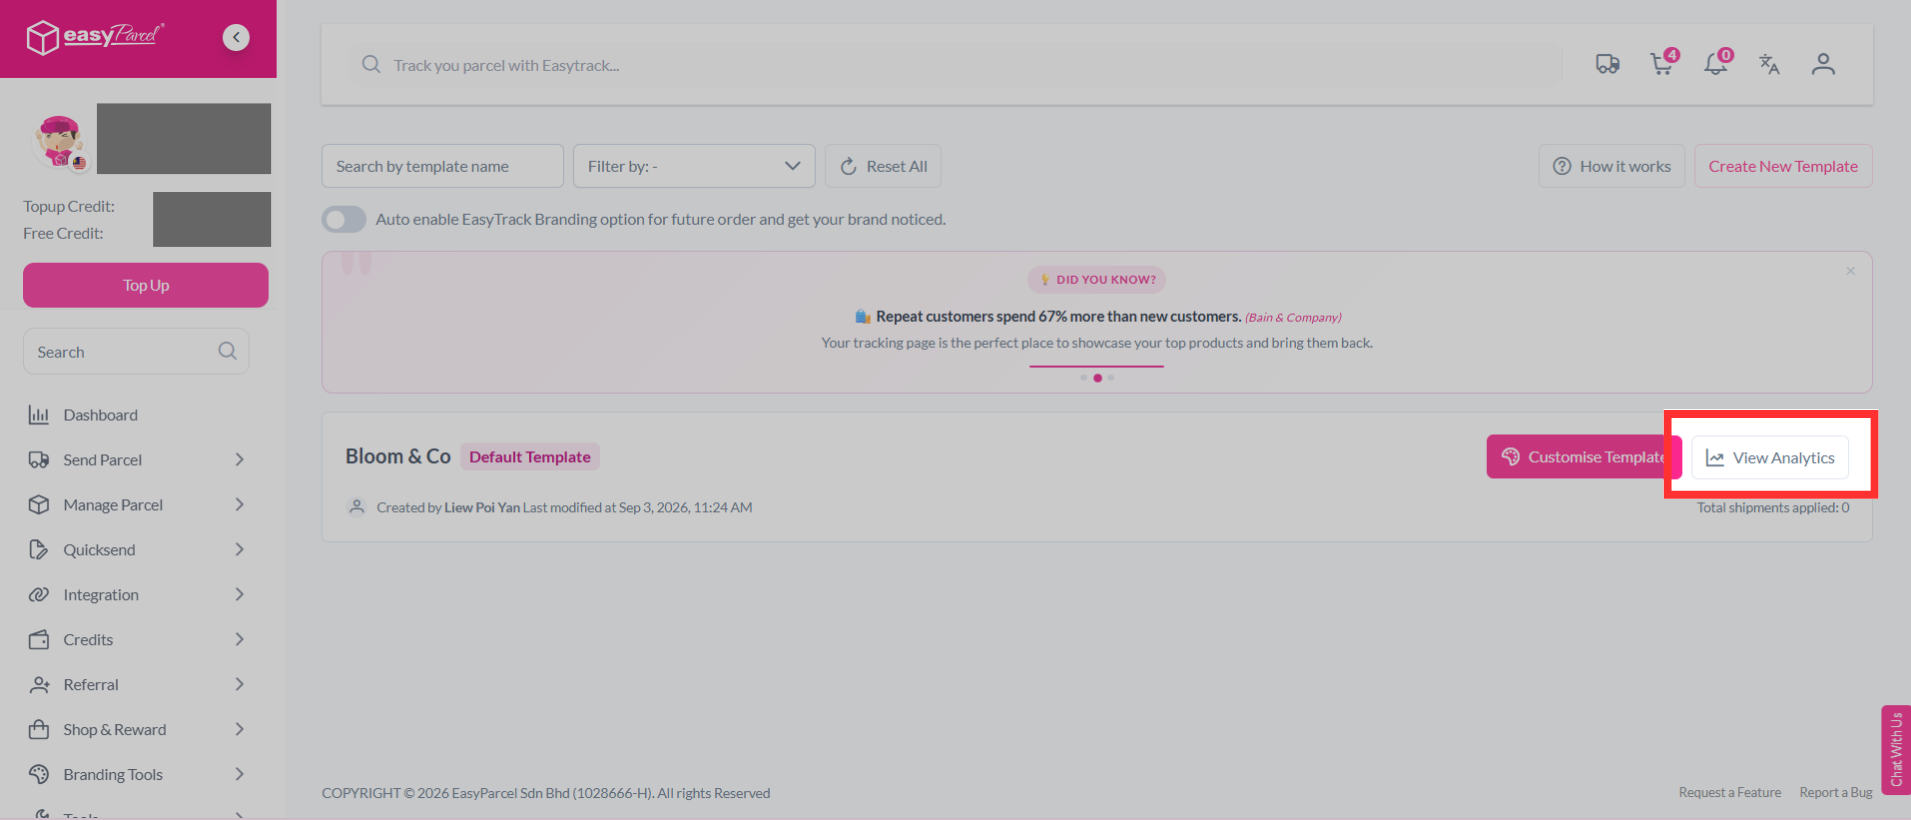
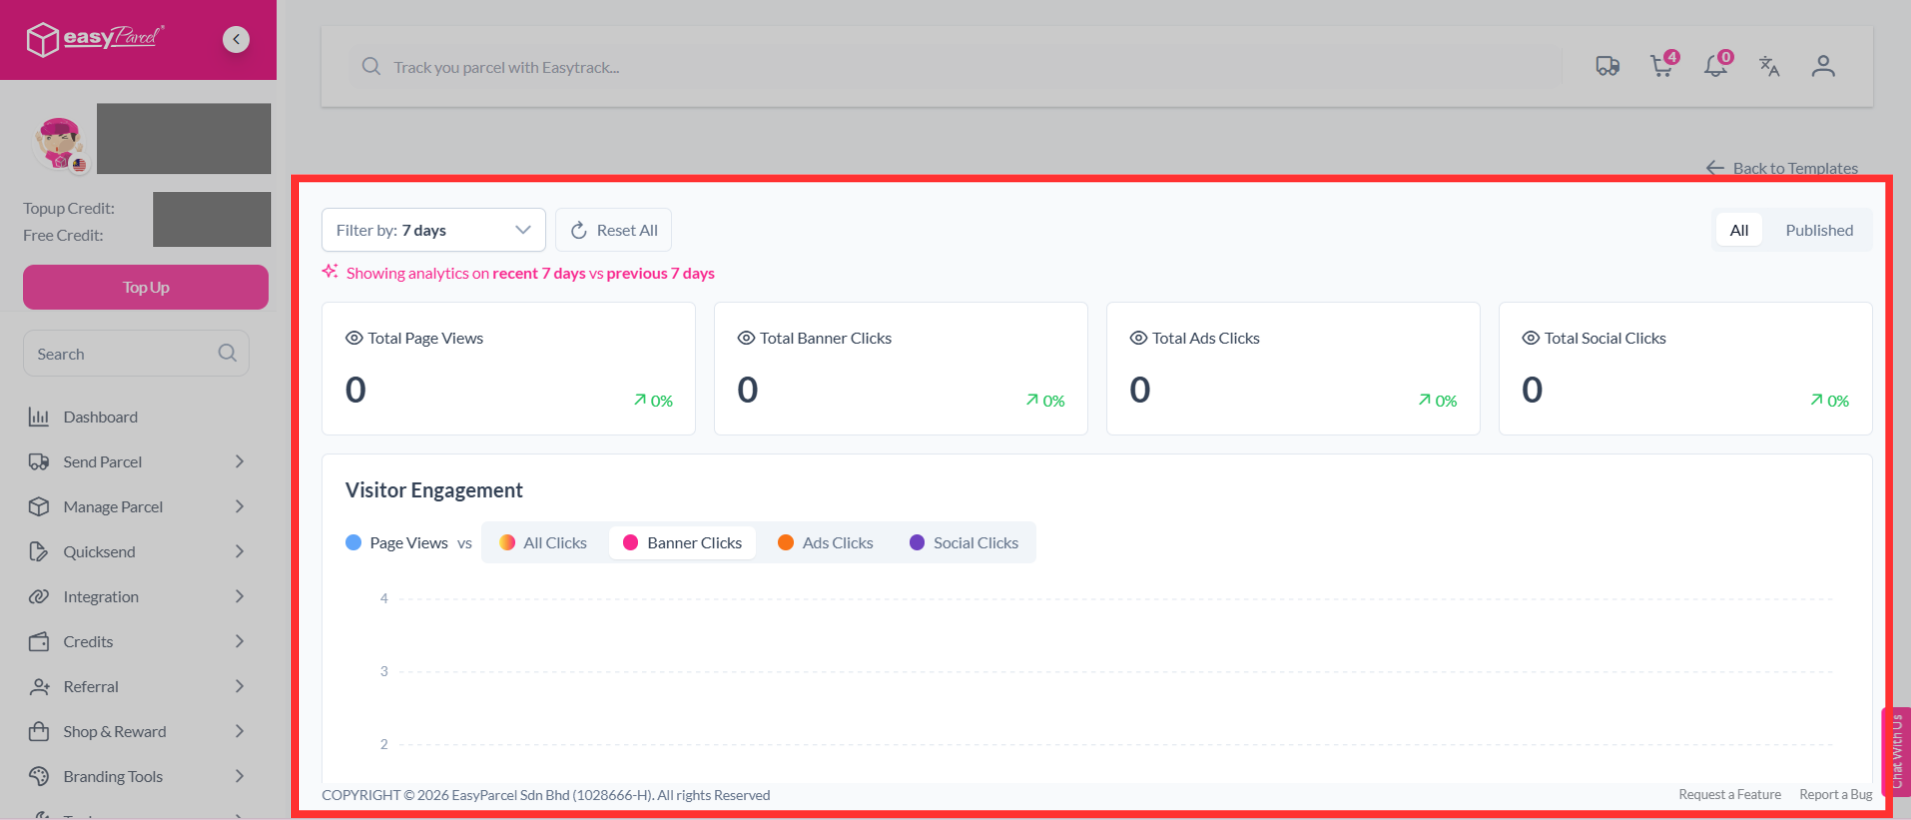
Step 18: Your template has been saved! Once you use this template for a shipment, you can click "View Analytics" to check your template performance and track visitor activity.
Just get your customer’s order out of delivery is not end of the story, you can further engage with your customers and build their brand loyalty by having EasyTrack Branding whenever they track for their shipment status.
How to set up EasyTrack Branding?
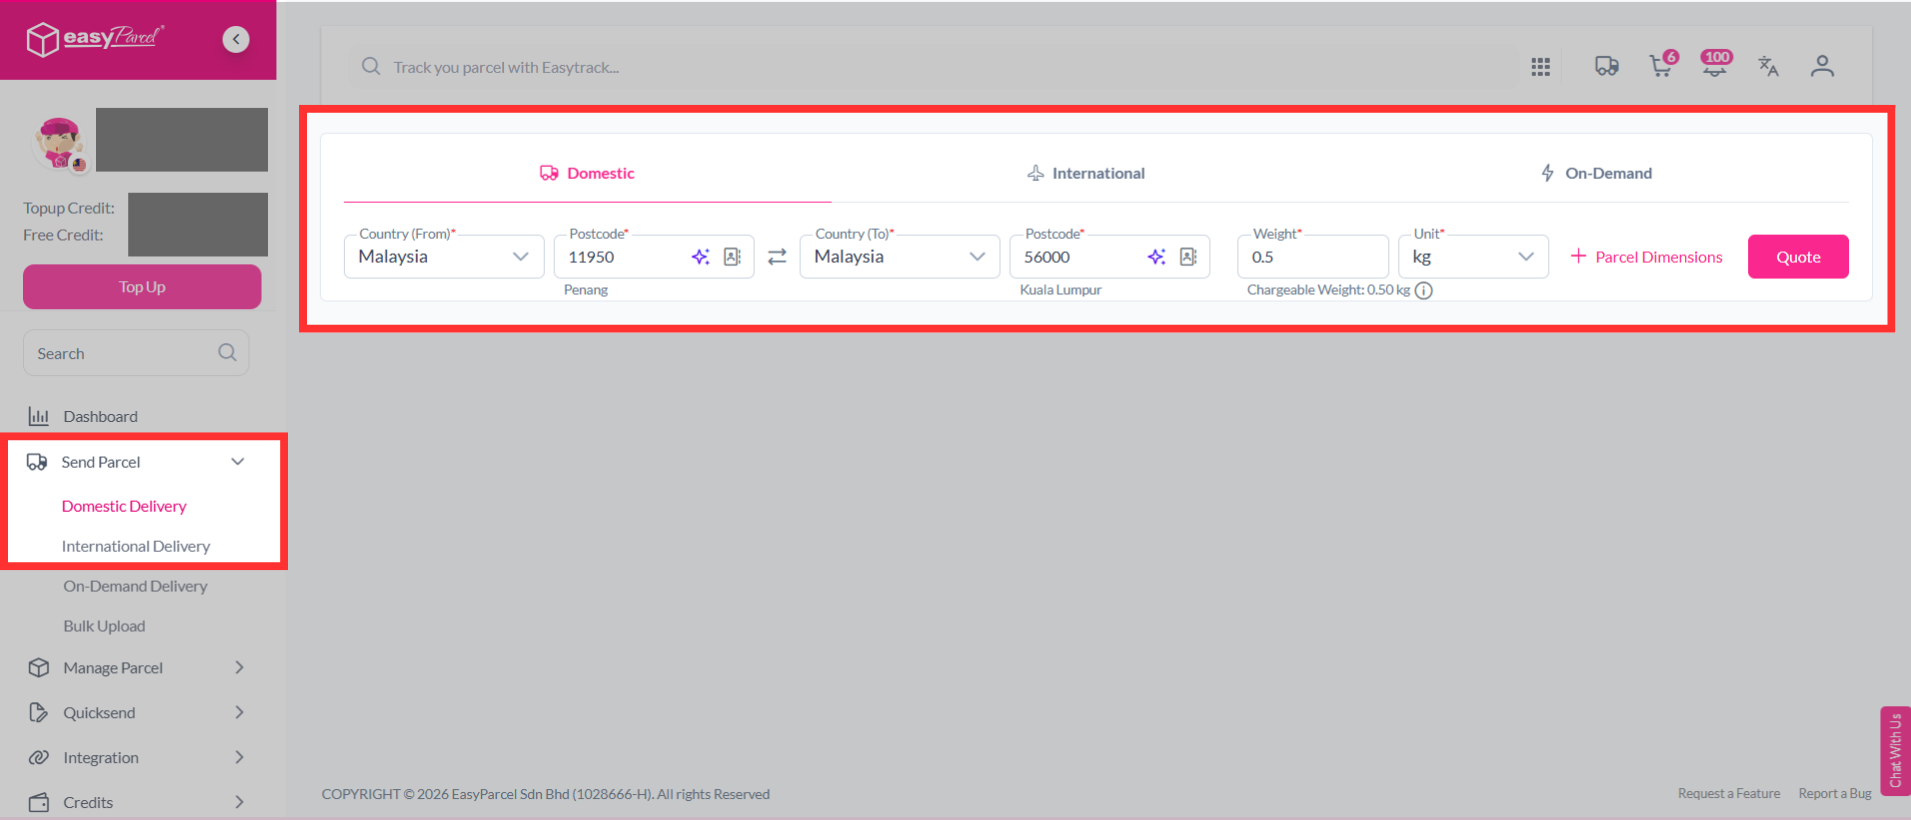
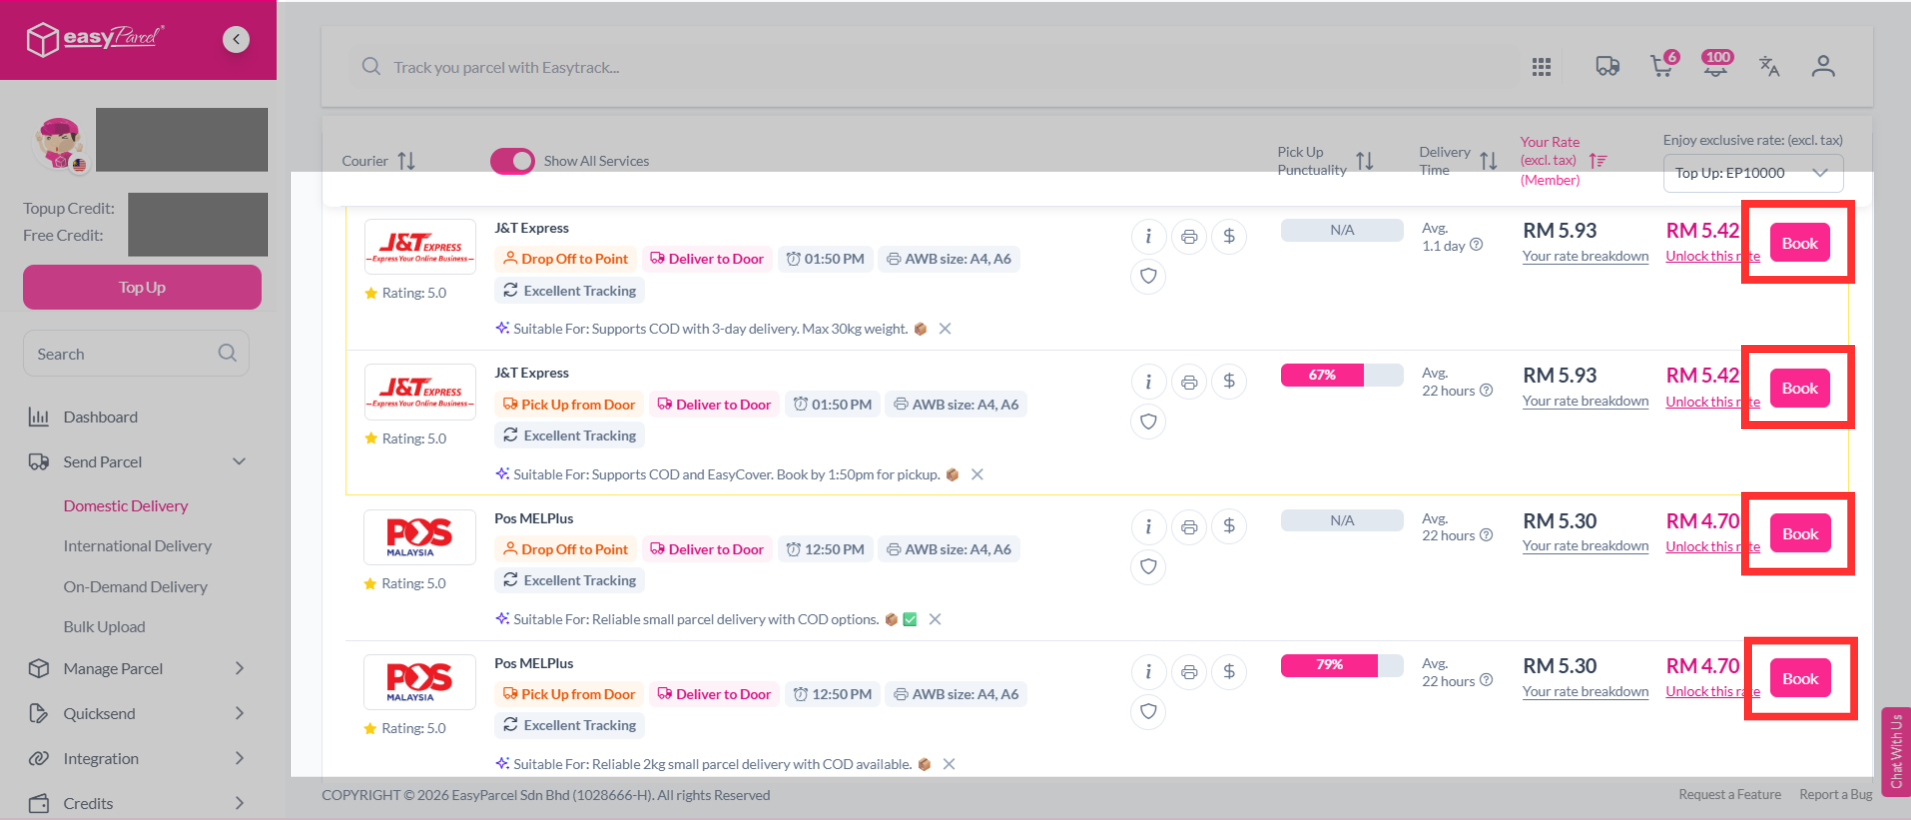
Step 1: Quote and book domestic/ international parcel as usual.
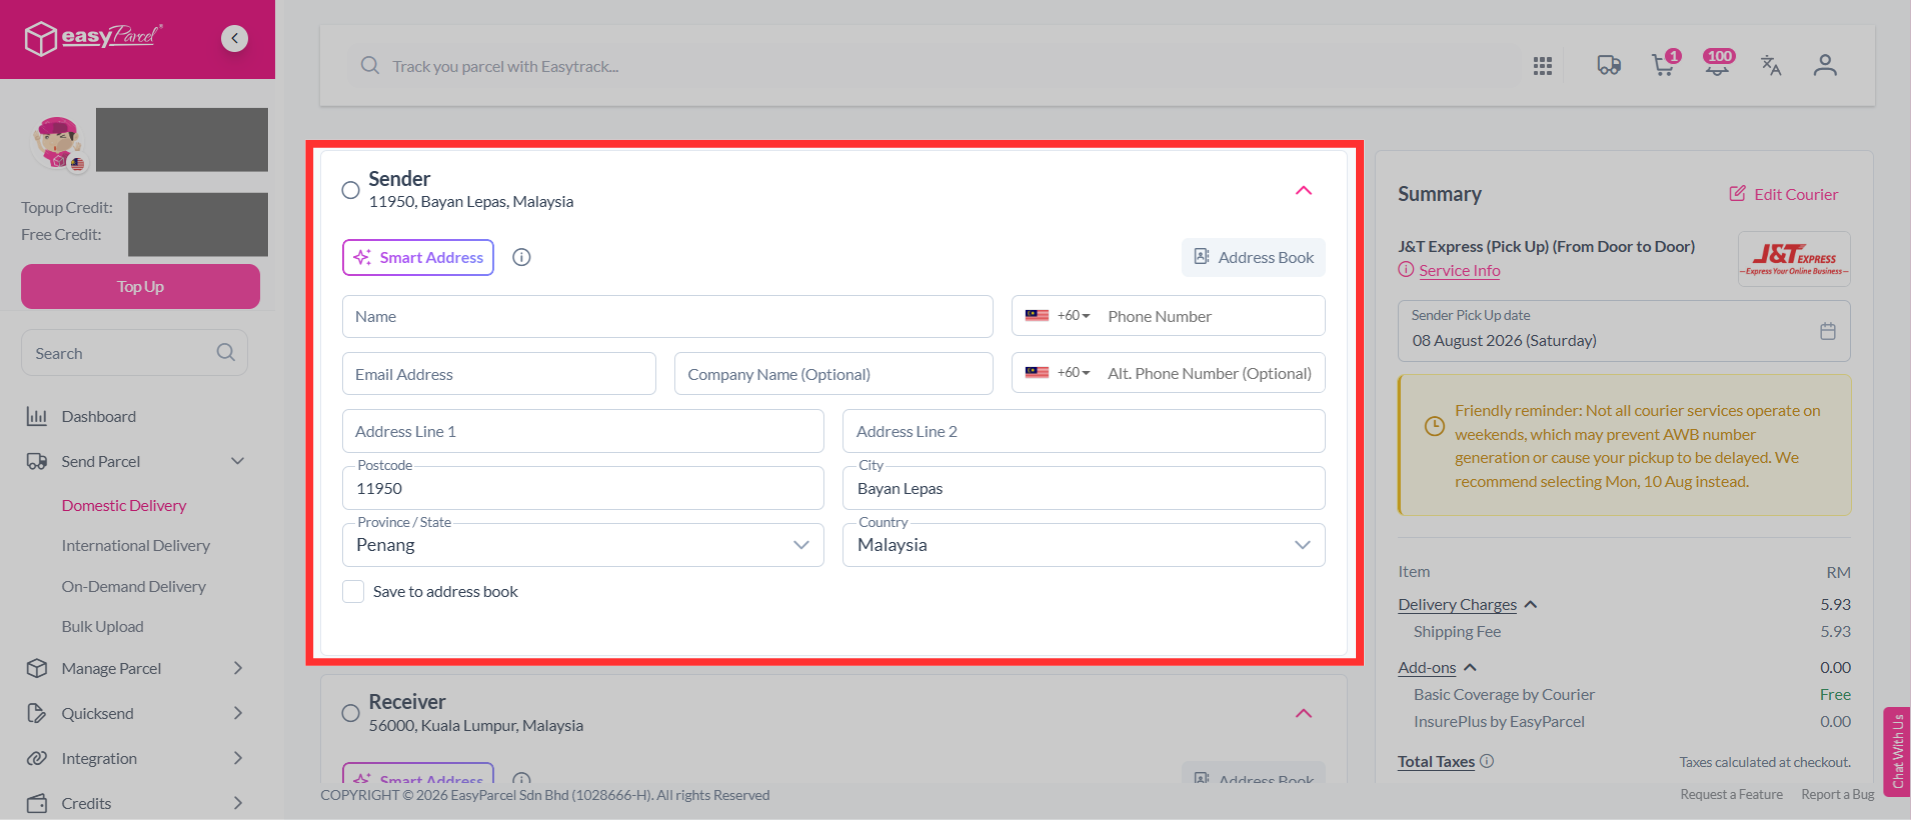
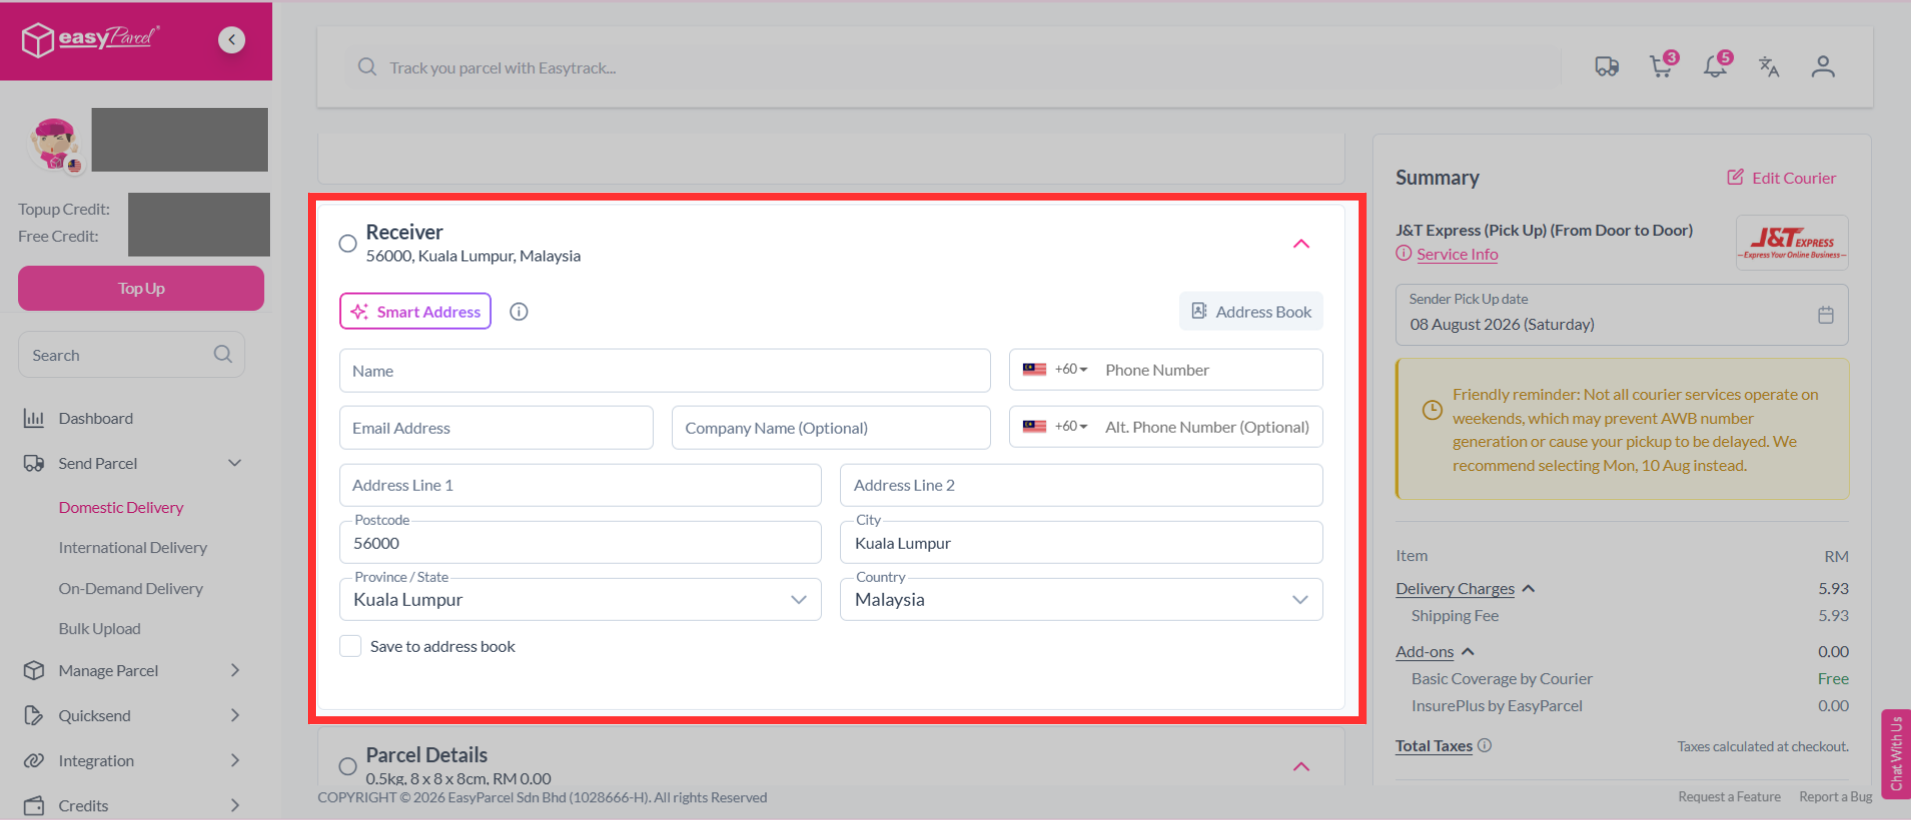
Step 2: Fill in the necessary details, including the sender details, receiver details, parcel content and value.
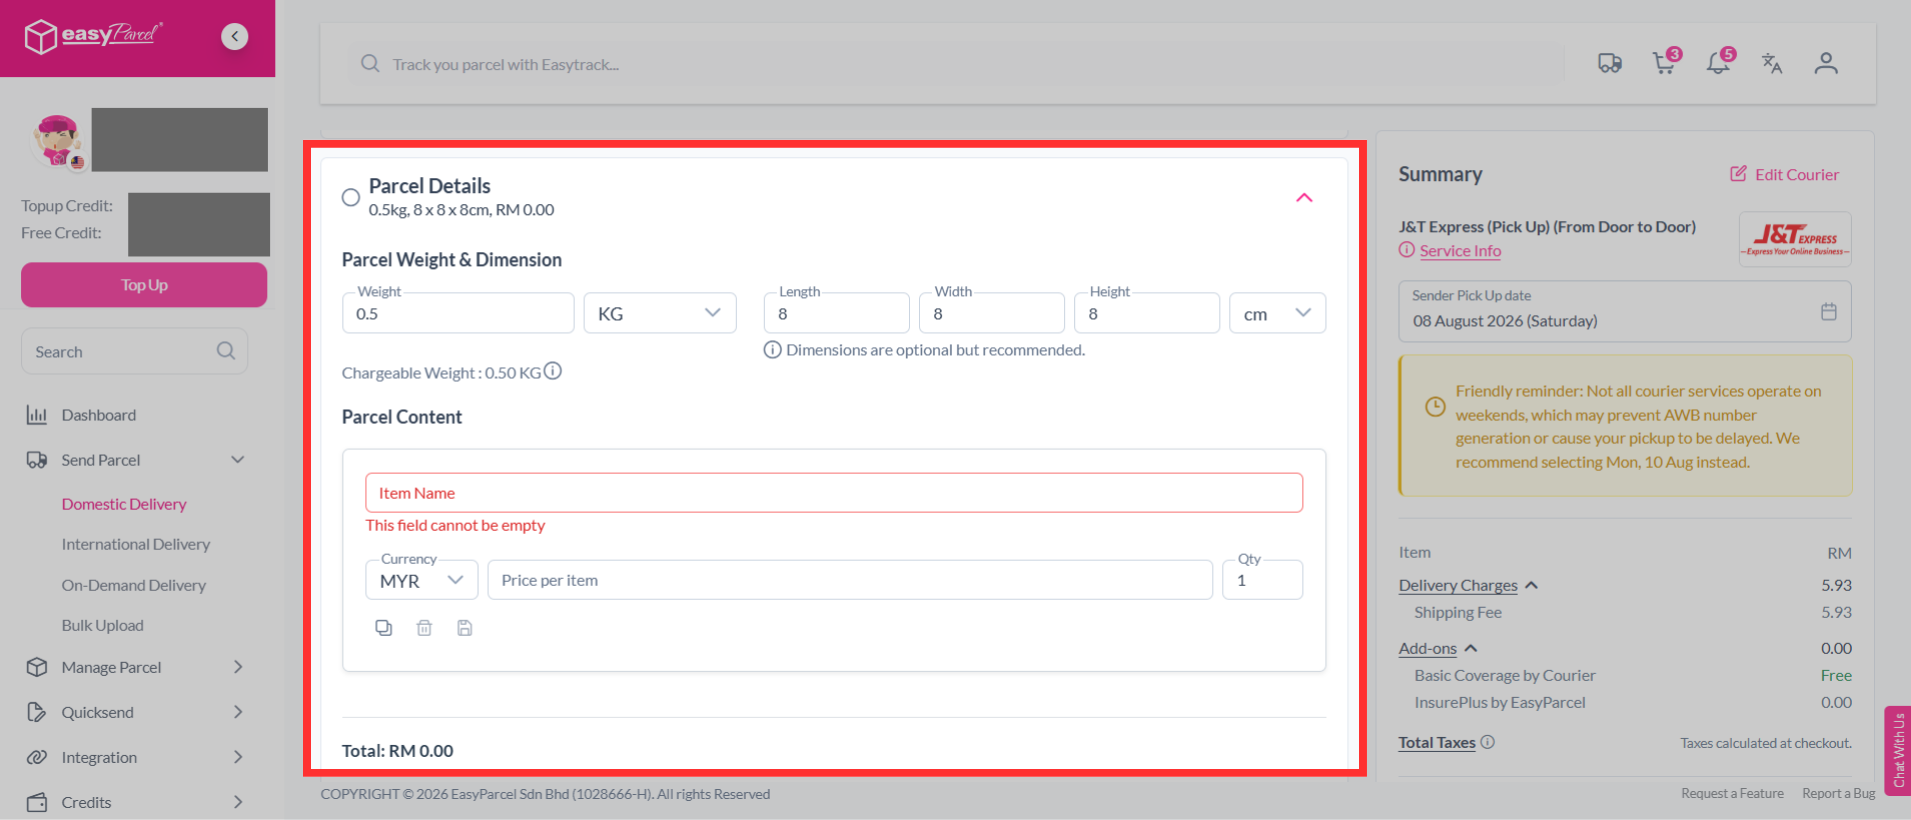
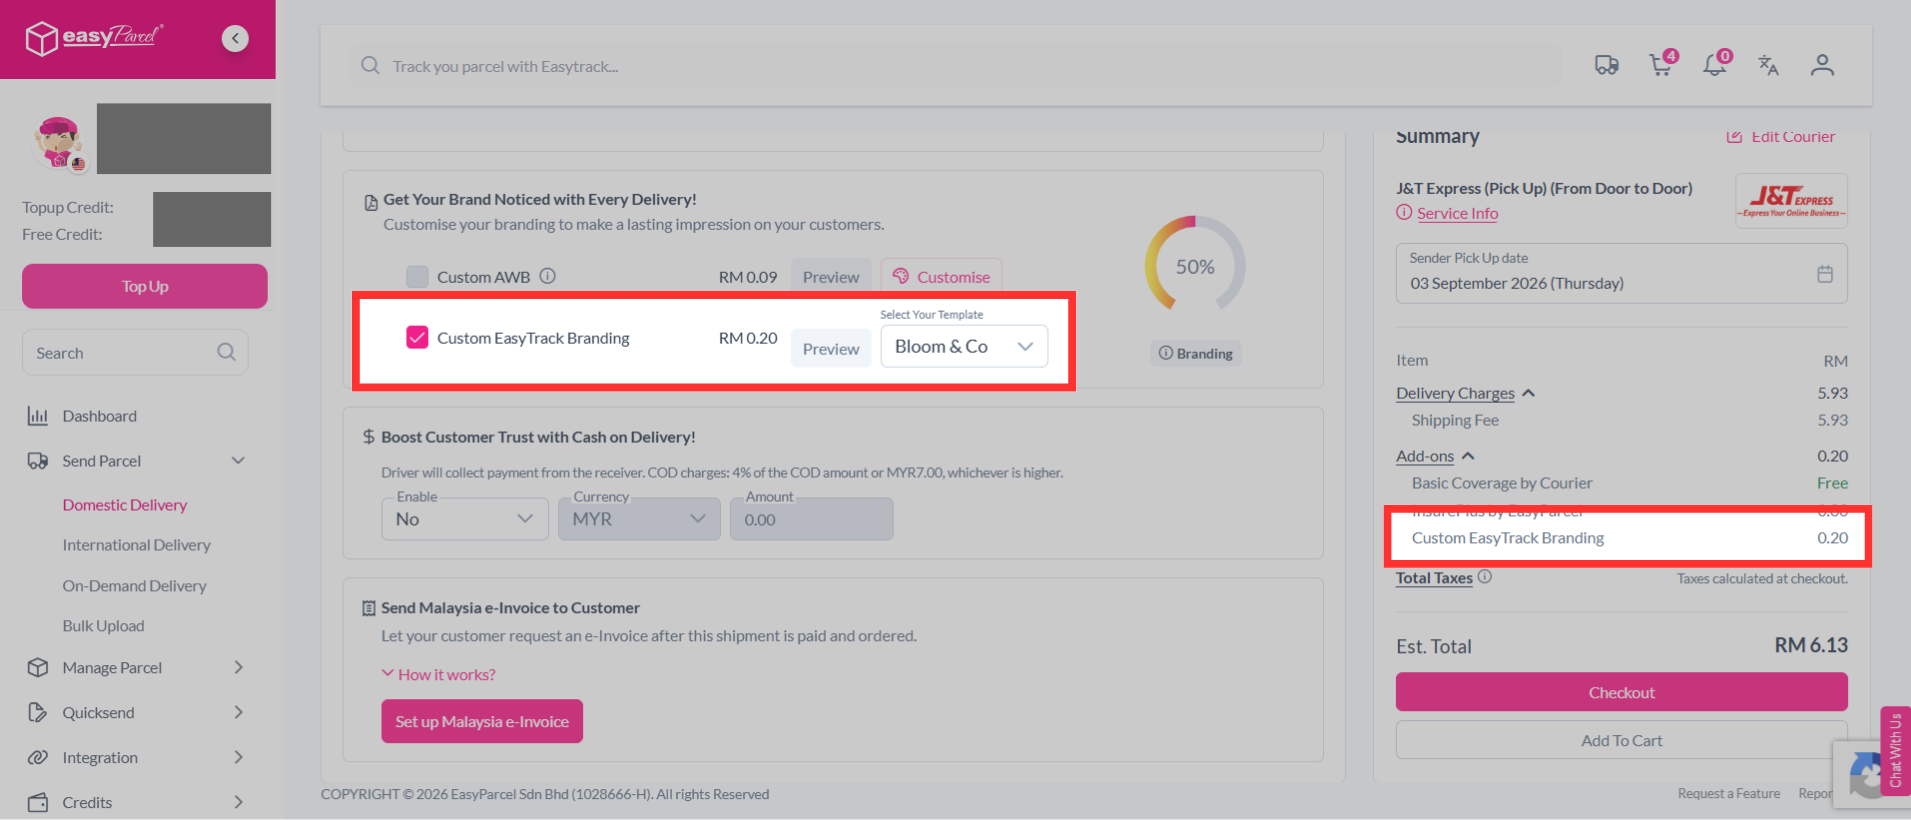
Step 3: After filling in your sender details, receiver details, parcel content, and parcel value, scroll down to the "Get Your Brand Noticed with Every Delivery!" section.
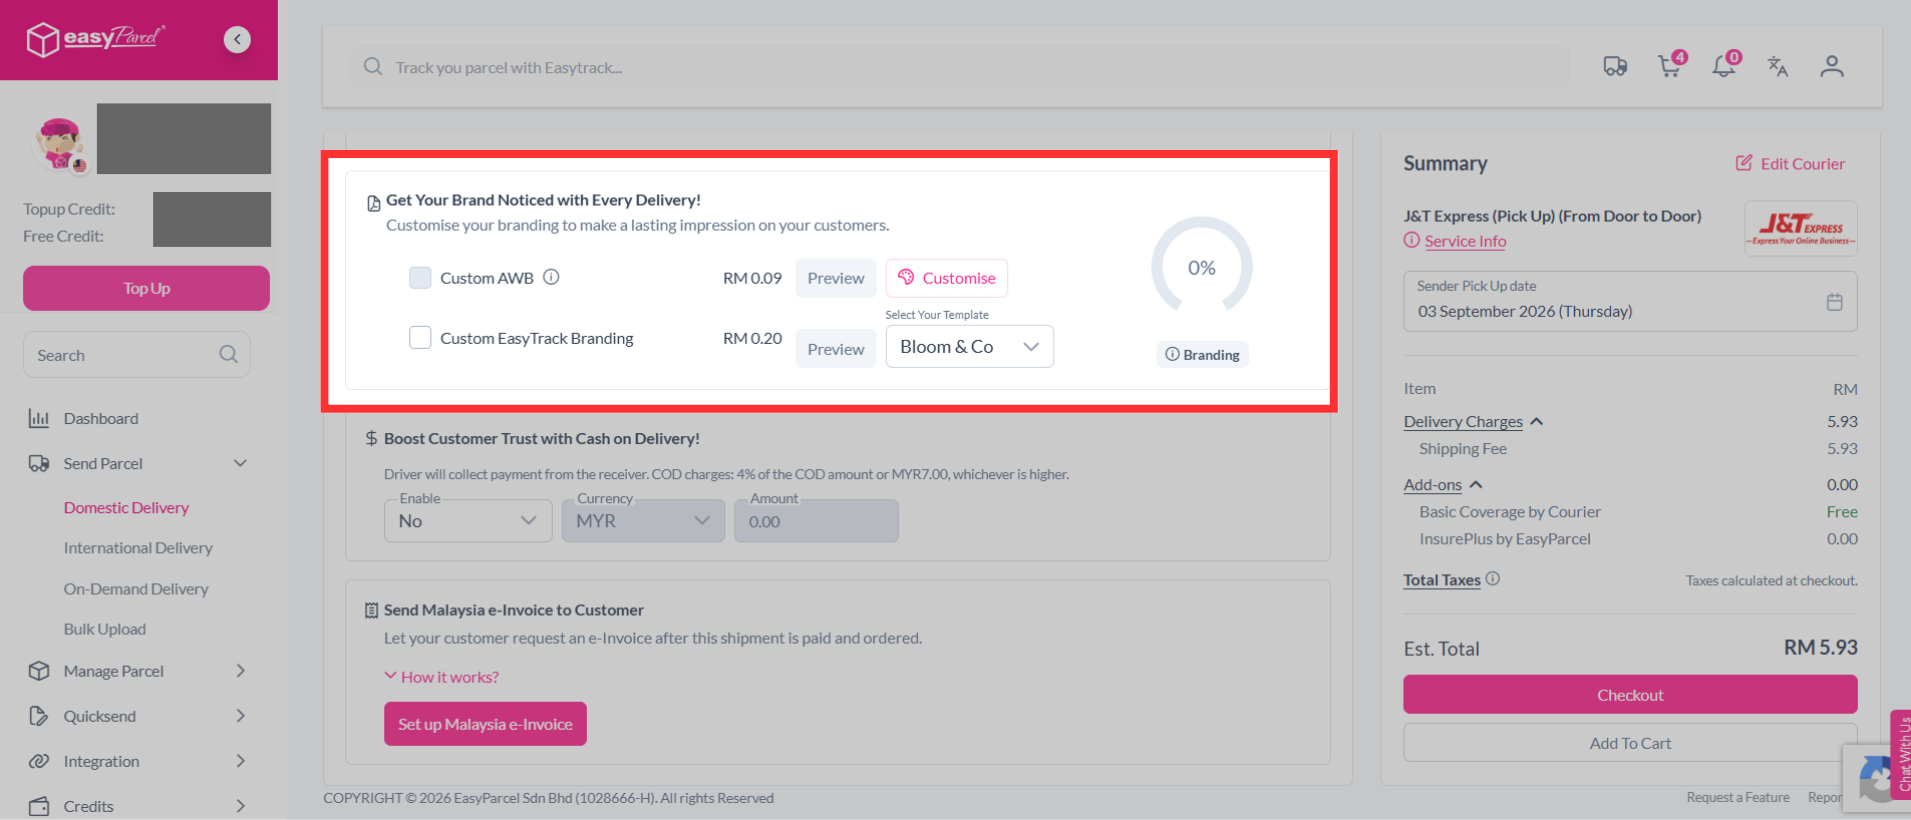
Step 4: Besides Custom EasyTrack Branding, you can select your template and preview it.
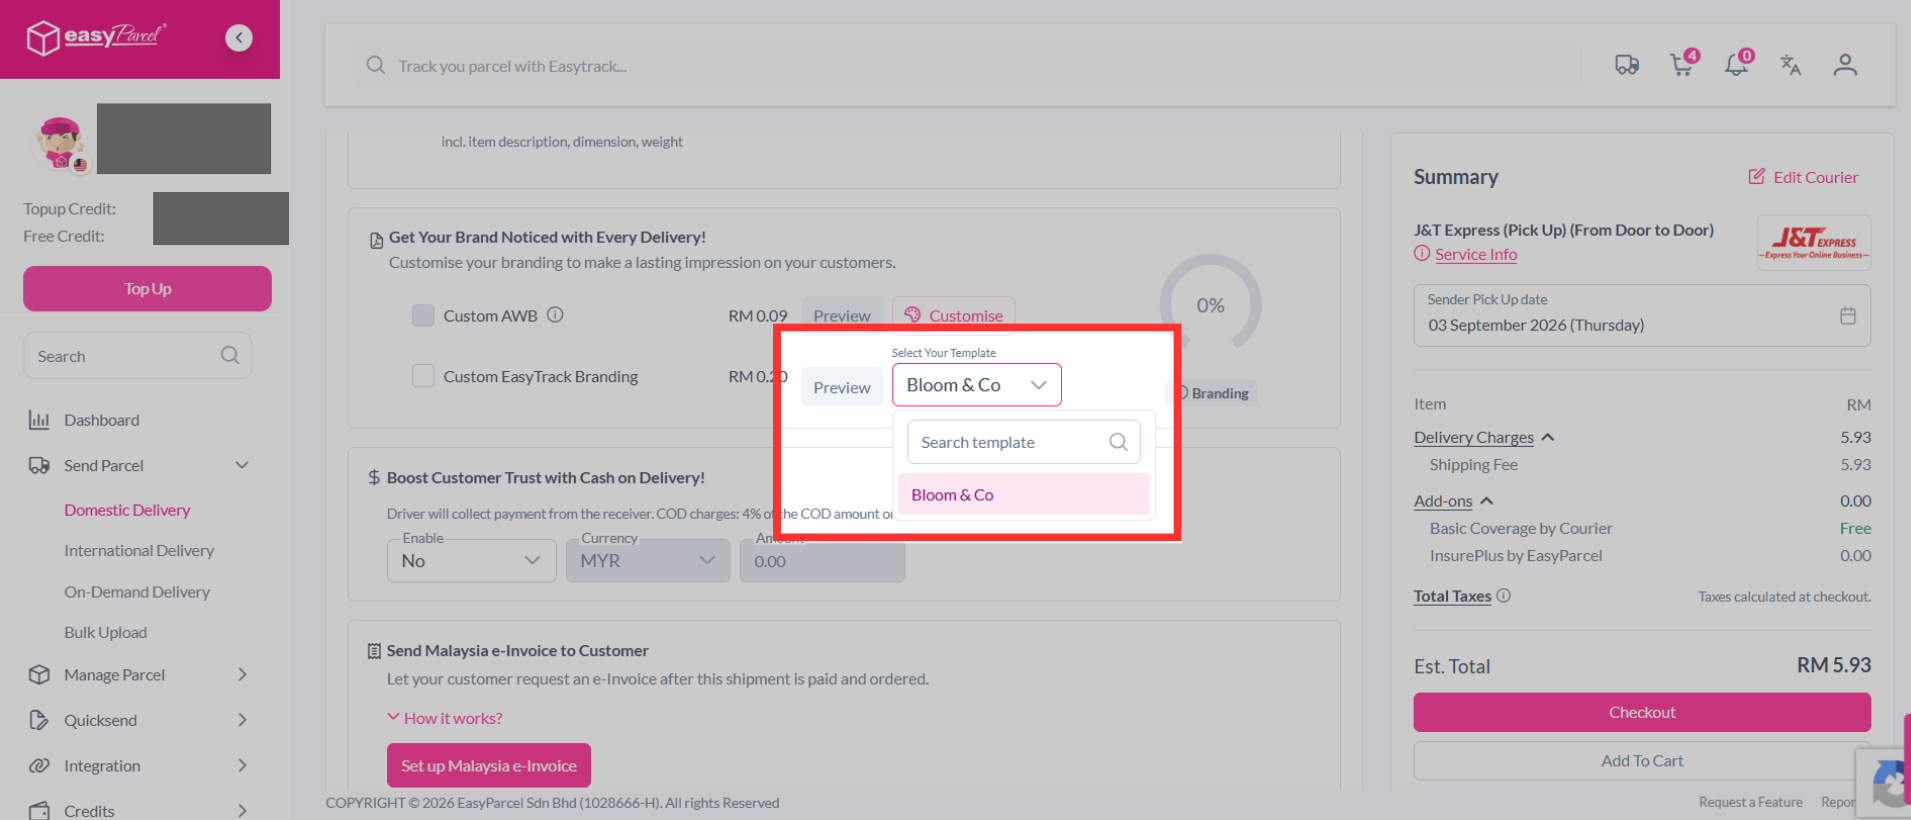
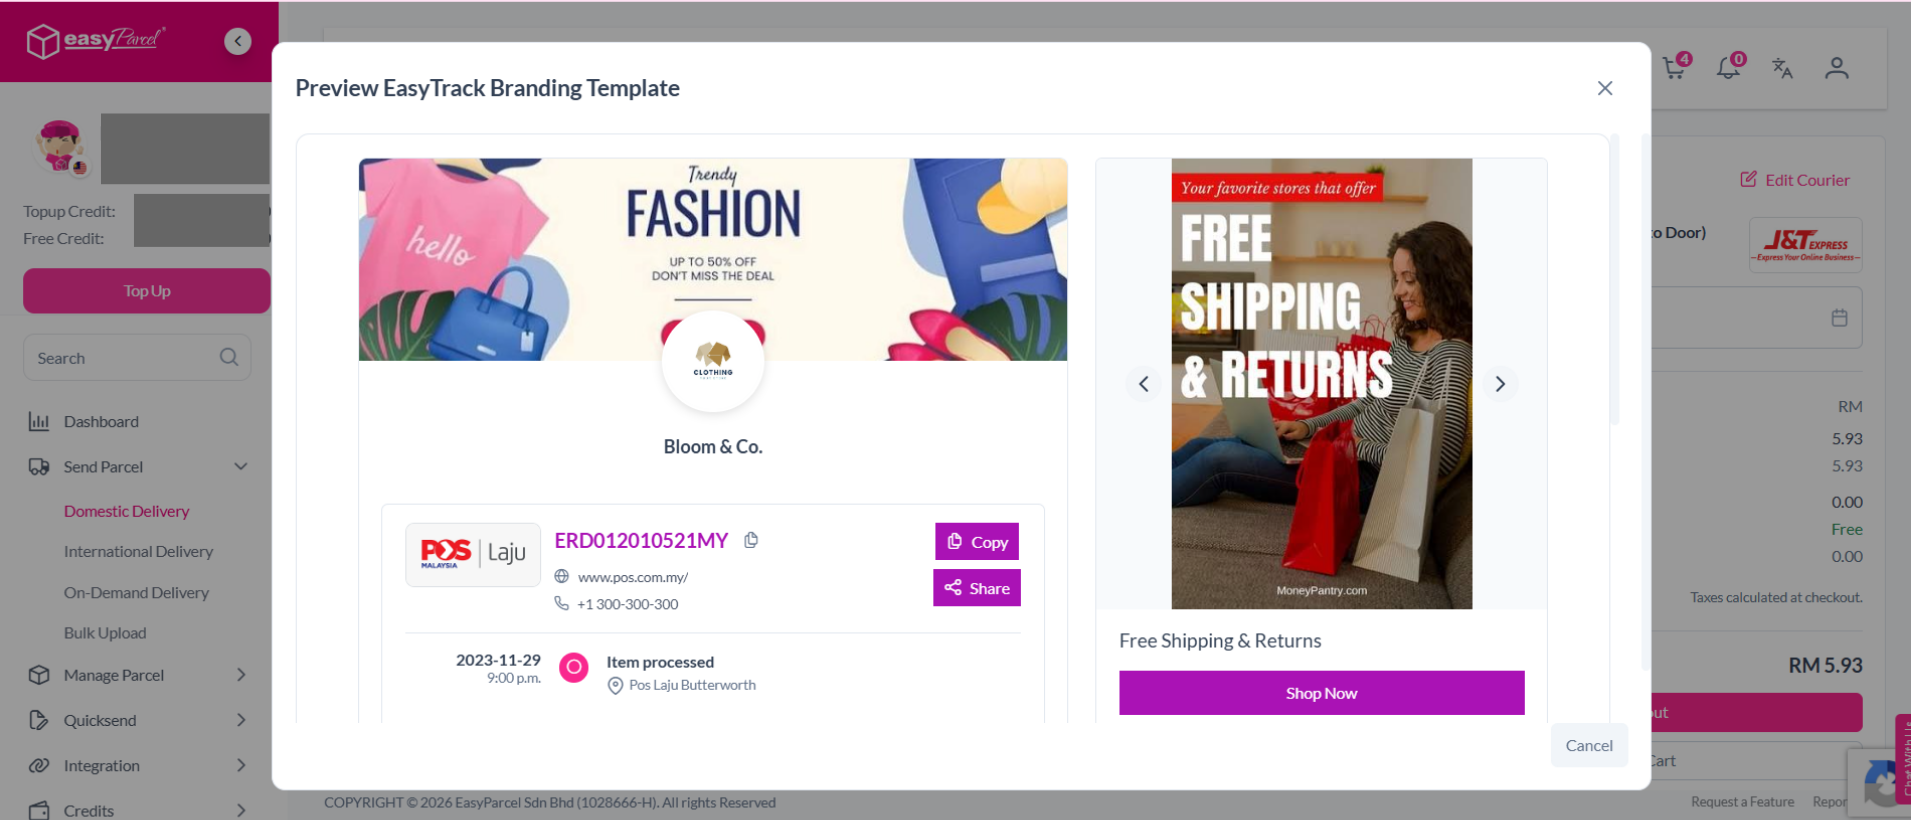
Step 5: Turn on "Custom EasyTrack Branding" under options to add to your parcel.
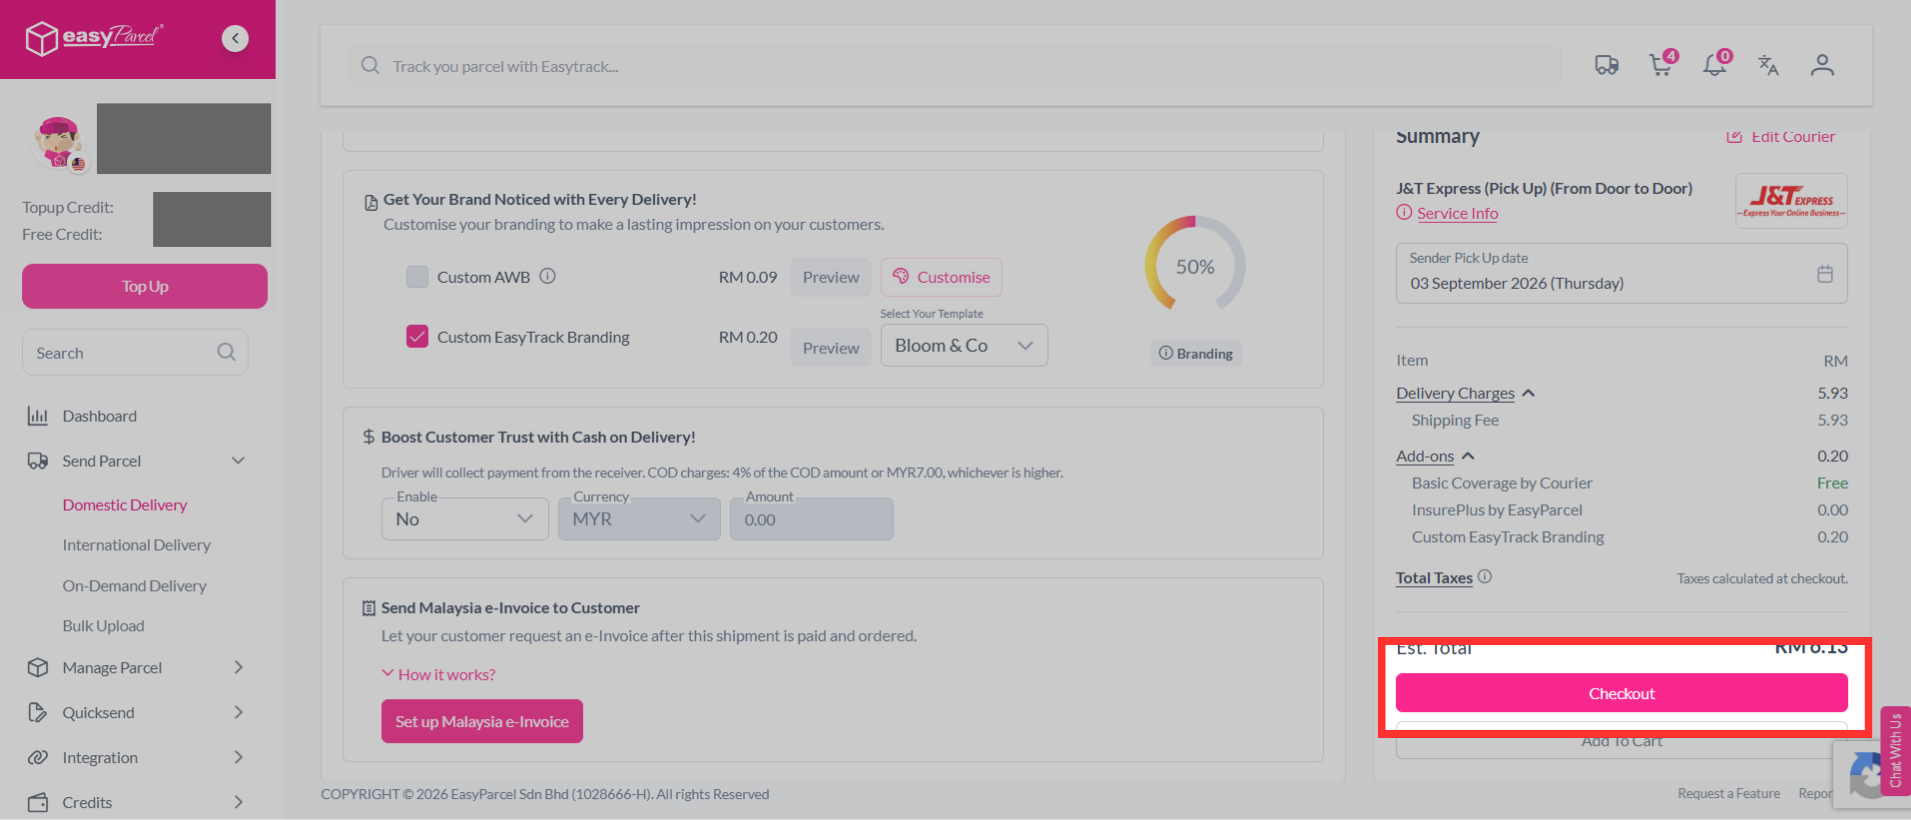
Step 6: Then continue with a click on the "Checkout" button.
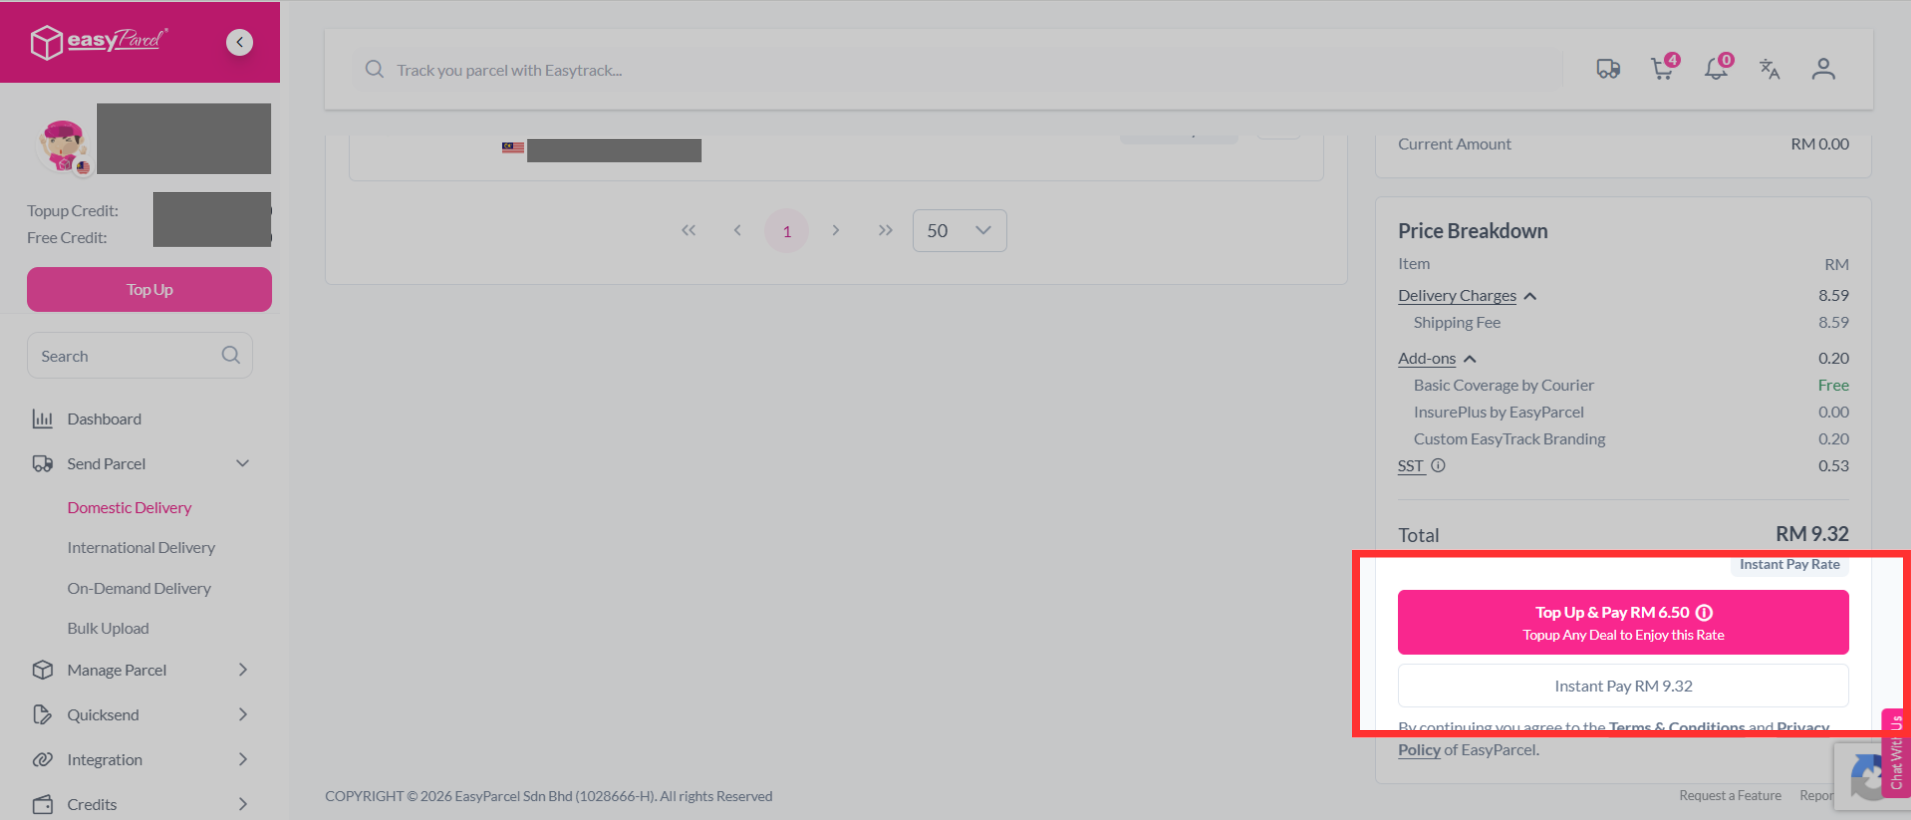
Step 7: Complete the booking and pay it.
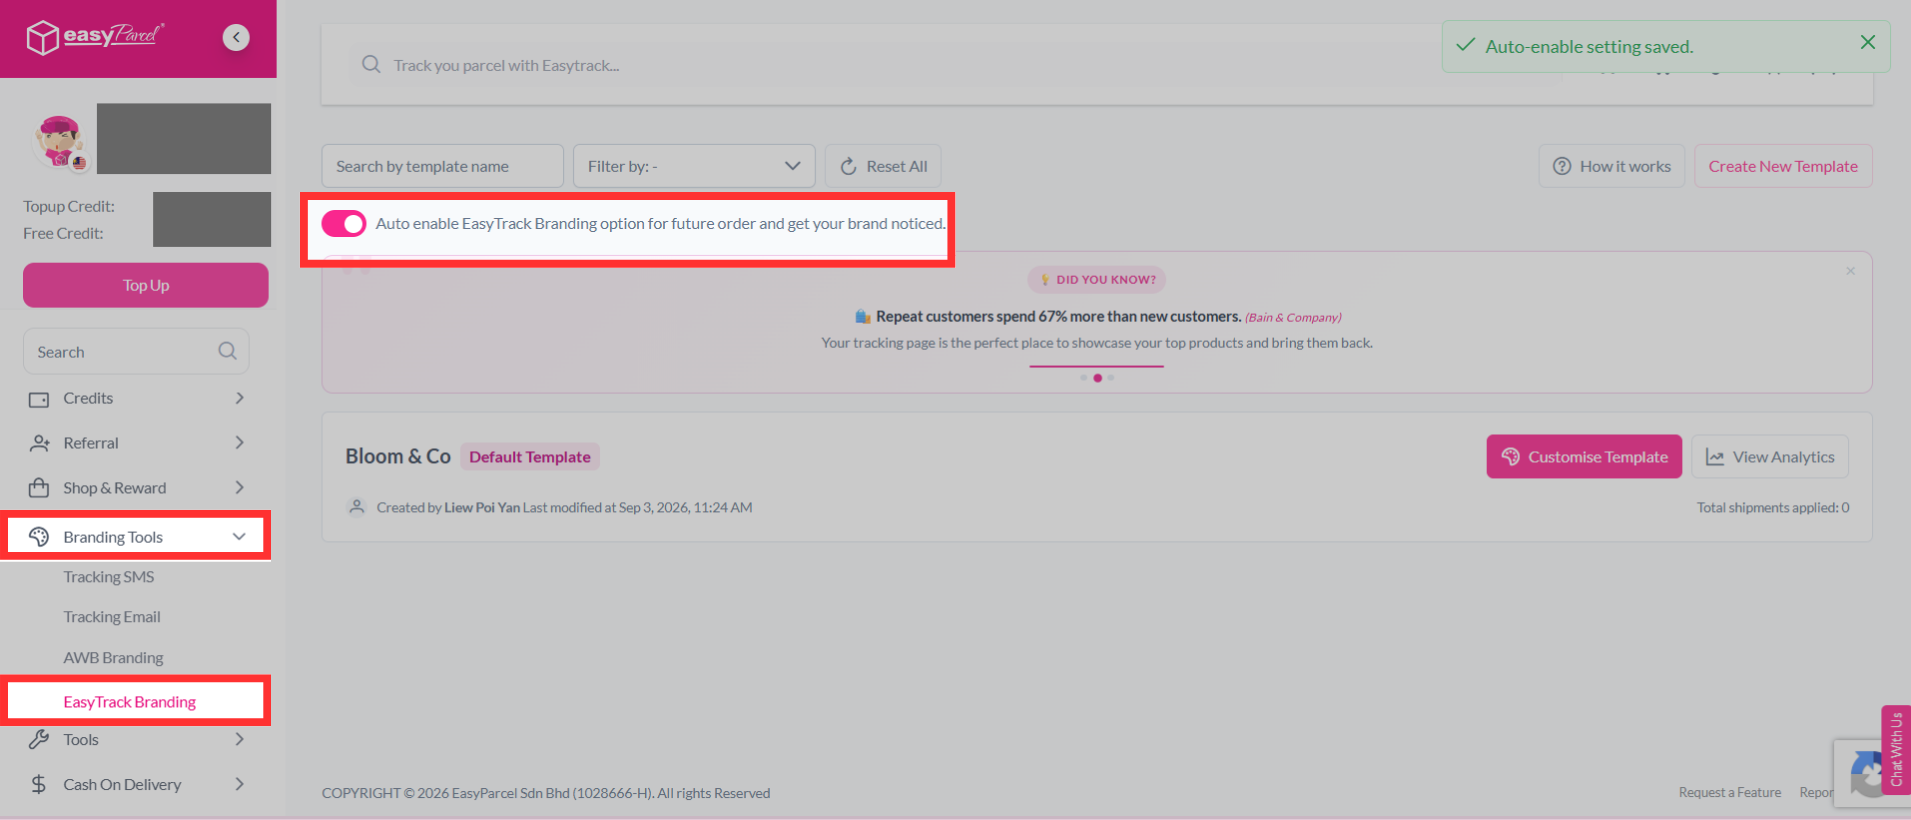
Note: You may turn on the auto enable EasyTrack Branding option to automatically apply your EasyTrack template to future shipments.